Having a few English words here and there might be a small deal, but it could affect your website’s message if it happens often. So, how can you translate these strings without getting into complicated code stuff?
Thanks to Loco Translate, you can easily translate all the texts in your themes and plugins to your desired language.
A quick heads up: Loco Translate has multiple features but can’t do everything regarding translation. It only translates “static” content, i.e., content contained in your theme, plugins, and WordPress Core.
It also cannot translate every theme and plugin. This is because your theme or plugin must have translation capabilities implemented by its developer.
Before we start the step-by-step guide, check if the travel theme you’re using is ready for translation.
Step 1: Install and Activate the Loco Translate Plugin #
- Go to Plugins > Add New Plugin from your WordPress dashboard
- In the search bar, type Loco Translate and press Enter.
- Click Install Now and then Activate to enable it.

Once you are done with it, the next step is to translate the theme and plugins of your choice.
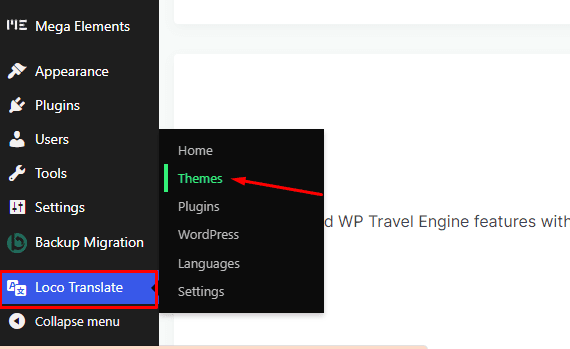
Step 2: Choose Your Theme from the List #
- Go to Loco Translate > Themes from your WordPress dashboard. Identify the theme you want to translate and click on it.
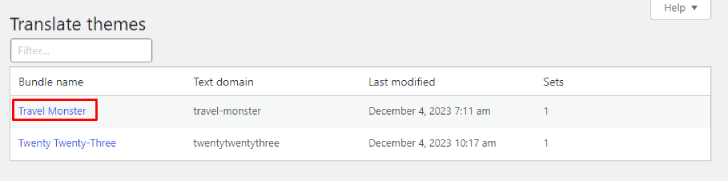
By default, Loco Translate displays both the active themes on your site and those that are only installed.
For this test, let’s take the Travel Monster theme.
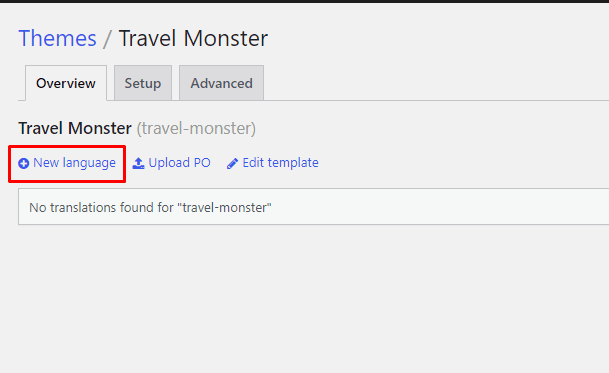
- Then click on the New Language button.
- Select the desired target language from the Choose a language dropdown menu.
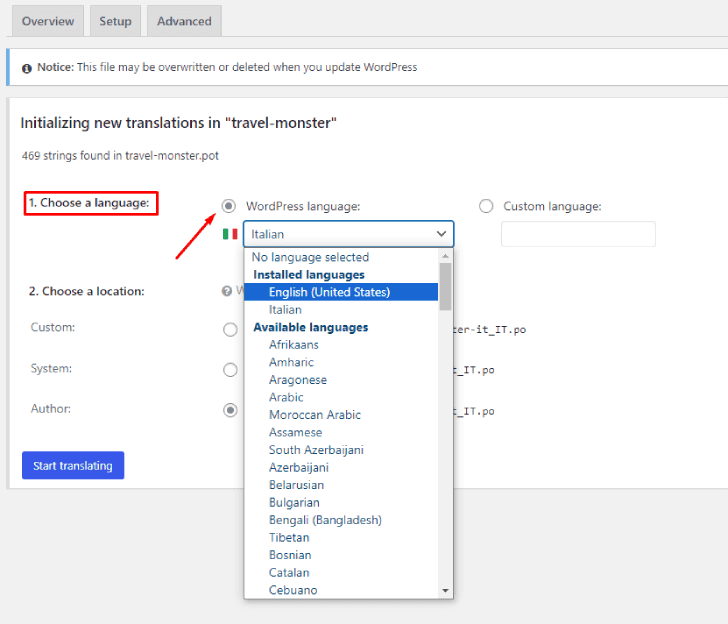
- Select a location where your translation file will be saved.
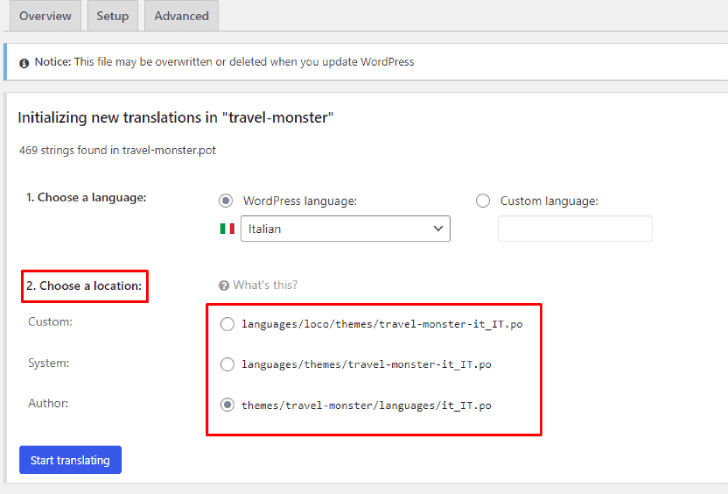
Here are three options to consider. It can be confusing if you’re unfamiliar with WordPress localization, but your chosen location is essential.
For now, select the Custom option as recommended by the developer. This option corresponds to the following path in my example: wp-content/languages/loco/themes/travel-monster-it_IT.po
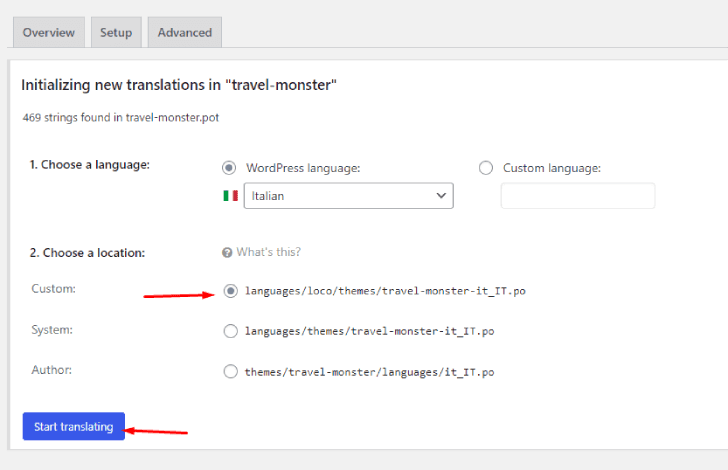
- Continue by clicking on the Start Translating button.
Step 3: Translate The Theme #
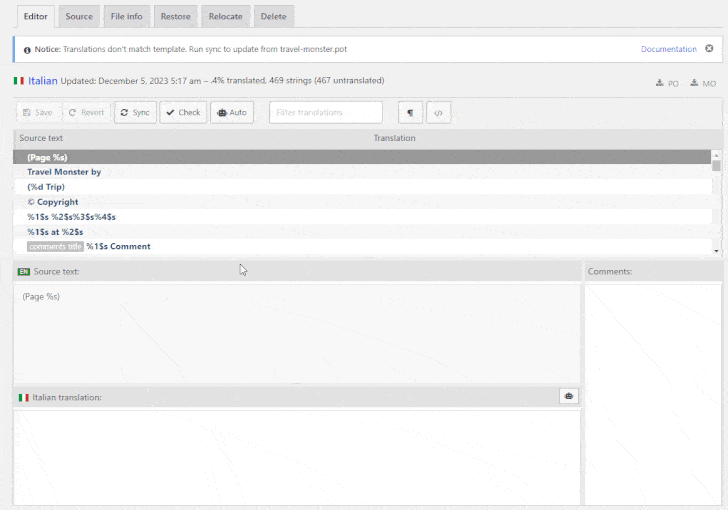
Now, let’s translate specific strings of the Travel Monster theme, in our case, via the Loco Translate editor.
You’ll see a list of strings included in the theme’s template file. Select one from the list, or you can search using the Filter Translations field.
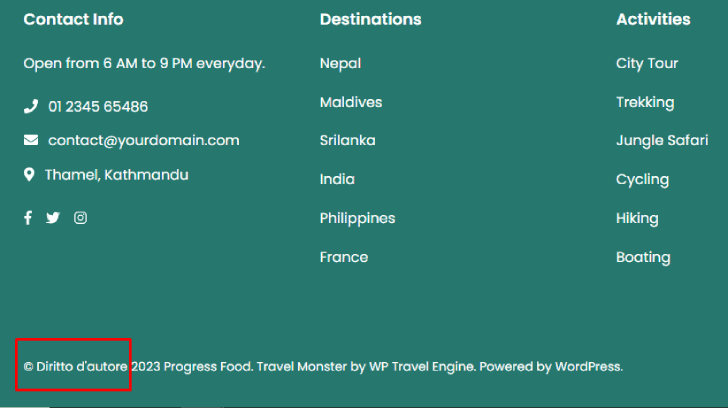
In our case, we searched for the “© Copyright” string, which we intend to translate into Italian.
Then proceed as follows:
- Select the text of your choice in the Source text box by clicking on it.
- Write its translation in the Italian translation box.
- Click Save to apply your changes.

Step 4: Verify the Translation of Your Strings #
To test that it worked, let’s compare what we’ve just translated before and after.
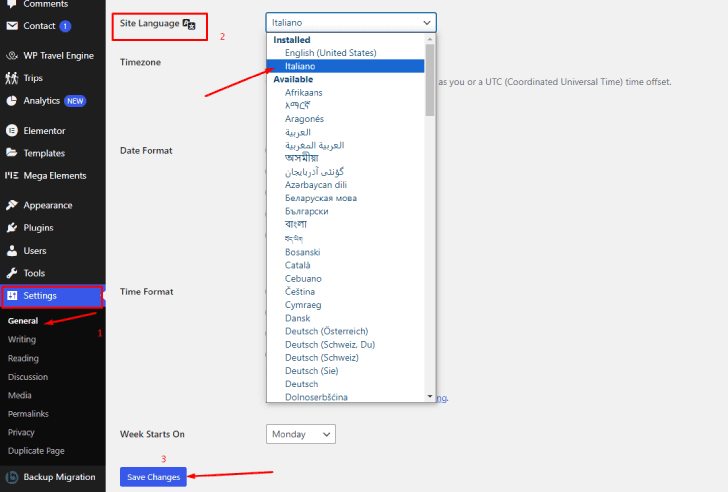
On your WordPress dashboard, navigate to Settings > General, then:
- Scroll down until you see the Site Language dropdown menu.
- From the dropdown list, choose a new language – Italian, in our case.
- Click on Save Changes.
Since we’ve translated the “© Copyright” string, let’s check the footer section. As expected, the string has been successfully translated.
Repeat the same process to translate more strings. Search the word, put in its translation, and save.
Step 5: Translate the Plugin #
Like translating themes, you can follow the same steps to translate any plugin you choose. Given that most travel websites rely on travel booking plugins to create a comprehensive travel booking experience, we’ll focus on the popular travel booking plugin, WP Travel Engine.
- Go to Loco Translate > Plugin from your WordPress dashboard.
- Locate WP Travel Engine in the list of plugins and click on it.

As you can see, the plugin already offers translations in three languages:

- French – 100%
- German – 23%
- Hungarian -72%
Since we aim to translate strings into Italian, simply click “New language” to add it. Alternatively, if you wish to modify an existing translation, such as German, click on the “Edit” link.
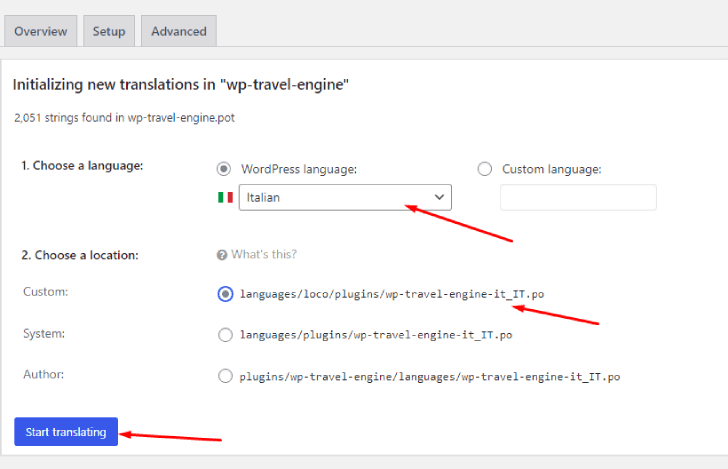
Upon clicking New Language or Edit, you will be redirected to the plugin’s editor, which you will learn to navigate in the next section.
- Click on the Language tab and select the language you want to translate into. In this case, we will choose the Italian.
- Select a location where your translation file will be saved.
- Click on the Start Translating button.
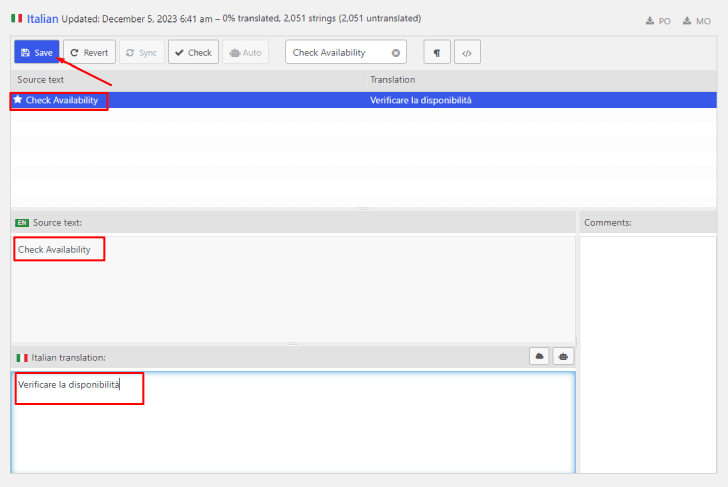
Now, let’s translate specific strings of the WP Travel Engine.
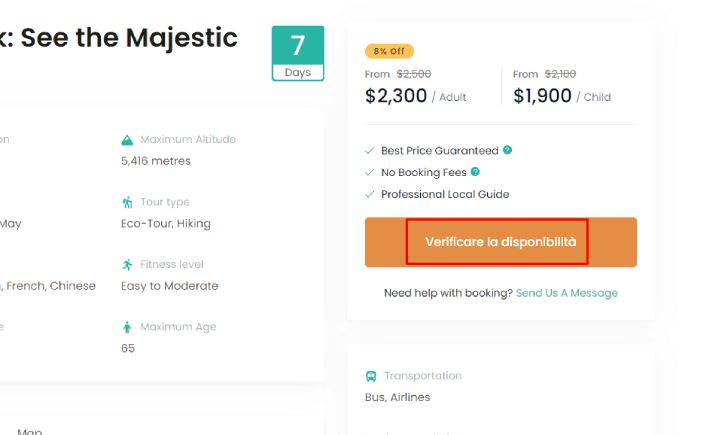
- Go to the Filter translations search bar to find specific strings to translate in the translation section. For example, type “Check Availability” into the search bar.
- Once you click on the string, the source text will appear.
- Write its translation in the Italian translation box.
- Click Save to apply your changes
The last step is to verify that your translation is working. Follow STEP 4 as above and test whether it worked.
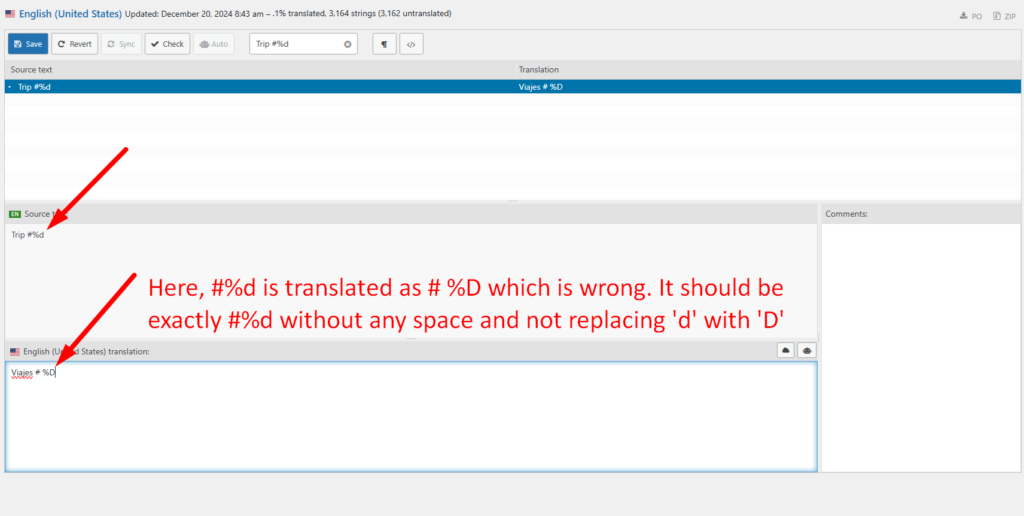
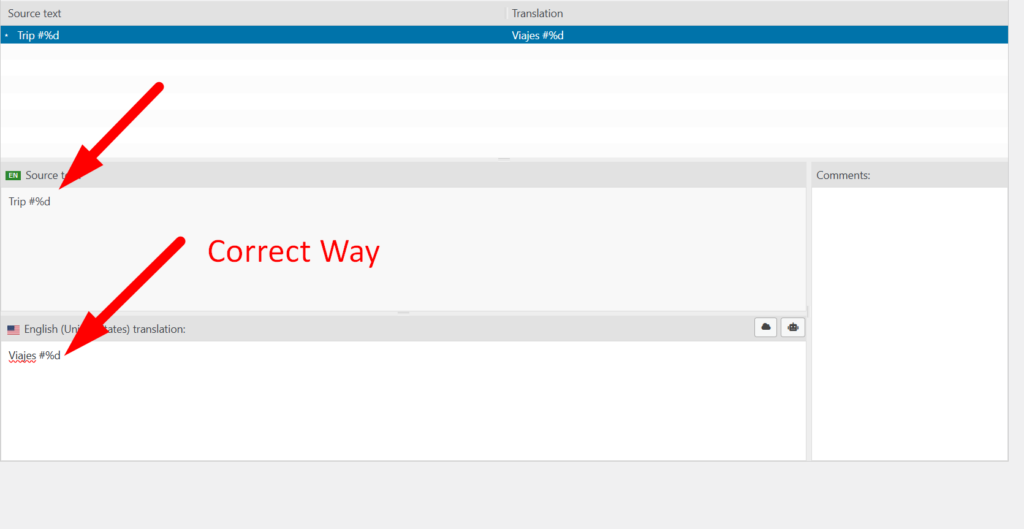
Important Note: Placeholder Format Specifiers #
When translating the plugin or themes, please ensure that format specifiers or placeholders (e.g., %s, %d, %1$s) are not translated and remain exactly as they appear in the original string.
Why This Is Important: #
- These placeholders are used to dynamically insert values (e.g., names, dates, prices) into text.
- If placeholders are altered or translated, it may disrupt the functionality of the plugin or theme, leading to errors or unexpected behavior.
Example: #
- Original:
Hello, %s! Your booking number is %d. - Correct Translation:
Hola, %s! Su número de reserva es %d. - Incorrect Translation:
Hola, %S! Su número de reserva es %num.
By keeping the placeholders unchanged, you help ensure that the plugin and theme function correctly across all translations. If you have any questions regarding placeholders, feel free to reach out for clarification.
Below is a screenshot of correct translation:
And below is another screenshot showing incorrect way of translation: