WP Travel Engine provides various settings to control the functionality and behavior of the checkout page on your tour booking site. These settings allow you to manage traveler details, display emergency contact fields, customize confirmation messages, and ensure compliance with GDPR regulations.
This guide will walk you through the available settings to ensure your checkout page is optimized for both user experience and operational needs.
Accessing the Checkout Page Settings #
To access the Checkout Page settings:
- Go to your WordPress Admin Dashboard.
- Navigate to WP Travel Engine > Settings > Display > Checkout.
- Here, you will find various options to configure the Checkout Page. Each setting is described below, along with guidance on how to use them effectively.

Please configure the below settings for the checkout page.
Book Confirmation Message #
You can enter a confirmation message here to be sent to your customers after they submit the checkout form. This message will be delivered once the checkout process is complete.
Template for Checkout Page #
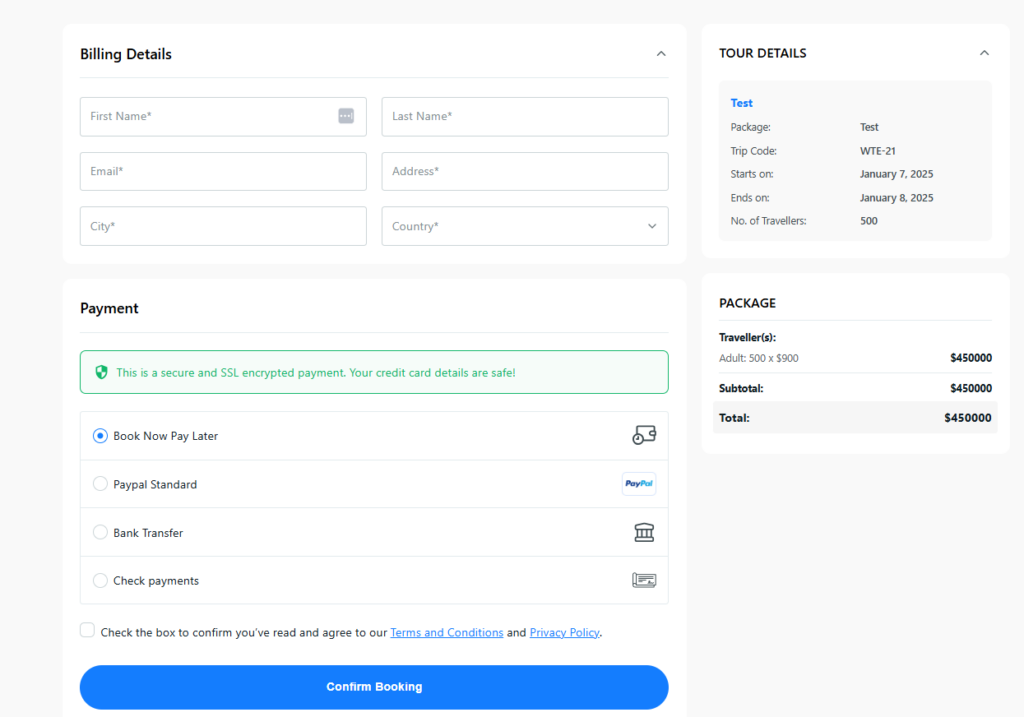
There are two layout options available for the checkout page: Default and New.
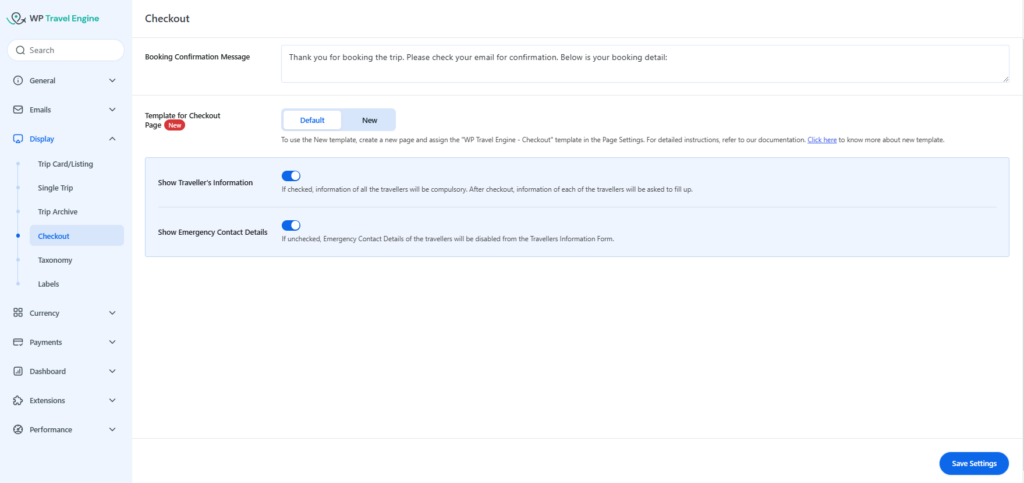
- Default Layout:
This is the standard checkout page layout we’ve been using. If you choose this layout, you’ll have the option to enable the Traveler Information feature.- Show Traveller’s Information:
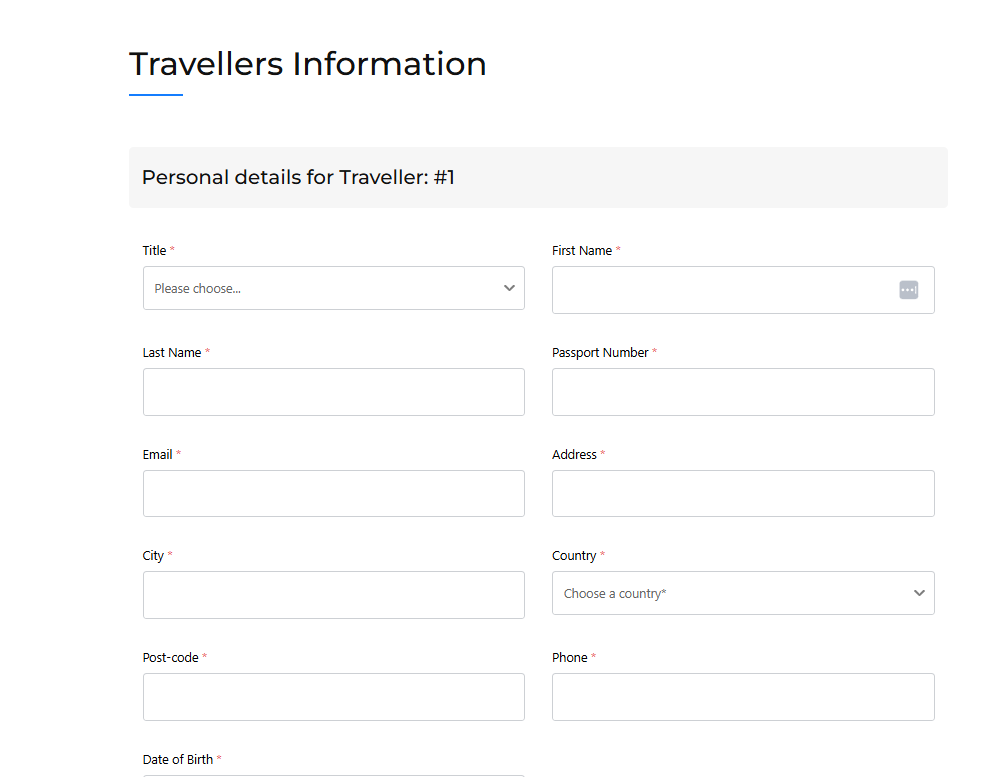
Enable this toggle to make it mandatory to collect information for all travelers. After checkout, details for each traveler will need to be provided. Once the traveller Information feature is enabled, you will also have the option to request emergency contact details for each traveller. You can enable the toggle to request emergency contact of all travellers.
- Show Traveller’s Information:
- New Layout: This is a new layout for the checkout page with an advanced design layout. Once you choose the New layout, you will have to configure the below settings.
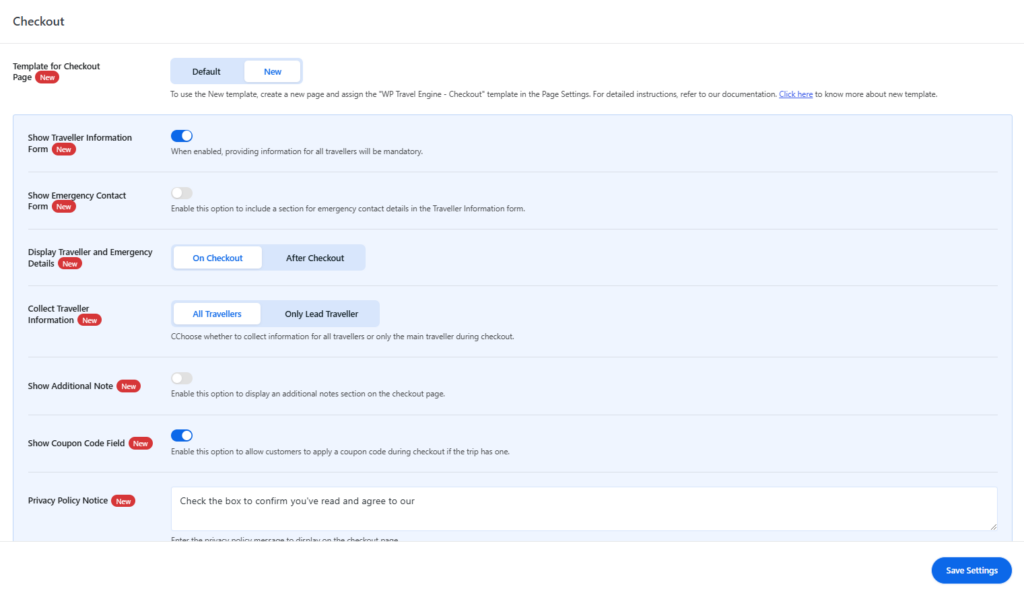
- Show Traveller Information Form: Enable this toggle to collect traveller information after checkout.
- Show Emergency Contact Details: Once you enable the traveler information feature, you’ll have the option to add emergency contact details for each traveller. Enable the toggle to activate this option.
- Display Traveller and Emergency Details: Choose whether you want travellers’ information to be filled out on the checkout page or after checkout.
- Collect Traveller Information: Choose the type of traveller details to display on the checkout page. You can select either “All Travellers” or “Only Lead Traveller“.
- Show Additional Note: Enable the toggle to allow users to add additional notes on the checkout page while booking their travel.
- Show Coupon Code Field: Enable the toggle to show the coupon discount on the checkout page.
- Privacy Policy Notice: You can add your own or modify the Privacy Policy message here.
- Footer Copyright: We provide a page template for the checkout page, which you can view below. After selecting the checkout page template, you can add your custom footer copyright.
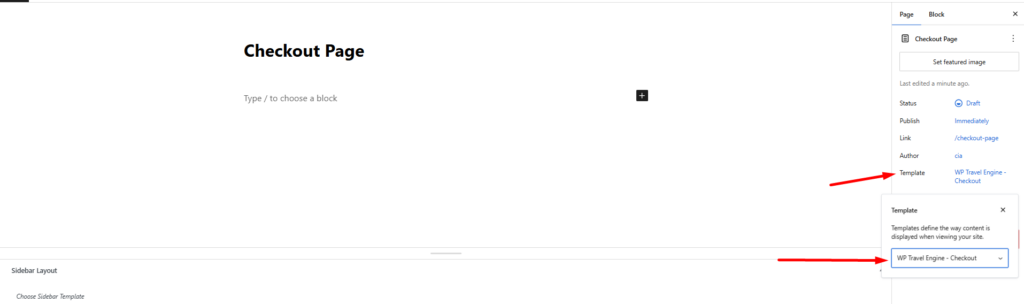
How to apply the Checkout Page Template? #
We offer a Checkout Page Template for the New layout that you can select from the Page Editor. To add the template, go to Dashboard > Pages > Add New > Checkout Page > Template. From there, you can choose the Checkout Page Template. This layout will override the theme’s header and footer design. If you’d like to add a custom footer copyright for the checkout page, you can do so through the Checkout settings mentioned above. Make sure to select the page in the Checkout Page option under Page Settings.
Note: If you select the Checkout Page template, it will override the default layout chosen in the checkout settings and display the new Checkout Page template instead.
How to add Shortcodes for Checkout Page Template? #
Here are a few shortcodes you can use for checkout page templates. To add these shortcodes, go to Dashboard > Pages > Add New > Checkout. Insert a shortcode block and add the following shortcodes based on the desired template:
- [WPTRAVELENGINE_CHECKOUT content=’checkout-form’]: This shortcode displays only the checkout form on the checkout page without showing any summary content.
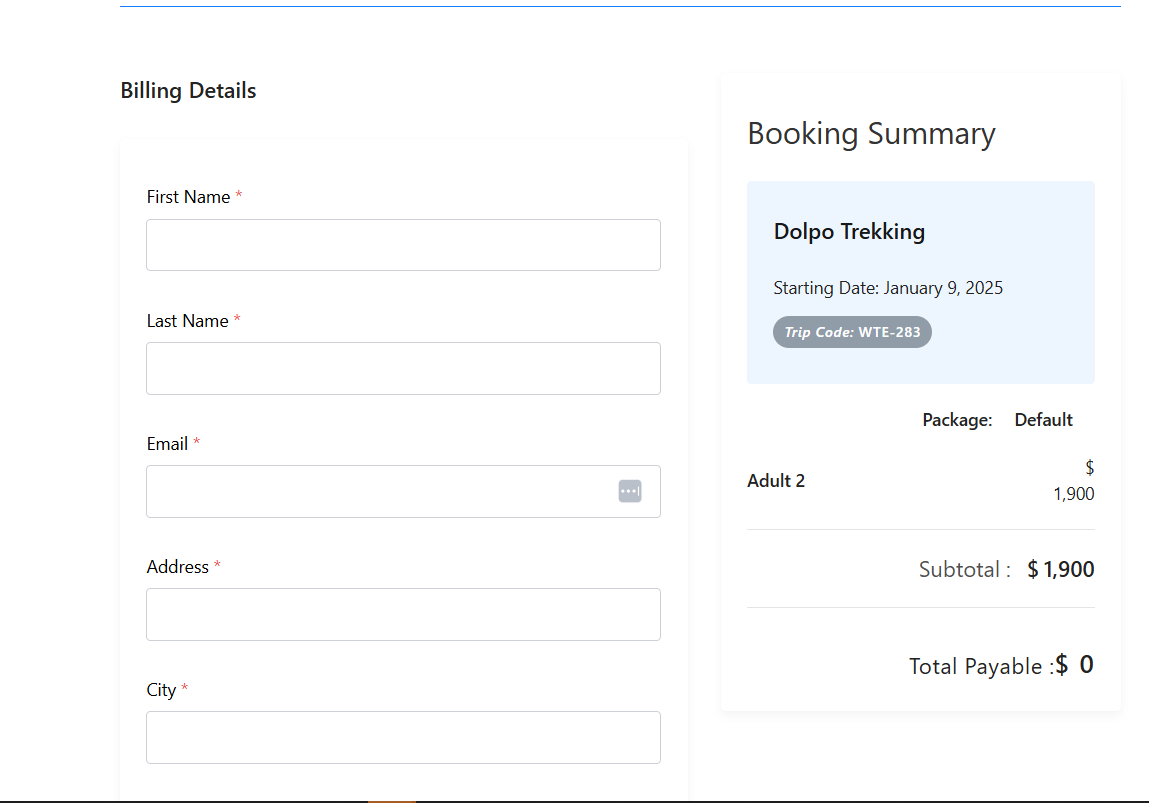
- [WPTRAVELENGINE_CHECKOUT content=’cart-summary’]: This shortcode displays only the cart summary on the checkout page.
- [WPTRAVELENGINE_CHECKOUT content=’tour-details’]: This shortcode displays summary of the tour details.
- [WP_TRAVEL_ENGINE_PLACE_ORDER version=2.0]: This shortcode displays the new checkout page template. Please note that even if the default option is selected in the checkout settings, the checkout page will still display the new template due to this shortcode being added.
If you face any difficulties, feel free to contact our support team.