WP Travel Engine Plugin helps you convert your WordPress website into a complete travel booking website.
Using this plugin, you can add trips with a detailed itinerary and allow customers to enquire and book the trips on your website. You can arrange and manage trips you offer based on destinations, activities, and trip types.
This plugin also helps you manage all your customers– new and old. You can view the number of bookings made by a particular customer. You can manage all the bookings, inquiries, and customers right from your WordPress dashboard.
You can also define your own payment method.
Fully Compatible Themes with WP Travel Engine:
- Travel Booking WordPress Theme by WP Travel Engine
- Travel Booking Pro by WP Travel Engine
- Travel Muni WordPress Theme by WP Travel Engine
- Travel Muni Pro by WP Travel Engine
- Travel Agency WordPress Theme by RaraTheme
- Travel Agency Pro by RaraTheme
- Tour Package WordPress Theme by RaraTheme
- Tour Operator WordPress Theme by RaraTheme
- Travel Tour WordPress Theme by The Bootstrap Themes
- Travel Tour Pro by The Bootstrap Themes
- Travel Company WordPress Theme by Scorpion Themes
- Travel Company Pro by Scorpion Themes
Getting Started #
Make sure you have the latest version of WP Travel Engine Plugin installed and activated. You can find the plugin here.
Installing the Plugin #
Using Site Admin
- Download the plugin from wordpress.org
- Install it from the Site Admin
- Activate the plugin through the ‘Plugins’ menu in WordPress.
Using FTP
- Download the plugin from wordpress.org
- Unzip wptravelengine.zip.
- Upload all the files to the /wp-content/plugins/wp-travel-engine.
- Activate the plugin through the ‘Plugins’ menu in WordPress.
Once activated, you will be redirected to “WP Travel Engine Onboard”.
WP Travel Engine Onboarding #
Once the plugin is activated from the plugin list page, you will be redirected to this current page, “WP Travel Engine Onboarding” if you are a first-time user, which will guide you through various basic configurations to make your site “WP Travel Engine” ready. This is to help you guide through the basics to configure the plugin to make your site ready as required.
Configurable Tabs & Settings #
There are 5 different tabs configurable in the “WP Travel Engine Dashboard” page as listed below:
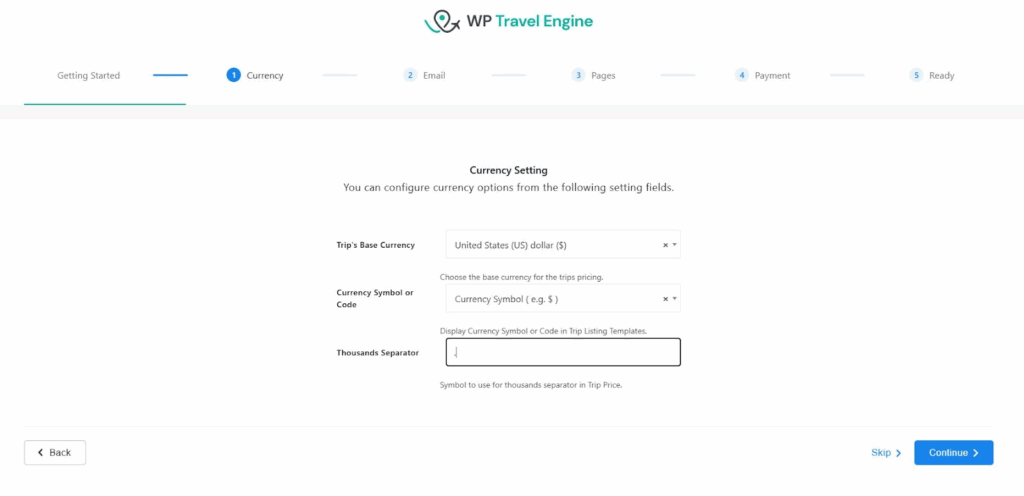
- Currency – You can configure various options, such as the types of currency your business supports, the currency symbol to display, and the thousand separator for currency. We do have detailed settings for currency settings. Please check here.
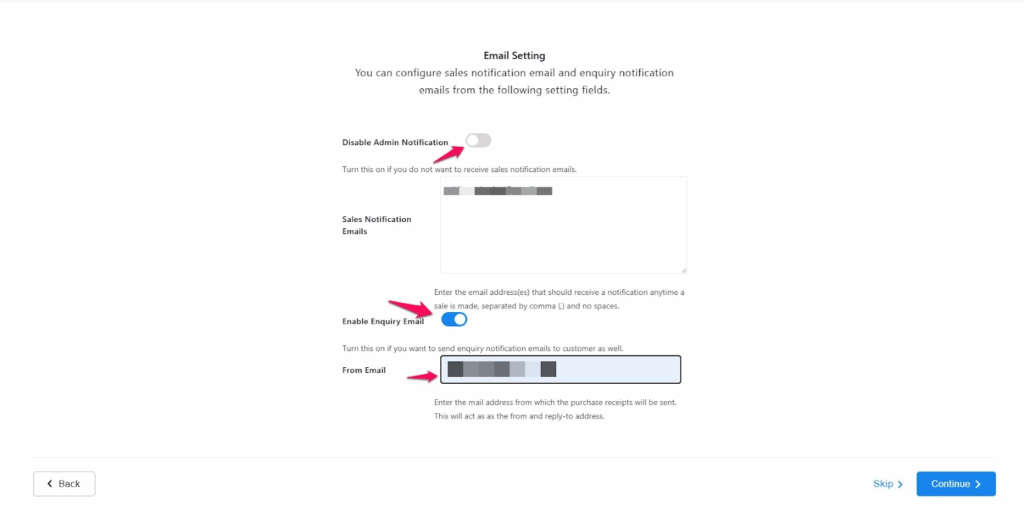
Email – You can configure if you want to send the sales notification email to the admin or send an inquiry notification email to use and custom emails. You can later configure the Email notification. Please check the detailed documentation here.
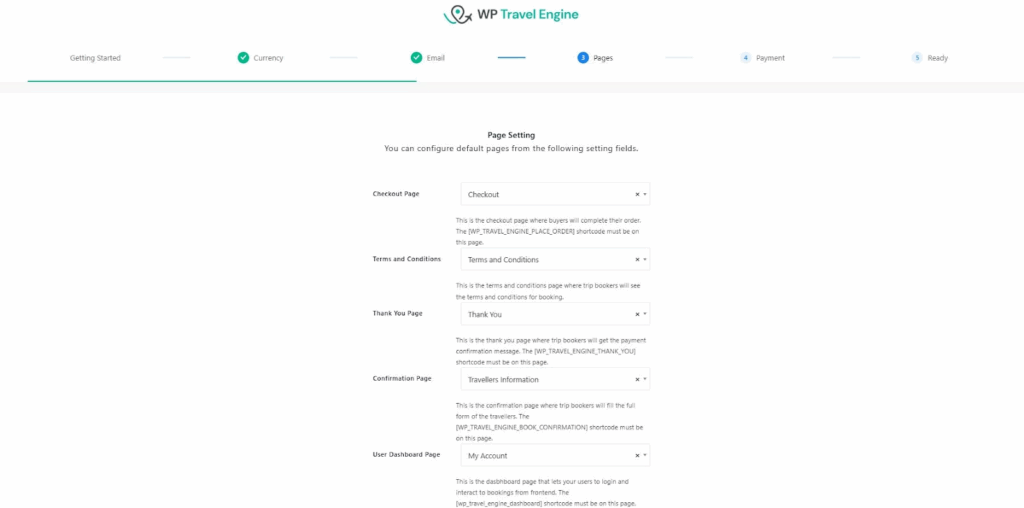
Pages – You can set the various pages for checkout page, terms and conditions, thank you page, purchase confirmation pages, etc. There is a detail setting for the page settings. Please check the documentation here: https://docs.wptravelengine.com/article/pages/
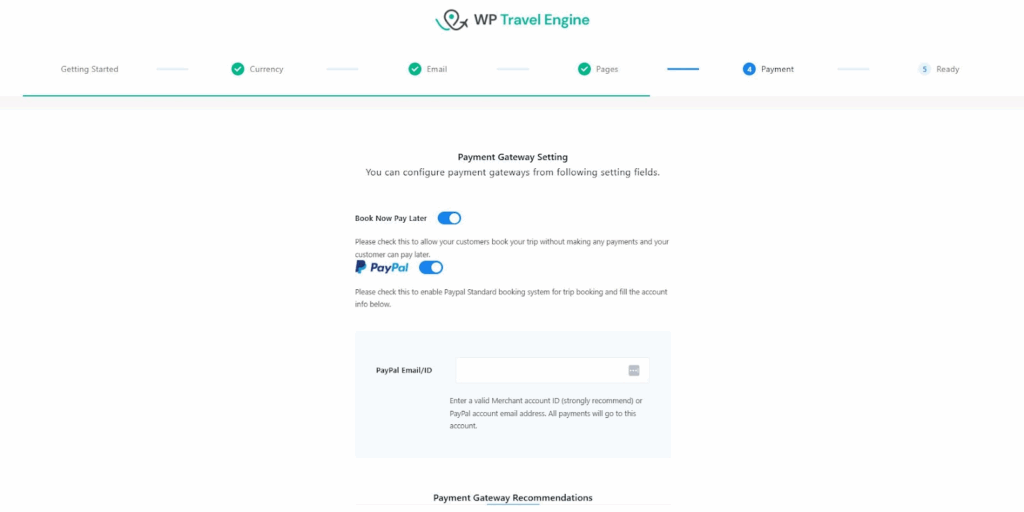
Payment – You can configure payment gateway options from here. Paypal is enabled by default and after you insert the PayPal email/id, you are ready to go.
Ready
After you complete the configuration, you will land on this tab, where you can find various links to different pages for documentation and support. You can also share or tweet about the plugin from here. Or you can start creating a new trip from here or return to the dashboard instead as well.
Home Settings #
Once you install the WP Travel Engine plugin, you can open Home to see general information and helpful links.
Please navigate to the Dashboard > WP Travel Engine > Home.
The Home screen is organized into tabs. Use these tabs to learn, get help, and manage important information about your setup.
Tabs covered in this guide: General, Tutorials, Themes, Go Premium, FAQs, System Info, What’s New?
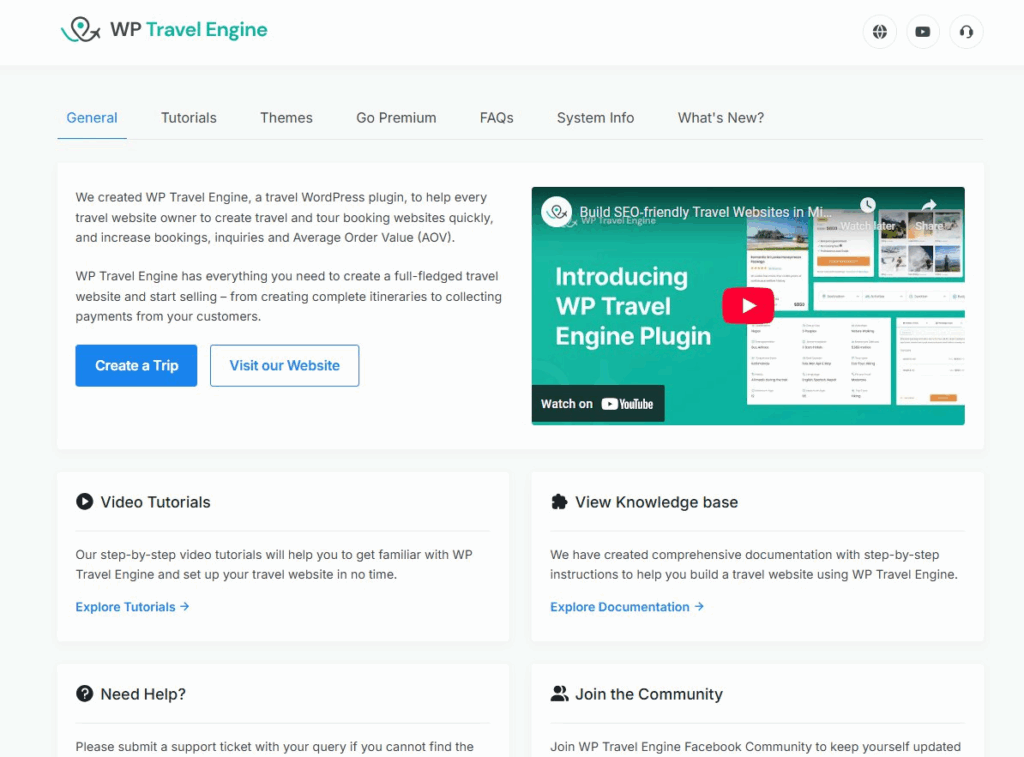
General #
A quick starting point with links to create trips, watch an intro video, and find help.
What you see #
- Intro message that explains what WP Travel Engine does.
- Create a Trip button. Click to add your first tour or activity.
- Visit our Website button. Opens the official website for themes, add‑ons, and resources.
- Intro Video. A short YouTube video that shows how the plugin works.
- Join the Community: Link to the Facebook community to share questions and tips with other users.
- Feature Request: A link to submit a feature request if you need any new features.
- View Knowledge Base: A link to check detail documentation of the product.
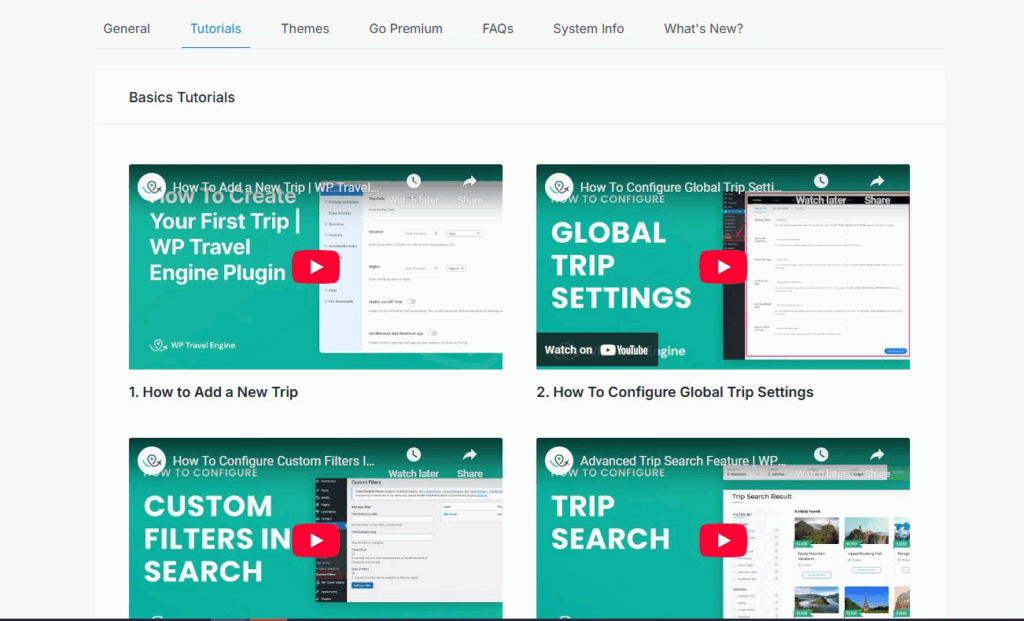
Tutorials #
Watch curated videos that show how to use important features. You can see a grid of YouTube videos. Each card shows a title and a thumbnail. Click a video to play it inside the page. You can also open it on YouTube to watch in full screen and enable captions.
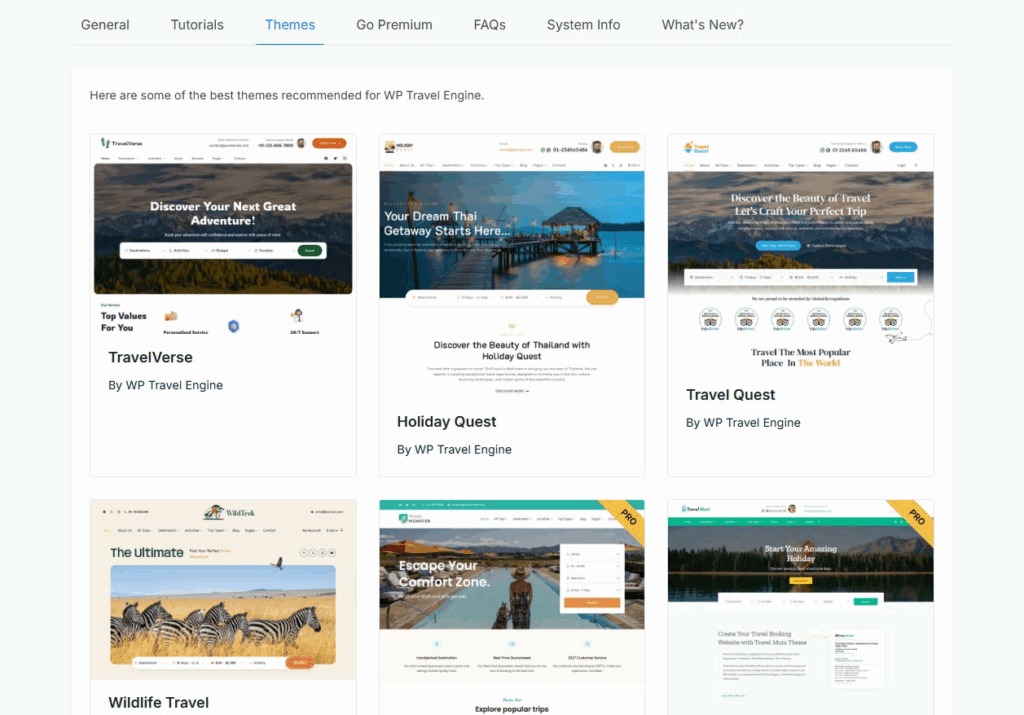
Themes #
In this section, you can explore a curated list of themes that are fully compatible with the WP Travel Engine plugin. These themes are designed to help you build professional travel and tour booking websites without compatibility issues. The collection includes both themes developed by our own team and selected third-party themes that have been tested to work seamlessly with WP Travel Engine.
Browsing through this list gives you a clear overview of the design options available. Each theme comes with layouts, features, and styles suited for different types of travel businesses, so you can choose the one that best matches your brand and the kind of tours you offer.
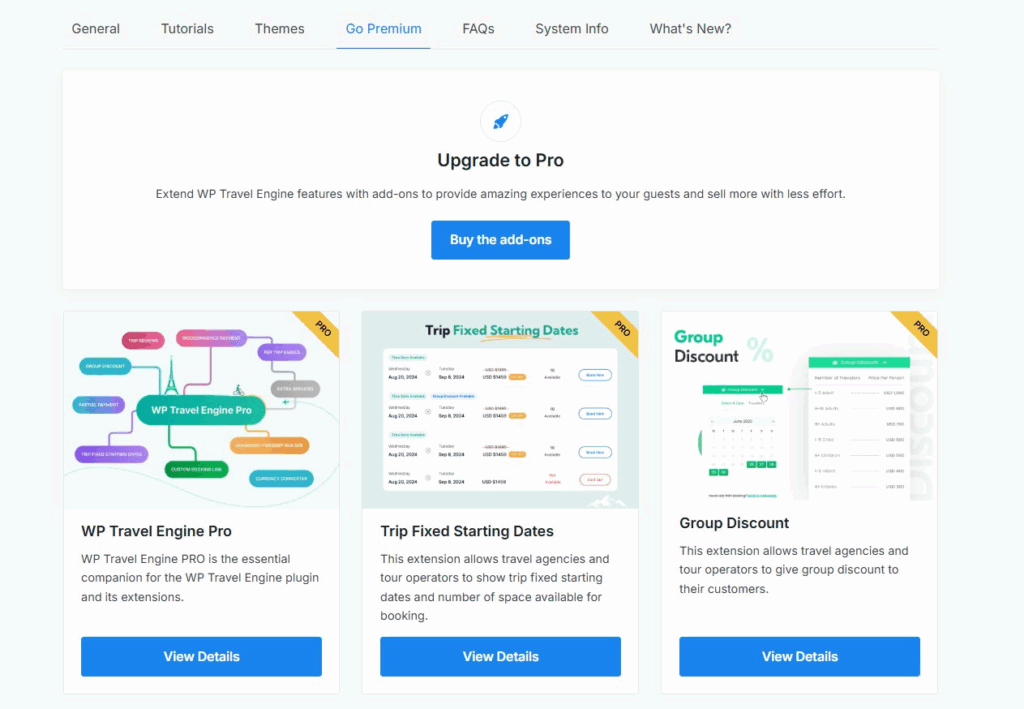
Go Premium #
In this section, you can explore premium add-ons and themes that enhance the features of the WP Travel Engine plugin. These add-ons allow you to extend the core functionality, giving you advanced tools to manage bookings, customize trips, and improve the overall experience for your customers.
Along with add-ons, we also offer a premium theme designed specifically for travel websites. Together, these resources help you create a more powerful and competitive tour booking site with features that go beyond the basics.
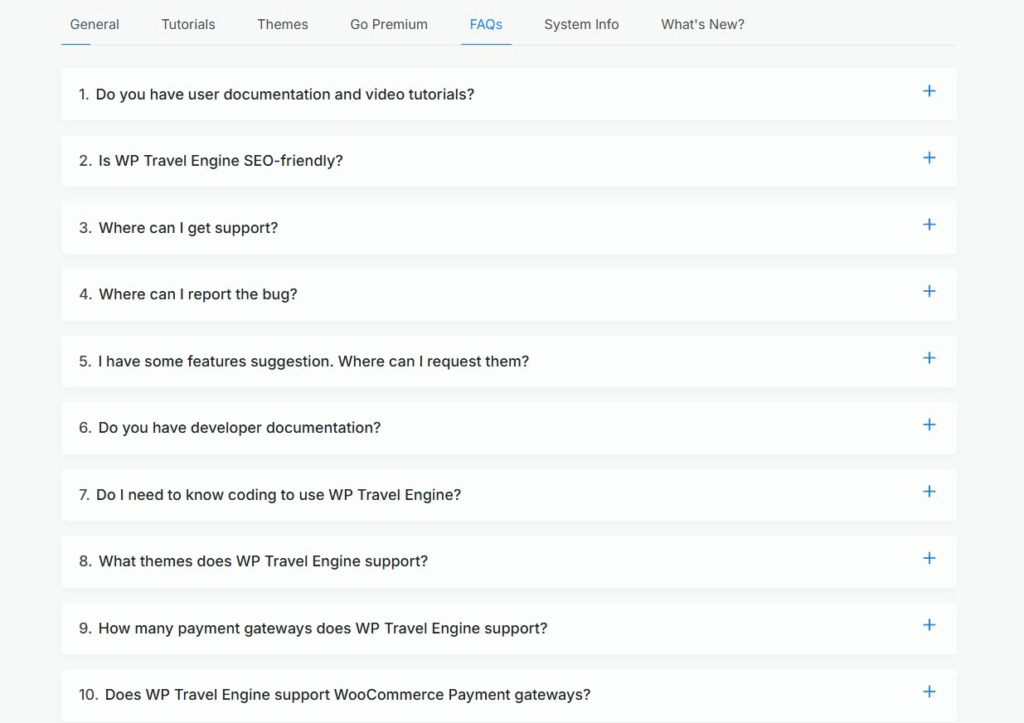
FAQs #
In this section, you’ll find answers to some of the most frequently asked questions about the WP Travel Engine plugin. These questions cover the common concerns that new and existing users often have, such as setup, compatibility, and available features.
Going through this FAQ will give you a quick understanding of how the plugin works, what it supports, and where to find additional help if needed. It’s a handy place to get important information in advance, whether you’re just starting with WP Travel Engine or looking to clear up a specific query without contacting support.
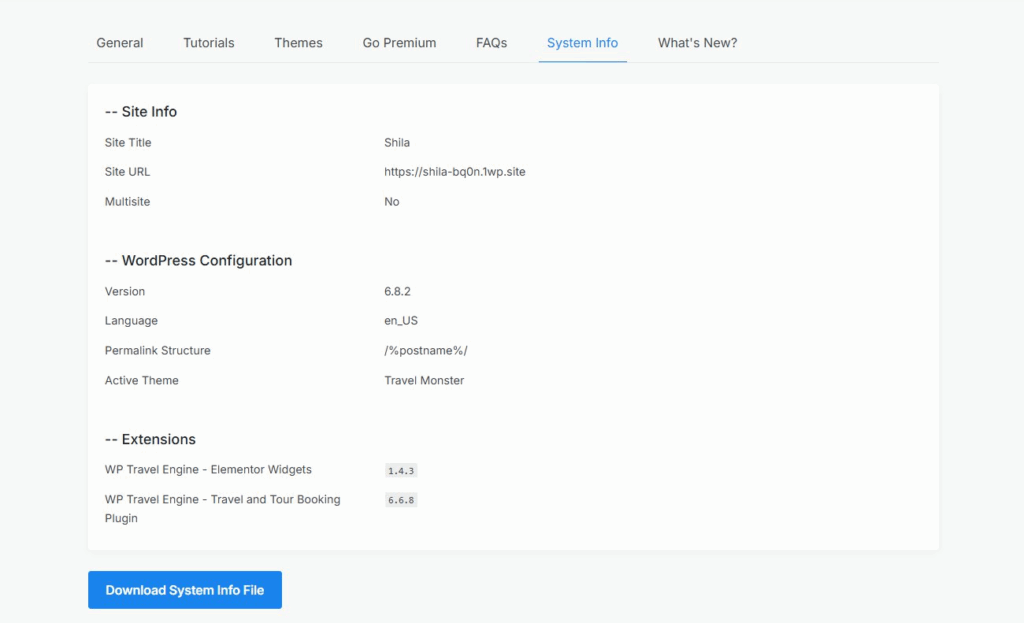
System Info #
The System Info section provides important technical details about your website setup, which can be very useful for troubleshooting or when requesting support. Under Site Info, you will see the basic details of your site, including the site title, the site URL, and whether your WordPress installation is running as a multisite or not. The WordPress Configuration area shows information about your WordPress environment, such as the version you are using, the selected language, the permalink structure applied to your site, and the currently active theme. Finally, the Extensions section lists the installed versions of the WP Travel Engine plugin itself along with any related extensions, such as Elementor Widgets. Having all of this information in one place makes it easier to confirm your setup, identify compatibility issues, and share accurate details with the support team whenever you need assistance.
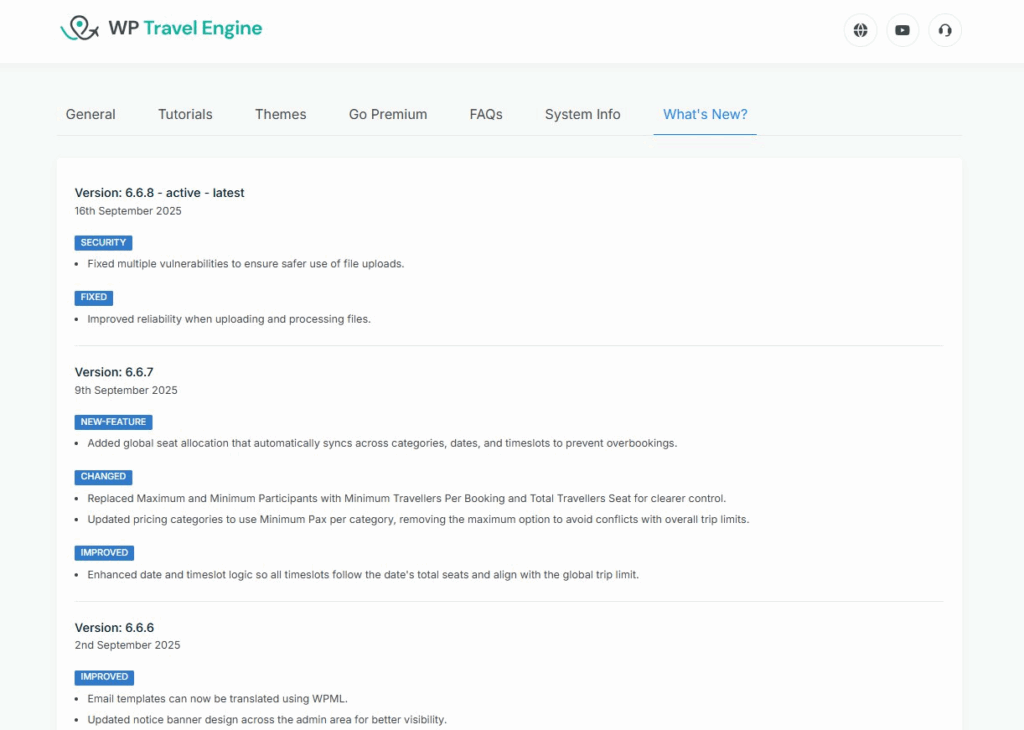
What’s New? #
This section allows you to view the complete changelog for every version of the WP Travel Engine plugin. The changelog is a record of all updates made to the plugin, so you can clearly see what has been added, changed, or fixed before or after you update to a new version. Each entry in the changelog is organized by version number and includes the release date, making it easy to track the timeline of updates. Within each version, the details are grouped under clear labels such as New Feature, Changed, Improved, Fixed, or Security.
Feel free to contact our support team for any other assistance.