Skip to content (Press Enter)
WP Travel Engine Documentation

WP Travel Engine Documentation

  • Home
  • Pricing
  • Add-ons
  • Themes
  • Support
    • Documentation
    • Youtube Channel
    • Video Tutorials
    • Support Ticket
    • Facebook Community
WP Travel Engine Documentation

WP Travel Engine Documentation

  • Home
  • Pricing
  • Add-ons
  • Themes
  • Support
    • Documentation
    • Youtube Channel
    • Video Tutorials
    • Support Ticket
    • Facebook Community

Create and Manage Trips

17
  • How to add Trip Gallery?
  • How to add General Info?
  • How to add Date and Price Info?
  • How to add Trip Overview Info?
  • How to add Trip Itinerary?
  • How to add Trip Includes/ Excludes?
  • How to add Trip Info?
  • How to add Image Gallery?
  • How to add a Trip Location Map?
  • How to add FAQs?
  • How to add Trip Shortcodes?
  • How to add a new trip tab
  • How to hide the Booking Form?
  • How to Hide Trip Enquiry Form on the Single Trip page?
  • Unable to upload Images on the Gallery
  • How to change the banner layout of the trip?
  • How to display a Trip Duration on the single trip page?

Customer Experience & Portal

2
  • Social Login
  • How to configure User Dashboard?

Design & Layout Customization

3
  • WP Travel Engine – Blocks, Patterns & Templates
  • Can I use WP Travel Engine with Elementor?
  • Is WP Travel Engine plugin compatible with Divi builder?

Elementor Widgets

21
  • Trips Tab
  • Trips Slider Three
  • Trips Slider Two
  • Trips Slider
  • Trips Module One
  • Trips Module Two
  • Trips Module Three
  • Trips Accordion
  • Featured Trip
  • Advanced Trip
  • Advanced Trip 2
  • Advanced Trips 3
  • Advanced Trips 4
  • Trips List
  • Destination/Activities 1
  • Destination/Activities 2
  • Destination/Activities Module 1
  • Destination/Activities Module 2
  • Destination/Activities Slider 1
  • Destination/Activities Slider 2
  • Destination/Activities Slider 3

Pro Addons

31
  • Advanced Analytics
  • Zapier
  • Advanced Email Automator
  • SliceWP Integration
  • Accommodation
  • Activity Tour Booking
  • Conditional Pricing
  • Pickup Points
  • WP Travel Engine Pro
  • Booking Fee
  • Custom Booking Link
  • Per Trip Emails
  • Elementor Widgets
  • Email Customizer
  • Trip Code
  • Currency Converter
  • Partial Payment
  • Itinerary Downloader
  • Form Editor
  • File Downloads
  • Advanced Itinerary Builder
  • Trip Reviews
  • User History
  • Trips Embedder
  • Trip Weather Forecast
  • Extra Services
  • Group Discount
  • Trip Fixed Starting Dates
  • Trip Fixed Starting Dates Countdown
  • Social Proof
  • Legal Documents

Email Notifications

7
  • How to configure Admin Email?
  • How to configure Enquiry Email?
  • How to configure Customer Email?
  • How to change booking emails
  • How to disable Enquiry Form on the Single Trip page?
  • Email Troubleshooting
  • How to resend the booking confirmation email

Feature Updates

6
  • New Pricing Widget Layouts for WP Travel Engine Mobile Users
  • WP Travel Engine – 5.5
  • [MAJOR UPDATE RELEASE] WP Travel Engine version 5.2
  • [MAJOR UPDATE RELEASE] WP Travel Engine version 5.0
  • [Major Update Release]WP Travel Engine – 4.3.0
  • Extra Services Addon – Version 2.0.4

General Setup & Configuration

13
  • How to add Global Trip Highlights?
  • How to Configure Currency Settings?
  • Getting Started
  • How to Configure Trip Archive Settings?
  • How to configure Trip Card/Listing page settings?
  • How to Configure Checkout Settings?
  • How to configure Single Trip settings?
  • How to configure Performance Setting?
  • How to configure Trip Search Settings?
  • How to Configure Taxonomy Settings?
  • How to configure Trip Info Settings?
  • How to configure Trip Tabs Settings?
  • How to configure Predefined Pages?

Licensing & Account Management

7
  • Unable to login into your account
  • How to make the purchase from Nepal using eSewa or bank transfer?
  • How to cancel the subscription for your purchase?
  • How to upgrade the purchased plan?
  • How generate the Invoice from WP Travel Engine account?
  • How to Download Add-ons and Themes After Purchasing?
  • How to activate the Pro add-on license key?

Multilingual & Translation

3
  • How to use Labels Feature for changing Static Strings?
  • How to Build a Multilingual Travel Website Using WP Travel Engine and WPML?
  • How to translate themes and plugins using Loco Translate?

Payment Settings and Gateways

16
  • How to Configure Checkout Settings?
  • How to add PayPal Standard?
  • How to configure the Check Payments Settings?
  • How to configure Tax Settings?
  • Razorpay
  • WeTravel Integration
  • Stripe Payment Gateway
  • WooCommerce Payment Gateway
  • PayU Biz Payment Gateway
  • PayU Money Payment Gateway
  • PayPal Express Checkout Payment Gateway
  • PayHere Payment Gateway
  • PayFast Payment Gateway
  • Midtrans Payment Gateway
  • Himalayan Bank Payment Gateway
  • Authorize.net Payment Gateway

Trip Management and Operations

5
  • How to change the Adult, Child Label
  • Changing the default currency i.e dollar
  • Change Currency Symbol to Currency Code
  • “Label” text is appeared instead of Pricing Category
  • How to View and Manage Trip Bookings ?

Troubleshooting

7
  • Page not found appeared on the single trip page
  • Trips Facts do not appear on the trip page
  • Search result page is showing a 404 error
  • The booking form is not displayed
  • How to check plugin conflicts in WordPress?
  • Resolving the Date and Price Tab Loading Issue
  • I have created some destinations and it’s not displayed on the destination page

WordPress Themes

6
  • Pattern Engine
  • Travelverse
  • Travel Muni
  • Travel Muni Pro
  • Travel Booking
  • Travel Booking Pro

Travel Monster

10
  • Install Travel Monster Theme
  • Import Starter Site
  • Configure Site Identity
  • General Settings
  • Header Settings
  • Footer Settings
  • Posts & Pages Settings
  • Configure Menus
  • Configure Widgets
  • Setup Static Homepage

Travel Monster Pro

9
  • Install and Activate Travel Monster Pro
  • How To Activate Travel Monster Pro License
  • Import Starter Site
  • General Settings
  • Header Settings
  • Footer Settings
  • Posts & Pages Settings
  • Misc Settings
  • User Social Link
View Categories
  • Home
  • Documentations
  • WordPress Themes
  • Travel Monster
  • General Settings

General Settings

Container Settings #

A container is an element that holds all your site contents. You can access the Container Settings via Dashboard > Appearance > Customize > General Settings > General > Container.

The following are the settings that you can use to manage your site container. 

Container Width – You can set the site container width for different devices via this option.

Fullwidth Centered Max-width – This setting sets the container width for a full-width centered layout.

Sidebar Settings #

You can access the Sidebar Settings via Dashboard > Appearance > Customize > General Settings > General > Sidebar.

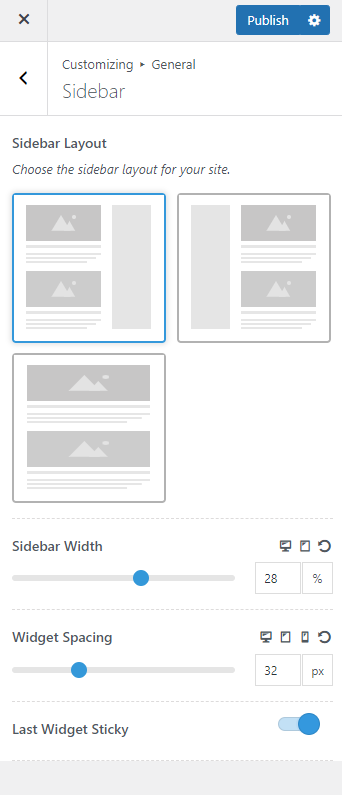
The following are the settings that you can use to manage the sidebar layout of your website.

Sidebar Layout: Choose the site layout with or without a sidebar. 

Sidebar Width – Set a value for the sidebar width.

Widget Spacing – Set a value for the spacing between the sidebar widgets.

Last Widget Sticky – Enable this option to apply sticky widget effect to the last widget in the sidebar.

Button Settings #

You can set styling for all the buttons to be used on your website via Dashboard > Appearance > Customize > General Settings > General > Button.

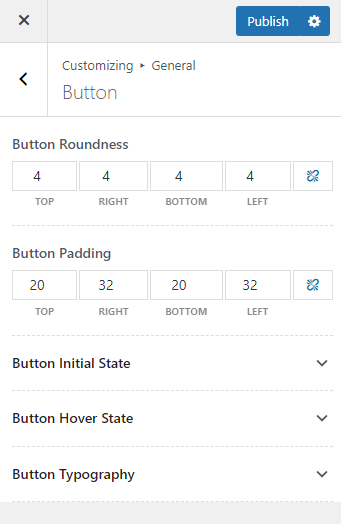
The following are the settings that you can use to manage the button layout of your website.

Button Roundness – Set values for the button radius.

Button Padding – Set padding value for the button.

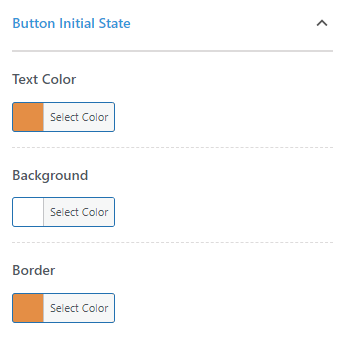
Button Initial State – Here you can select the text, background and border color for the button on initial state.

Button Hover State – Here you can select the text, background and border color for the button on hover state.

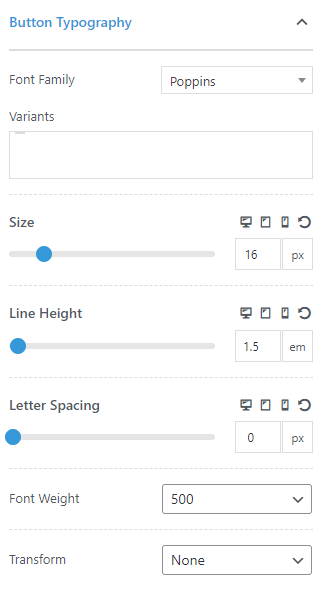
Button Typography – You can configure the typography settings for the button text via this setting.

Scroll to Top Settings #

You can configure the Scroll to Top Settings on your website via Dashboard > Appearance > Customize > General Settings > General > Scroll To Top.

Show Scroll to Top: Enable this option to display the Scroll to Top button.

Icon Size: This option is only visible when the Show Scroll to Top option is enabled. You can select the icon size for the Scroll to Top button here.

Alignment: Choose between Right or Left to adjust the alignment of the scroll button.

Bottom Offset: Set the distance between the bar and the bottom of the screen.

Side Offset: Set the distance between the bar and the side of the screen.

Pagination Settings #

You can access the Pagination Settings via Dashboard > Appearance > Customize > General Settings > General > Pagination.

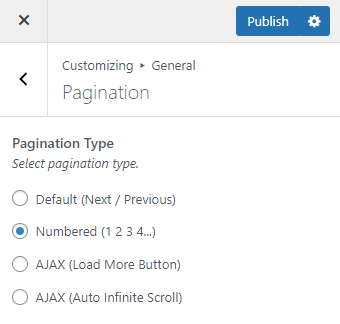
Here you can select the Pagination type that you want to display for your website pages.

404 Page Settings #

You can configure the settings for the 404 page on your website via Dashboard > Appearance > Customize > General Settings > General > 404 Page.

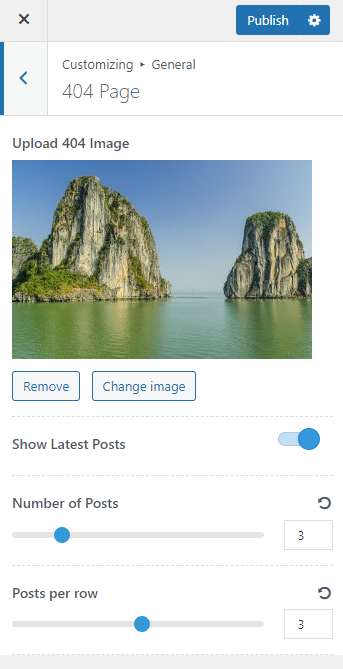
The following are the available settings for setting up a 404 page.

Upload 404 Image – Set an image to display on the 404 page.

Show Latest Posts – Enable this option to display the latest posts on the 404 page.

Number of Posts – Select the number of posts to display on the Latest Post section.

Posts per Row – Select the number of posts to display per row on the Latest Post section.

Colors Settings #

You can select colors for different elements of your website via the Colors Settings. For this, navigate to Dashboard > Appearance > Customize > General Settings > Colors.

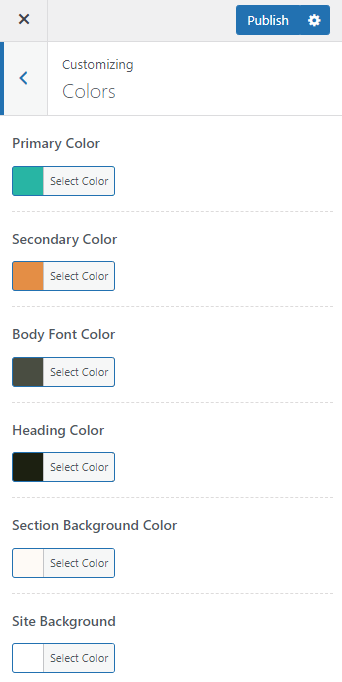
Primary Color – Select the Primary color for your website.

Secondary Color – Select the Secondary color for your website.

Body Font Color – Select a color for all the general site text.

Heading Color – Select a color for all the site headings.

Section Background Color – Select a color to apply in some specific background settings in the theme.

Site Background – Select a background color to apply for the entire website.

Typography Settings #

The Typography settings allow you to select font-family, variants, font-size, line-height, letter-spacing, font-weight and capitalization type for the different types of texts used on your website.

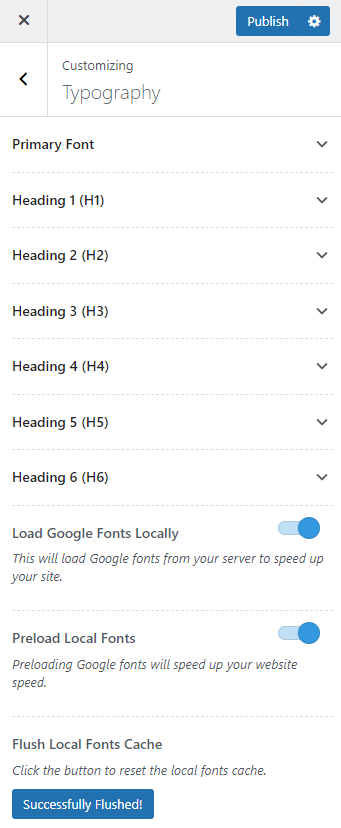
Primary Font – You can select the Primary font and settings for your website here.

Headings – The typography settings selected for this text type applies to the site headings.

Load Google Fonts Locally – Enable this option to load Google Fonts from your server. This will help to speed up your website.

Preload Local Fonts – Enable this option to activate preloading of Google Fonts.

Flush Local Fonts Cache – Click on the Successfully Flushed! button to clear the local fonts cache.

SEO Settings #

The SEO settings comprises of the Breadcrumbs setting and Post Date setting for the website.

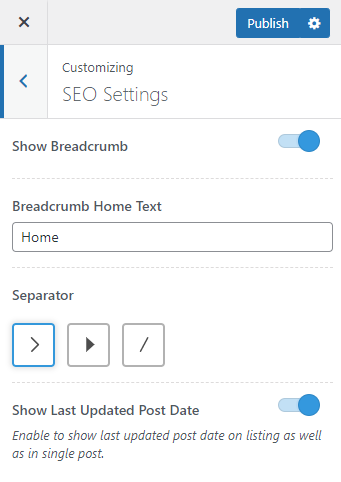
Show Breadcrumb – Enable this option to display breadcrumb on your website.

Breadcrumb Home Text – Enter the text with which you want to represent the Homepage on the breadcrumb.

Separator – Select the type of separator that you prefer.

Show Last Updated Post Date – Enable this option to display the date when a post was last updated. When you enable this, Google can read the post updated date and index your latest content.

Social Networks Settings #

You can set your social network accounts via Dashboard > Appearance > Customize > General Settings > Social Networks.

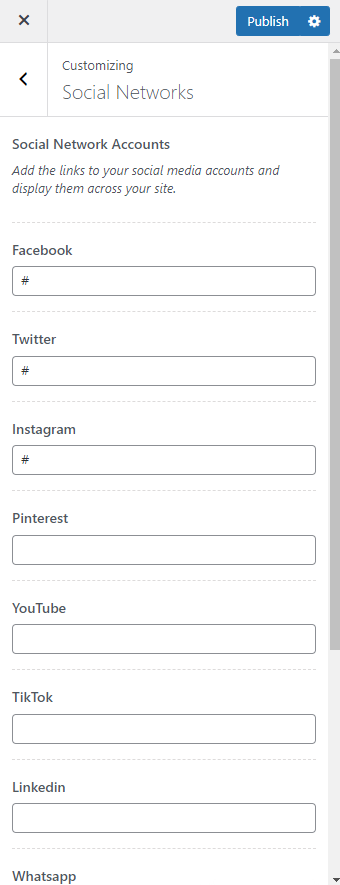
You can enable and add social media icons to display on the site header via Social Media Settings provided under the Header Settings. These icons will then automatically be linked to the social network accounts entered via the Social Networks Settings.

Updated on July 30, 2024
Configure Site Identity
Table of Contents
  • Container Settings
  • Sidebar Settings
  • Button Settings
  • Scroll to Top Settings
  • Pagination Settings
  • 404 Page Settings
  • Colors Settings
  • Typography Settings
  • SEO Settings
  • Social Networks Settings
© Copyright 2025 WP Travel Engine Documentation. All Rights Reserved.