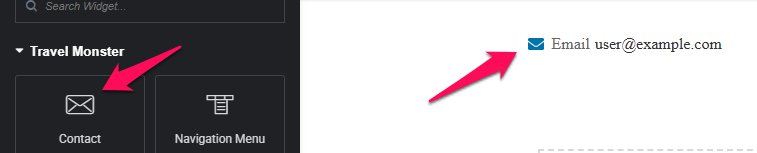
You can add the Contact Widget via the Elementor plugin to display contact information on your pages.
Below are the settings you can configure to set up the Contact Widget:
Contact Settings #
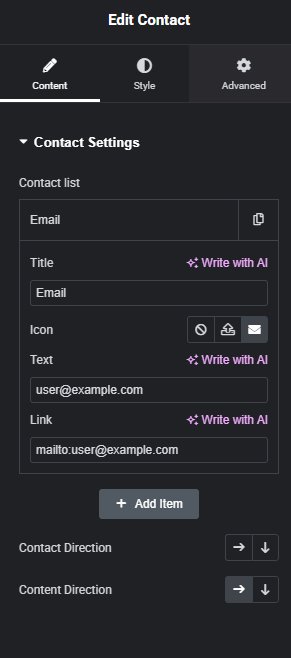
The Contact Widget allows you to showcase multiple contacts with a title, icon, text, and link. You can also duplicate contact items using the duplicate button.
Contact List #
- Title: Enter the contact name or designation.
- Example:
Email
- Example:
- Text: Enter the display text for the contact.
- Example:
[email protected]
- Example:
- Link: Add a URL or email link for the contact.
- Example:
mailto:[email protected]
- Example:
- Icon: Optionally display an icon next to the contact. You can disable it, upload a custom icon, or select one from the Elementor icon library.
- Duplicate Button: Clicking this button creates a copy of the current contact item, including all its settings.
Add Item #
Click Add Item to create a new contact in the list. Each new item allows you to enter a separate title, text, link, and icon.
Contact Direction #
Choose how the contact items are arranged on the page:
- Row (Horizontal): Items are placed side by side.
- Column (Vertical): Items are stacked vertically.
Content Direction #
Configure the alignment of the content within each contact item:
- Row (Horizontal): Icon and text appear side by side.
- Column (Vertical): Icon appears above the text.
Note: #
If the Elementor library icons are not displayed, please enable “Load Font Awesome 4 Support”:
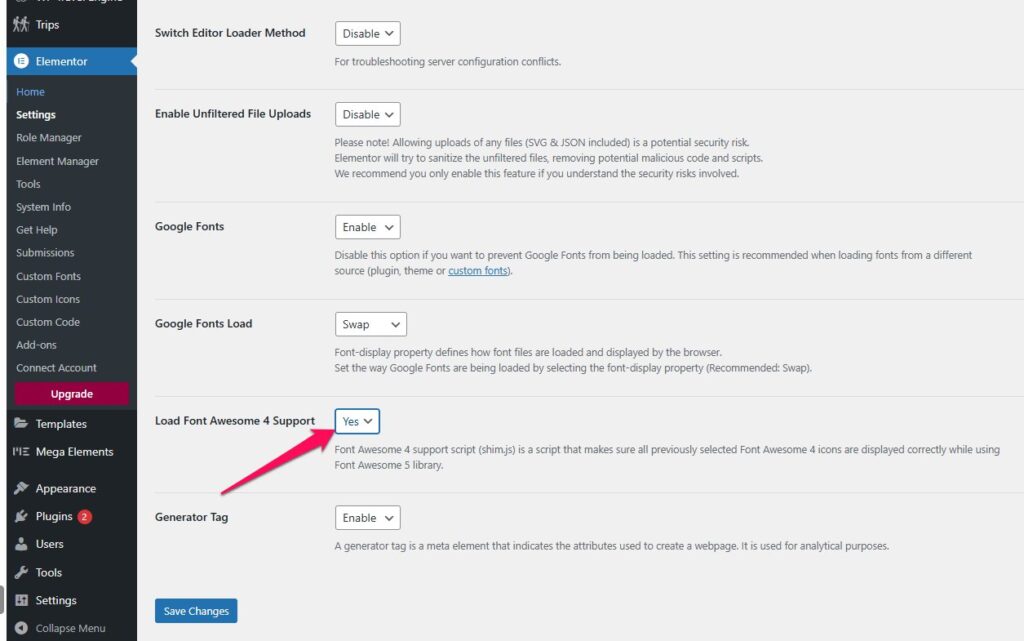
- Go to Elementor > Settings > Advanced.
- Enable Load Font Awesome 4 Support.