Waitlist is a premium add-on for WP Travel Engine that allows travelers to join a waitlist when a trip is fully booked. It helps tour operators capture interest after all seats are sold out by giving travelers a simple way to register for future availability. When seats open due to cancellations, added capacity, or new departure dates, the Waitlist add-on ensures you have a ready list of interested travelers.
The add-on is ideal for high-demand and limited-capacity trips. It keeps travelers engaged and helps operators convert missed opportunities into confirmed bookings.
Key Features #
- Join Waitlist: Allow travelers to register for trips that are fully booked.
- Availability Modes: Show waitlist only when fully booked or from the start.
- Waitlist Capacity: Set maximum number of travelers who can join.
- Booked & Available Seats Display: Show the number of travelers already on the waitlist and remaining spots.
- Email Notifications: Automatically notify travelers and admins when seats become available using customizable email templates.
- Admin Management: View, email, and delete waitlist submissions from the dashboard.
Prerequisites #
Before using this add-on, make sure:
- You have WP Travel Engine installed and activated on your WordPress site (Version 6.5.0 or more).
- You have installed and activated the Fixed Departure Dates add-on.
- You have installed and activated the Waitlist add-on.
- You have added at least one trip.
Benefits at a Glance #
| Feature | Benefit |
| Join Waitlist for sold-out trips | Capture bookings even after trips are full |
| Availability Modes (Fully Booked / From the Start) | Access early demand and manage interest effectively |
| Waitlist Capacity Control (Global) | Limit entries and manage operational capacity across all trips |
| Booked & Available Seats Display | Monitor waitlist status at a glance |
| Automated Email Notifications | Keep leads engaged and informed without manual work |
| Admin Management Tools (View, Email, Delete) | Efficiently manage all waitlist submissions from the dashboard |
| Custom Labels & Messages | Maintain clear communication and branding across trip pages |
How to install the Waitlist Add-on #
Verification #
To confirm the add-on is active and working:
- Navigate to WP Travel Engine → Settings → Extensions
- You should see the Waitlist tab under Extensions.
Configuring the Global Settings for Waitlist Add-on #
These settings apply to all trips across your site.
You can configure the global settings for Waitlist via WP Travel Engine > Settings > Extensions > Waitlist
General Waitlist Settings #
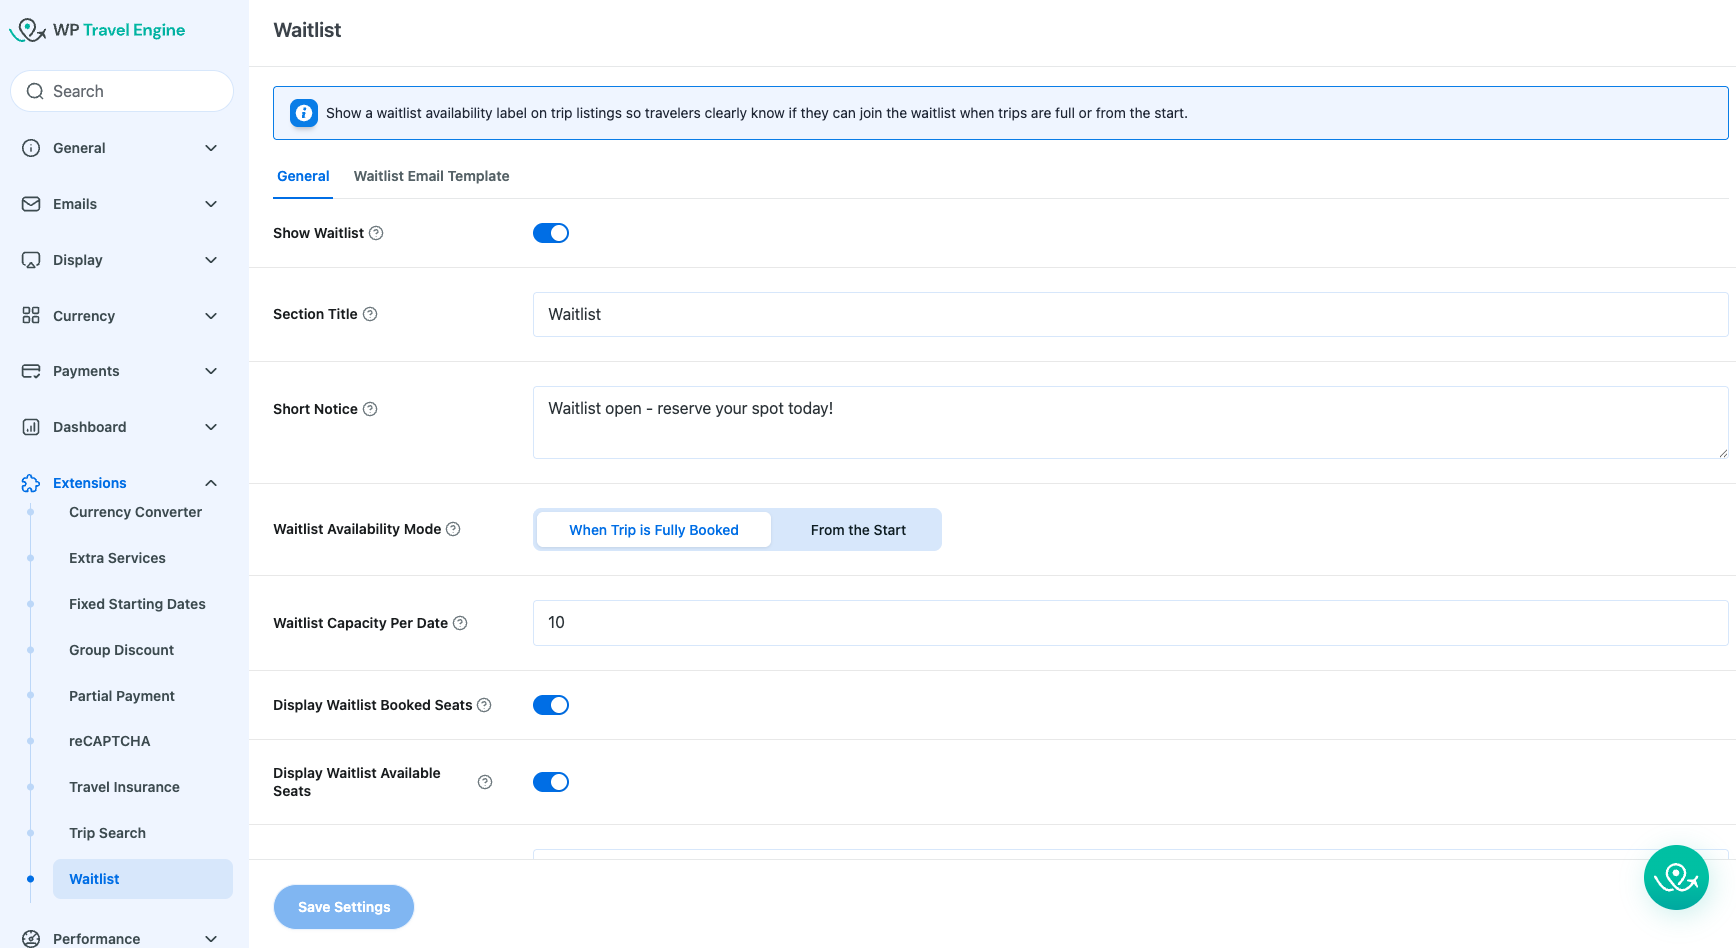
- Show Waitlist: Turn this toggle ON to make the waitlist feature available on all your trips. When disabled, travelers will not see any option to join the waitlist.
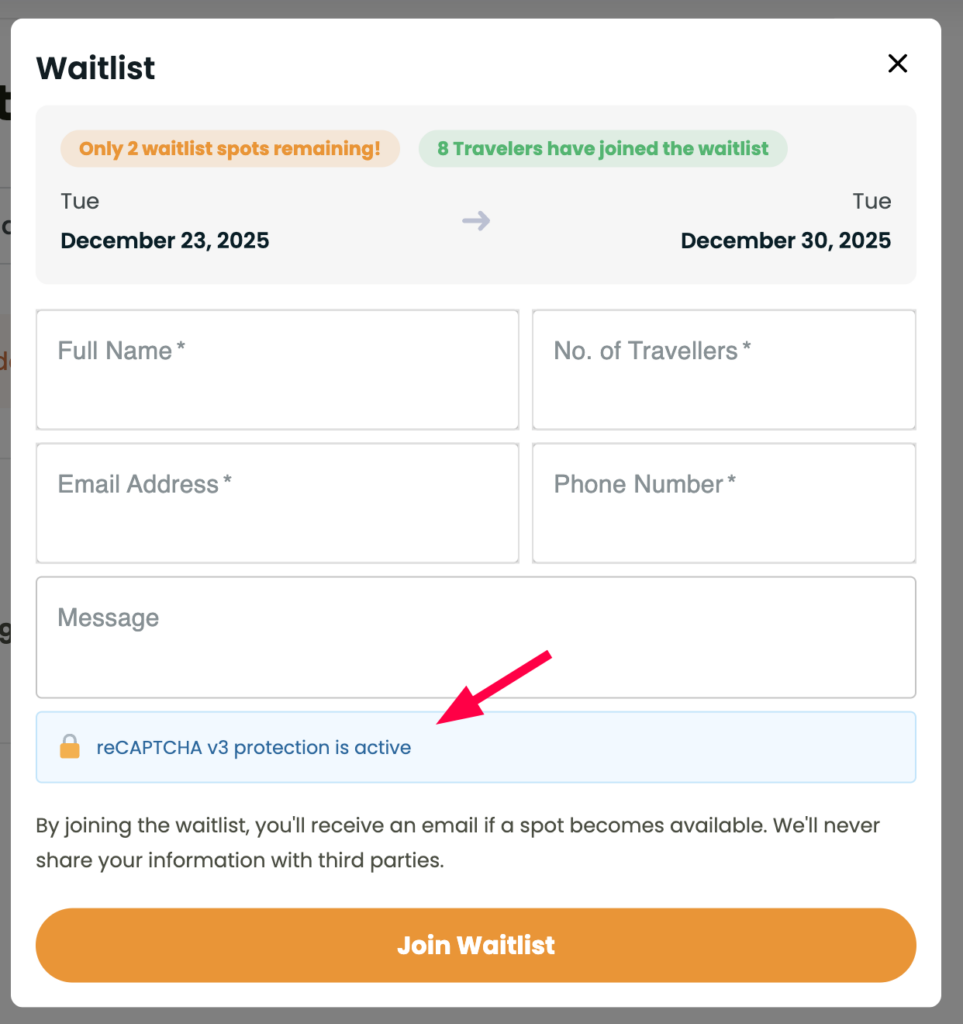
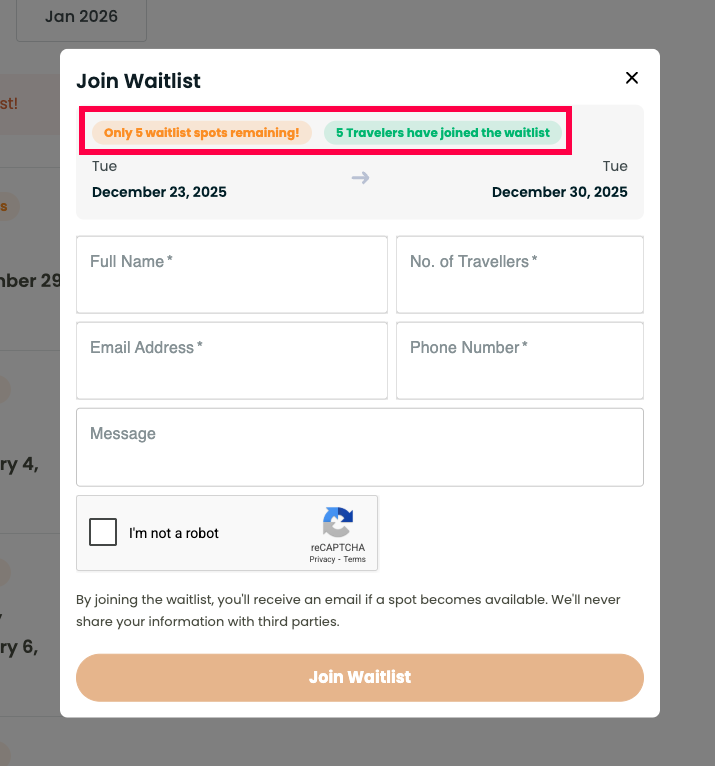
- Section Title: Enter a title for the waitlist pop-up form that appears on trip pages when a traveler attempts to join the waitlist, e.g., “Waitlist.” This title is displayed at the top of the pop-up form.
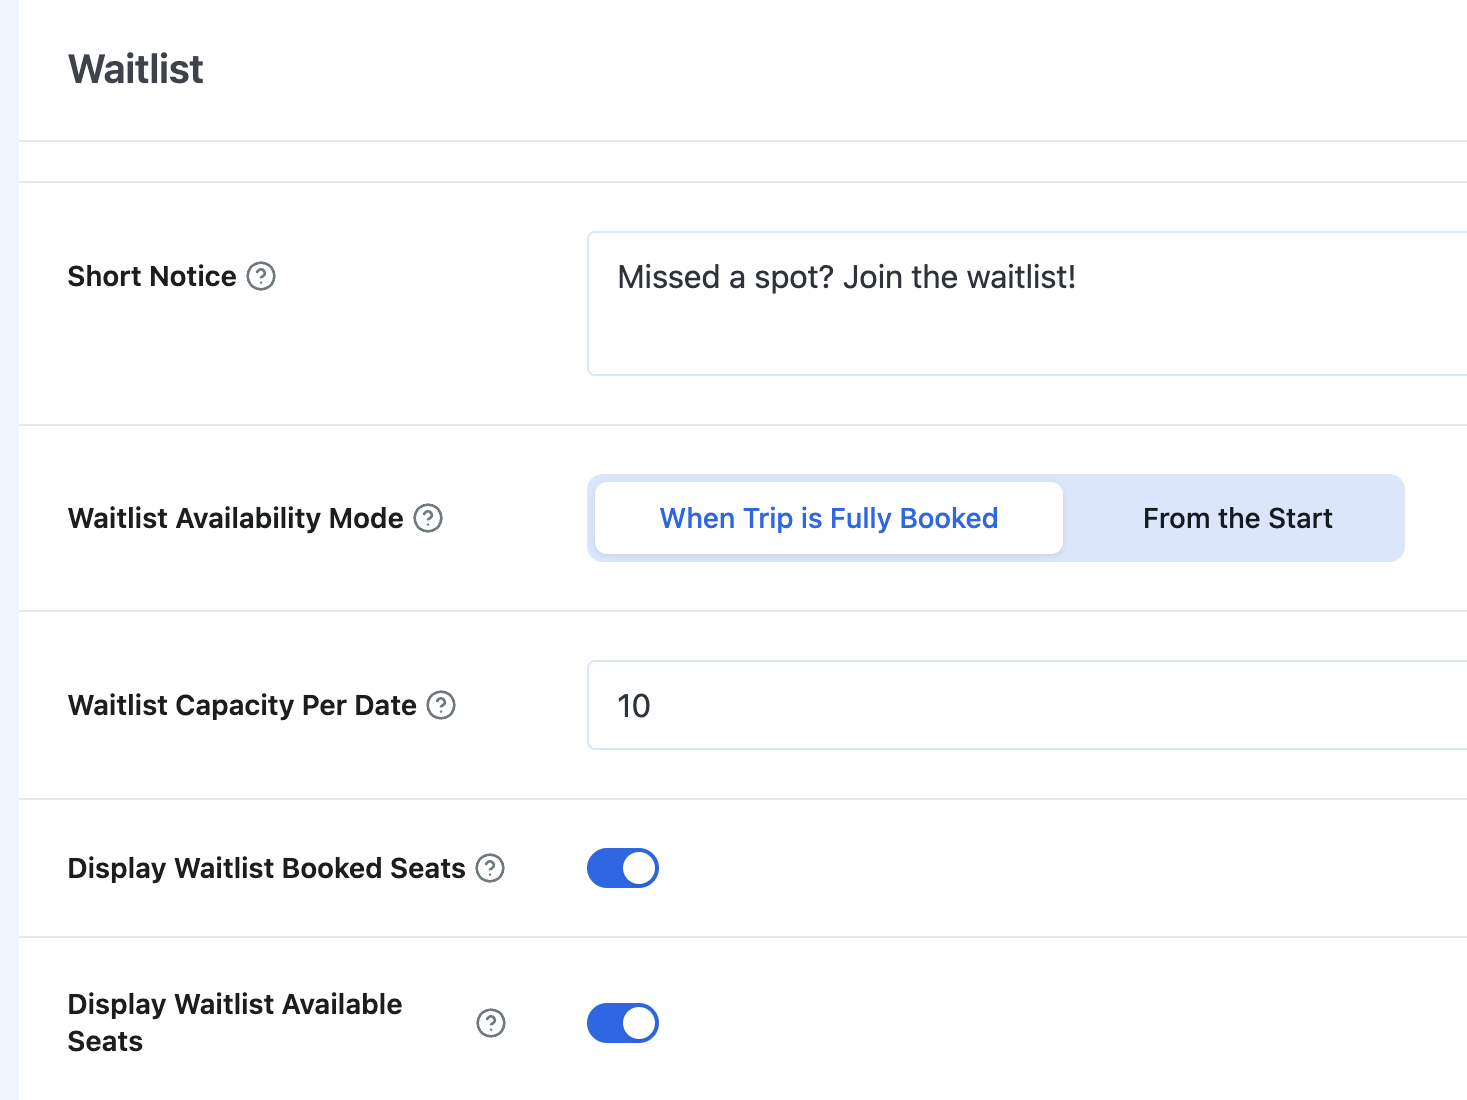
- Short Notice Message: Add a brief message that appears on your trip page when the waitlist is active, such as “Waitlist open – reserve your spot today!” This message informs travelers about the waitlist and encourages them to register.
- Waitlist Availability Mode: Choose when the waitlist button appears on trip pages.
- When Trip is Fully Booked: The waitlist option only appears after all seats for a trip or departure date are sold out. Travelers can join the waitlist once the trip is fully booked.
- From the Start: The waitlist option appears immediately after the trip is published, even while seats are still available. Travelers cannot book the trip when this mode is selected, they can only join the waitlist. This is useful when you want to measure early interest, collect leads, or promote trips before opening bookings.

- Waitlist Capacity: Set the maximum number of travelers allowed to join the waitlist. The system will prevent additional submissions once the limit is reached. Leave blank for unlimited entries.
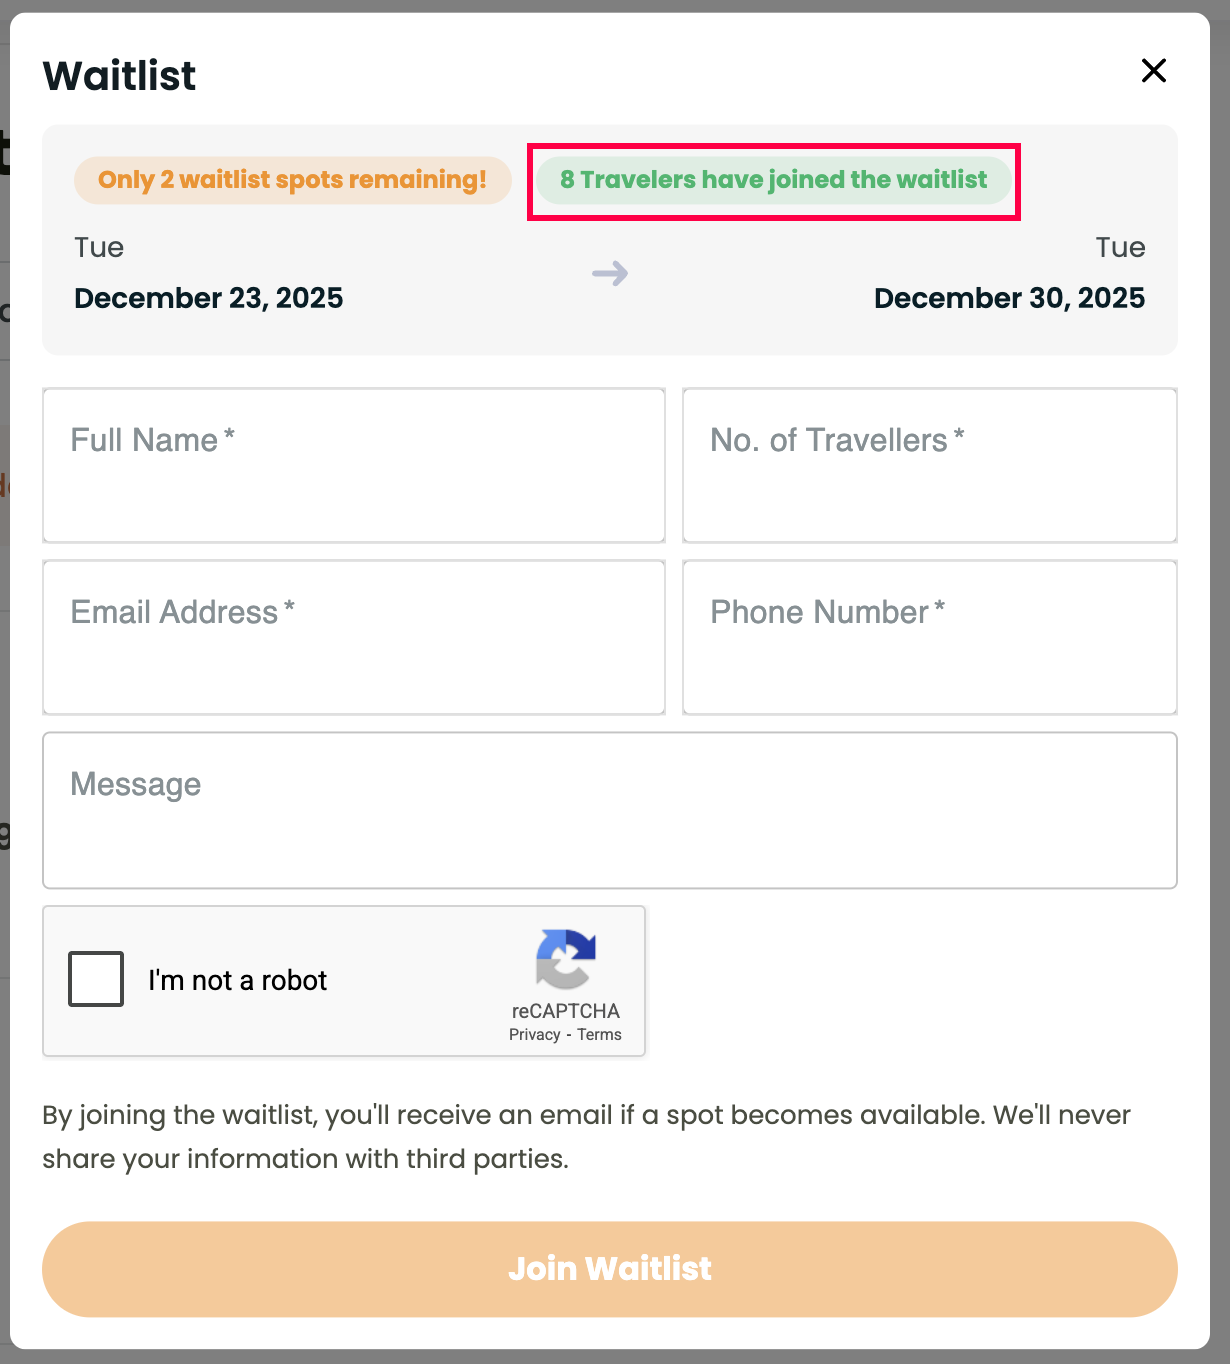
- Display Waitlist Booked Seats: Enable this option to show how many travelers have already joined the waitlist.
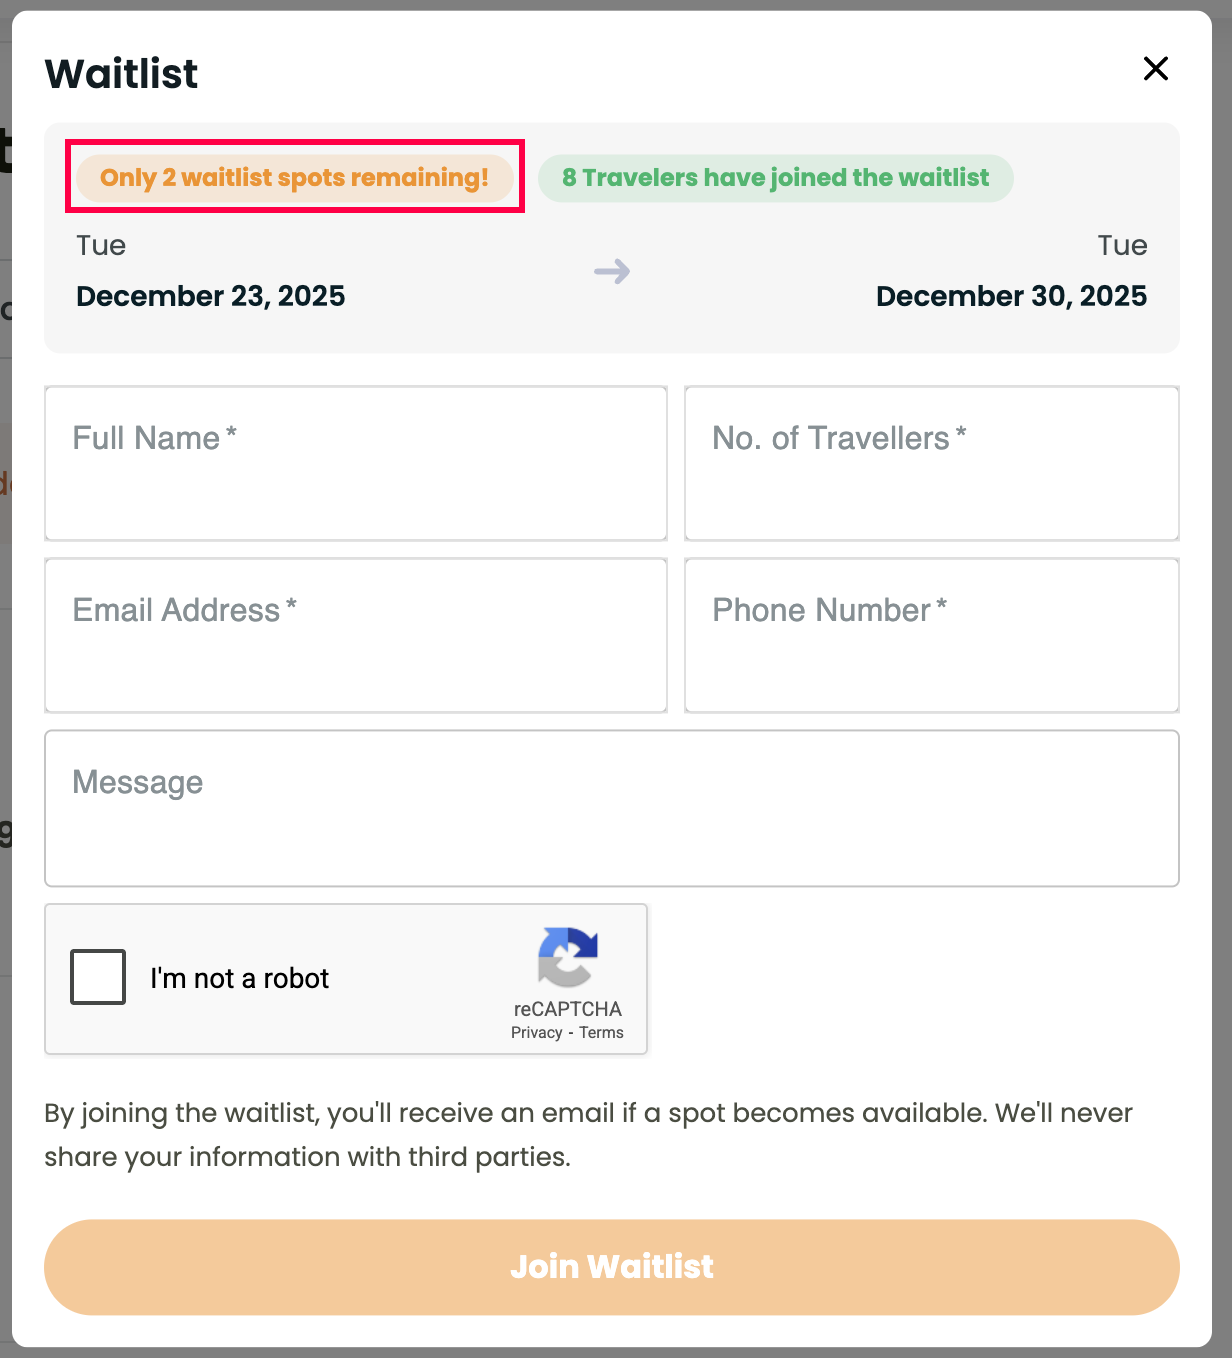
- Display Waitlist Available Seats: Enable this option to show the remaining number of waitlist spots. This dynamically updates as travelers join.
- Popup Disclaimer Text: Add a disclaimer text that appears below the waitlist form on the pop-up form, e.g., “By joining the waitlist, you’ll receive an email if a spot becomes available.”


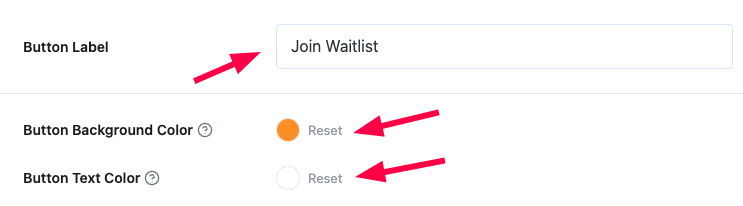
- Customize Button Label and Color
- Button Label: Customize the text of the Join Waitlist button to match your site’s tone or branding.
- Button Background Color: Select the background color for the Waitlist button to match your website’s theme.
- Button Text Color: Select the specific color for the text inside the Waitlist button to ensure it is readable against the background.
- Enable ReCaptcha: Turn this toggle ON to add reCAPTCHA to the Waitlist popup to block spam sign-ups.

- Link Availability Duration: Set the time limit (in hours) for how long the booking link sent to a waitlisted traveler remains valid. Once this duration expires, the link will no longer work.

Waitlist Email Template #
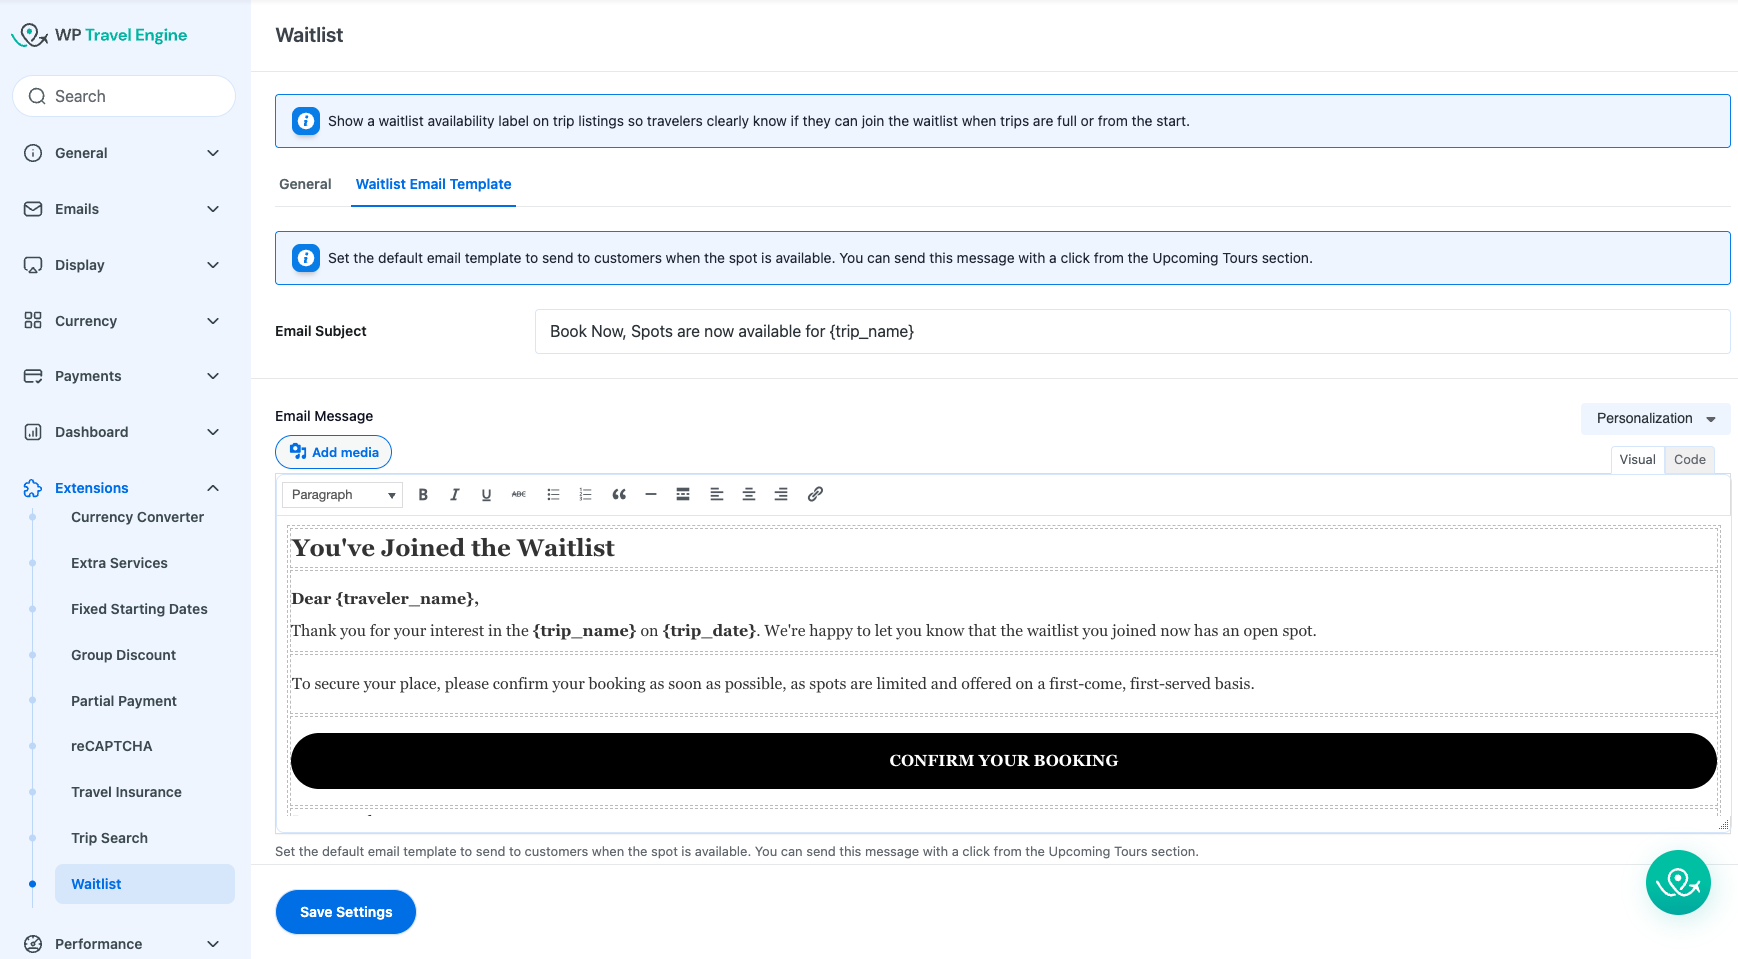
- Email Subject: Enter the subject line for the email notification. You can use placeholders like {trip_name} to make the subject specific to the tour (e.g., “Book Now, Spots are now available for {trip_name}”).
- Email Message: Customize the body content of the email using the text editor. You can add text, images, and formatting to create a professional notification.
Personalization: Use the Personalization dropdown to insert dynamic details into your email. These tags will automatically be replaced with the actual trip and traveler details when the email is sent.- {traveler_name}: Displays the name of the customer.
- {trip_name}: Displays the name of the specific trip.
- {trip_date}: Displays the departure date the traveler is interested in.
- {site_name}: Displays your website’s name.
- {booking_link}: Generates the unique URL that allows the traveler to confirm their booking.
Waitlist Trip-Specific Settings #
You can configure the Waitlist Status for individual trips on specific trip dates.
On a trip page, navigate to WP Travel Engine – Trip Settings > Date and Price > Edit Pricing & Dates > Dates.
- Click on a specific date to edit it.
- Find the Waitlist Status setting and choose an option:
- Disabled: The waitlist is turned off for this date.
- When Trip is Fully Booked: The waitlist appears only after all seats are sold out.
- From the Start: The waitlist appears immediately, even if seats are open.

The option selected here will override the global default for this specific date.
Configuring reCAPTCHA #
To use the anti-spam feature on your Waitlist forms, you must first connect your site to Google reCAPTCHA.
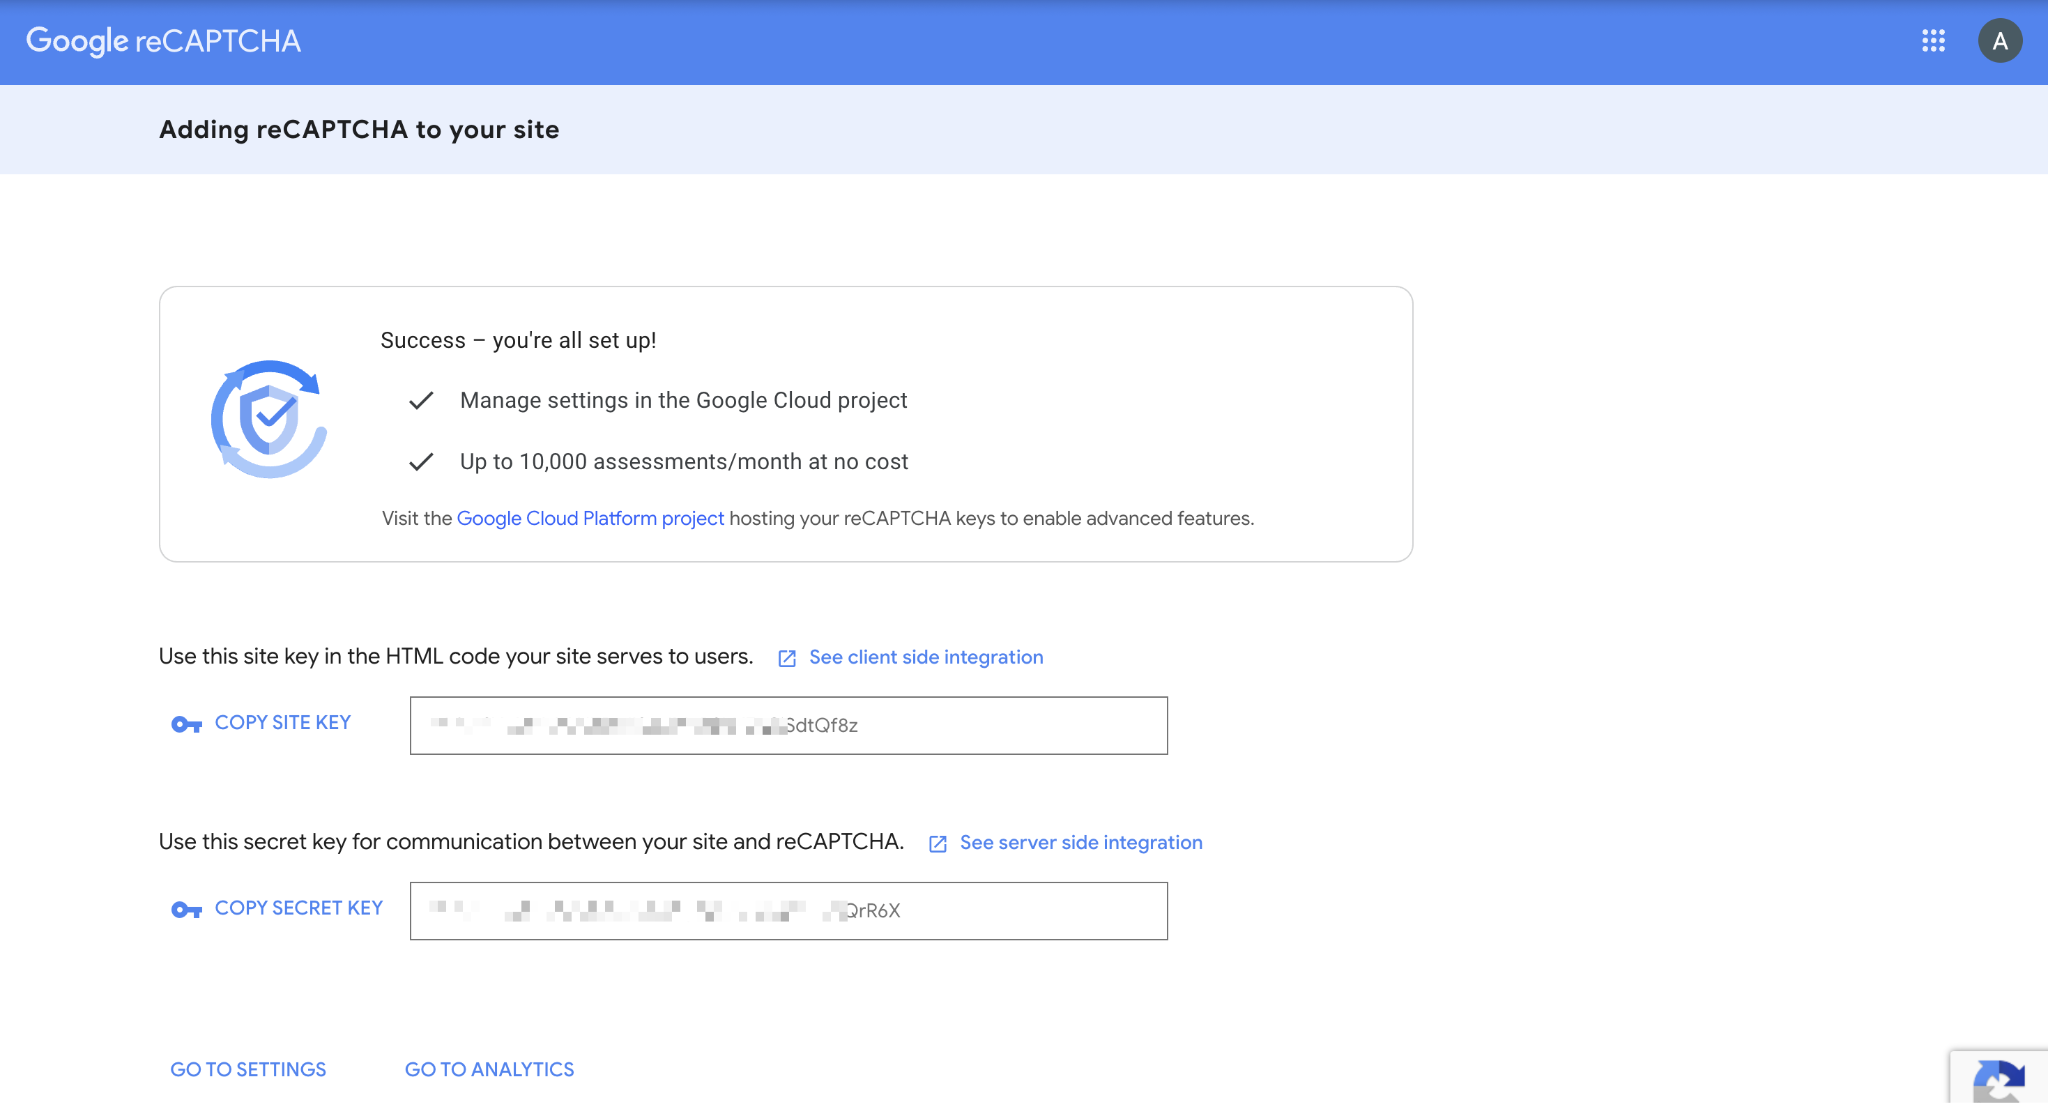
- Get Your Keys:
- Go to the Google reCAPTCHA Admin Console.
- Enter a name for your site (e.g., “My Travel Site”) so you can easily identify it later.
- Choose the version you want to use: Score based (v3) or Challenge (v2).
- Enter your website’s domain name (e.g., xyz.com).
- After clicking submit, you will see your unique keys. Copy the Site Key and Secret Key provided by Google.
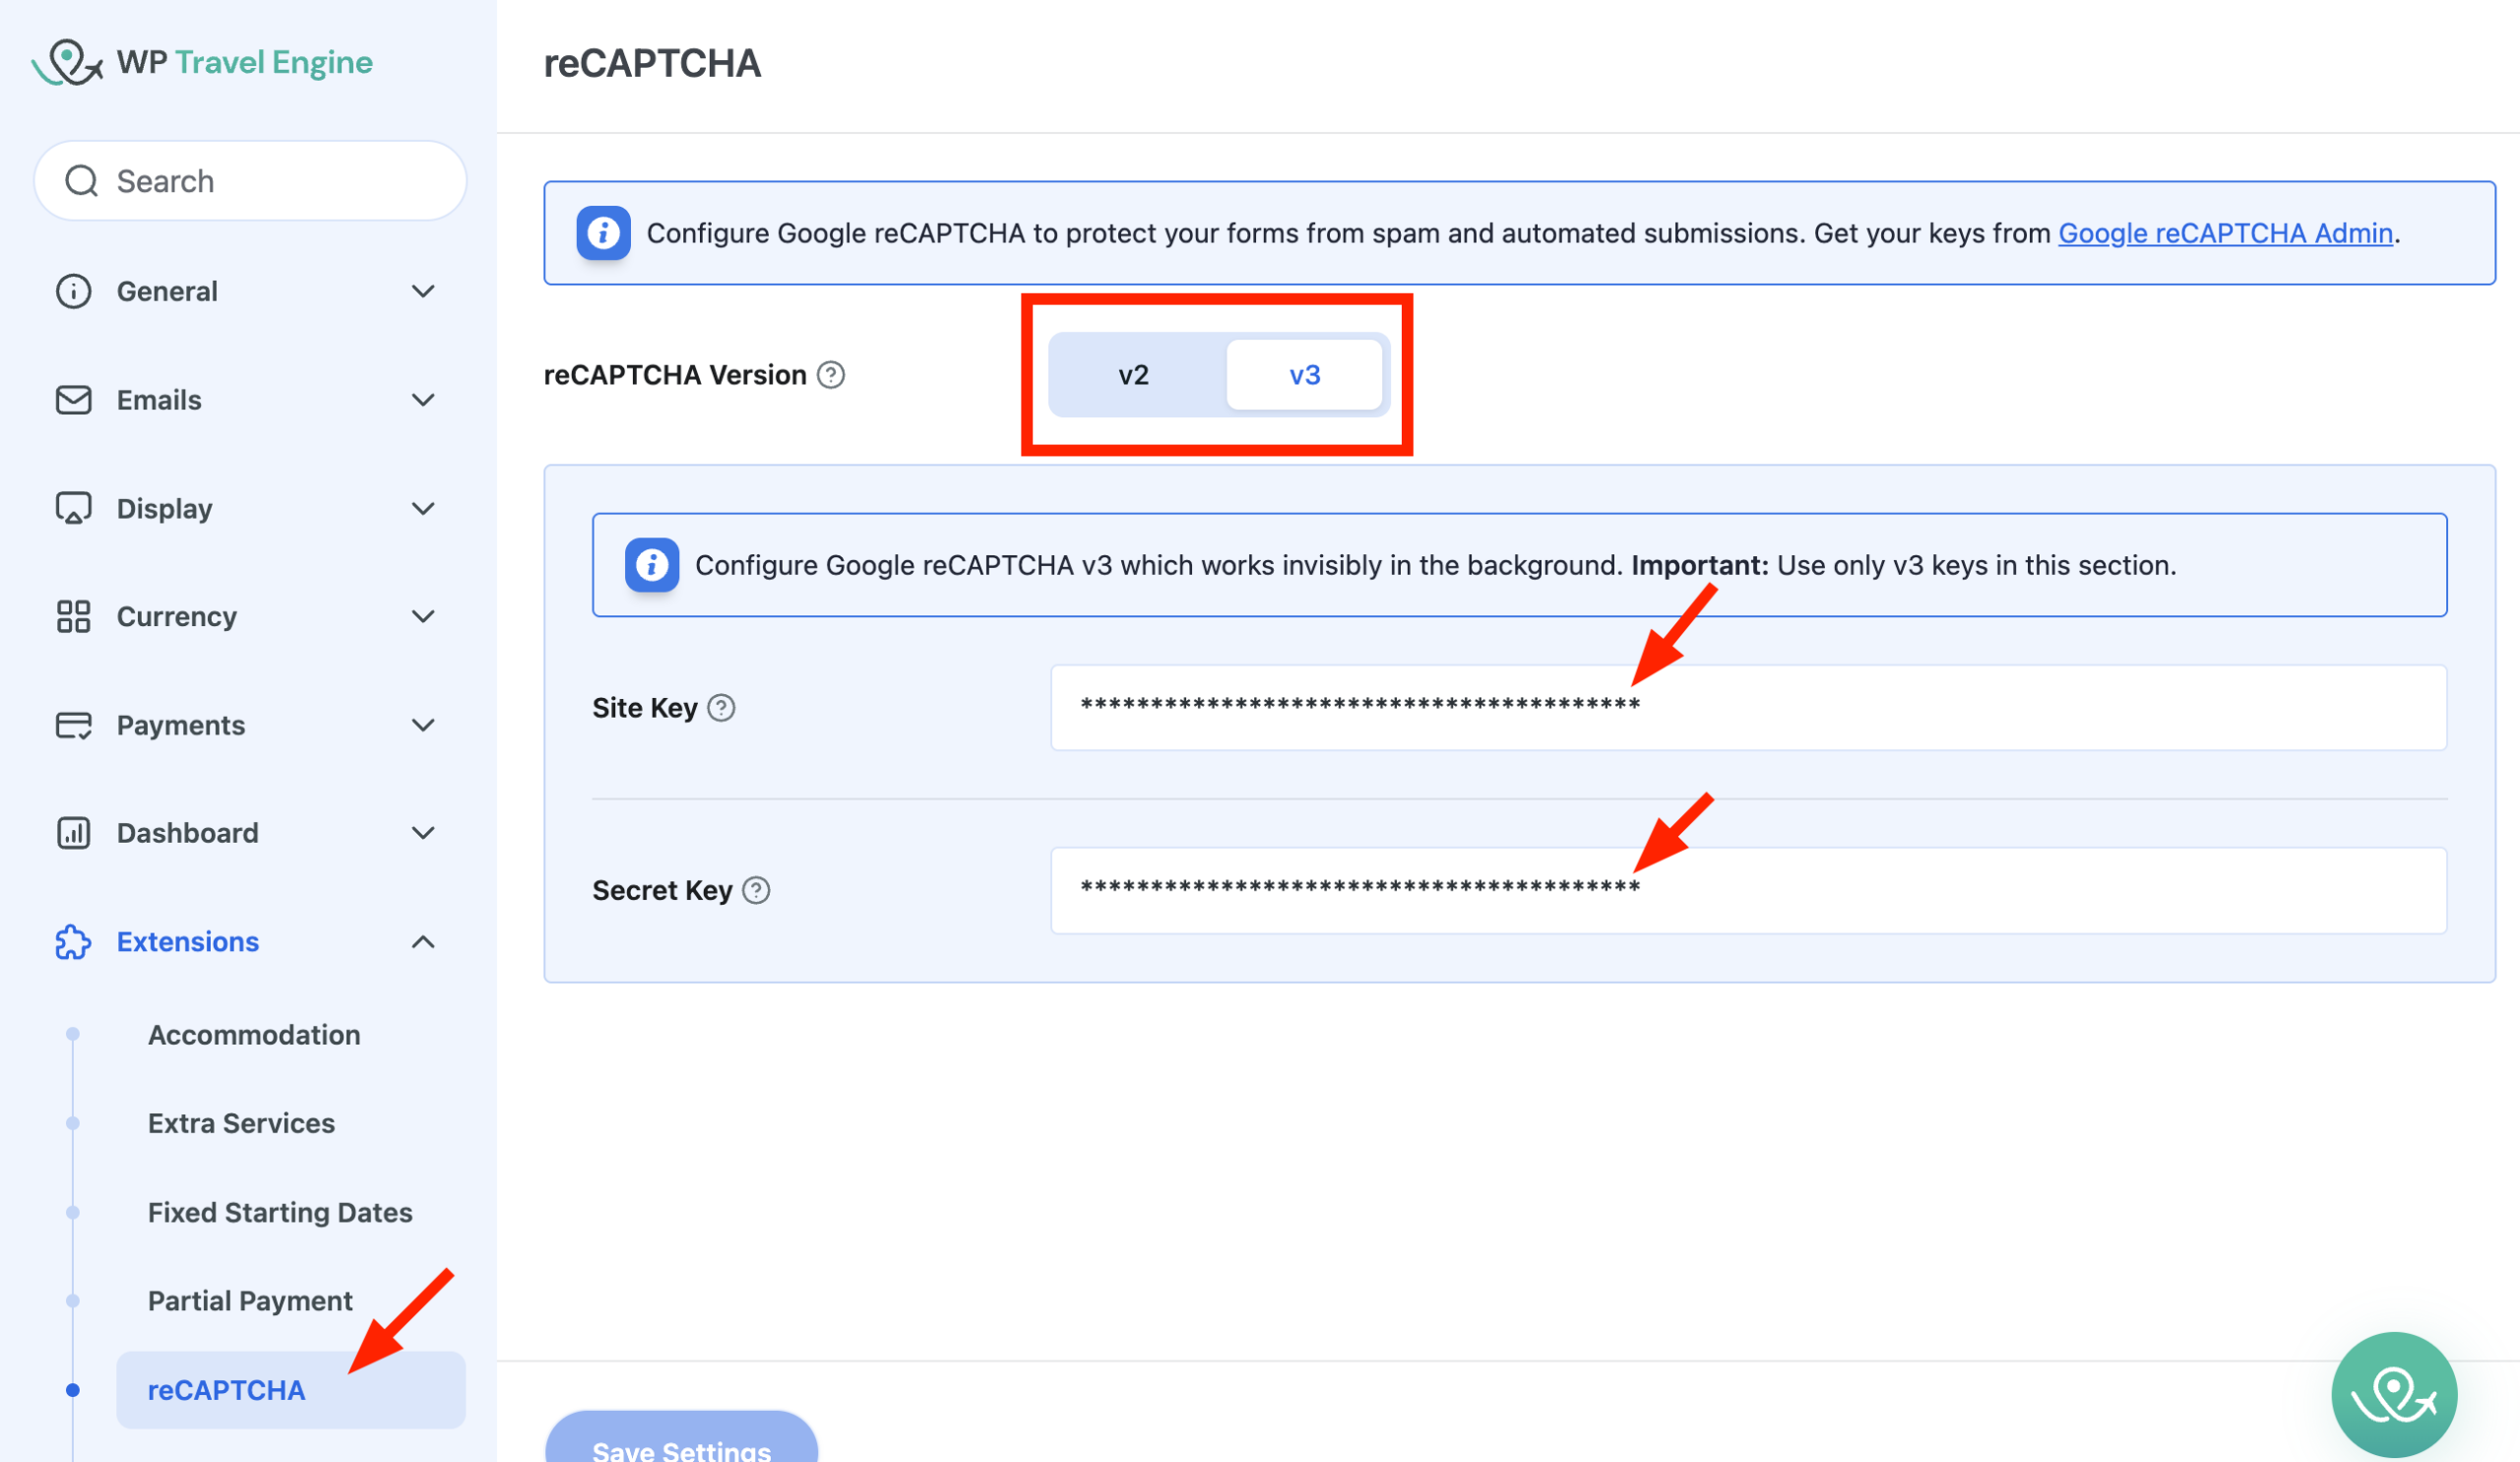
- Add Keys to WP Travel Engine:
- Navigate to WP Travel Engine > Settings > Extensions > reCAPTCHA.
- Select the reCAPTCHA Version (v2 or v3) that matches the keys you generated.
- Paste your Site Key and Secret Key into the respective fields.
- Click Save Settings.
Manage Waitlist Submissions #
Admins can manage all waitlist submissions directly from the Upcoming Tours section.
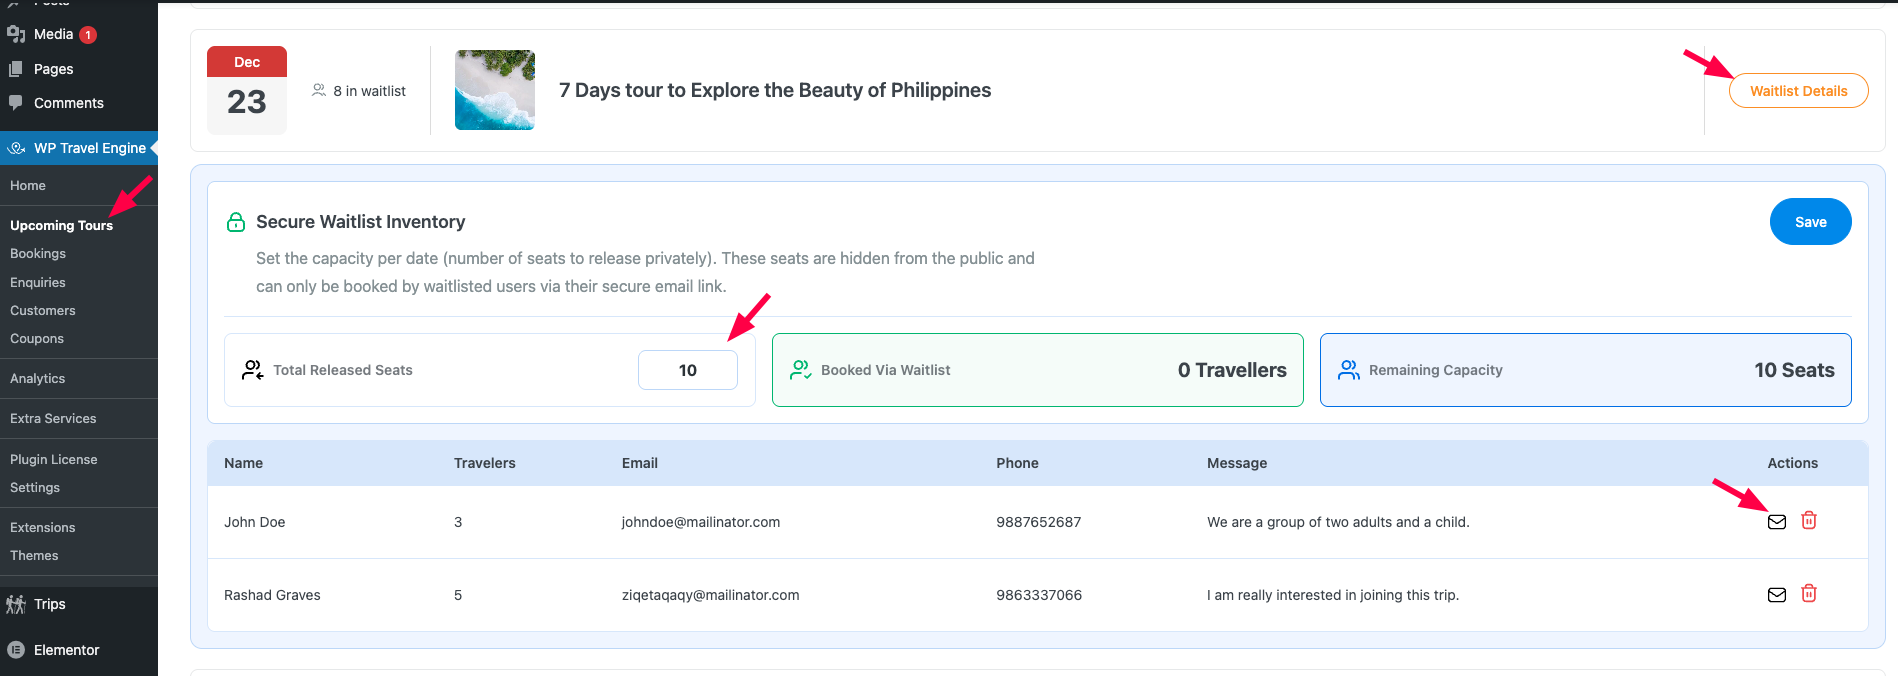
Navigate to WP Travel Engine → Upcoming Tours to view a complete list of waitlist entries for each trip and departure date. Click on Waitlist Details to view all the waitlisted travelers.
From here, you can:
- Set the Total Released Seats to release spots privately to waitlisted travelers. These seats remain hidden on the website and can only be booked by travelers using the secure link sent via email.
- View a complete list of interested travelers, including their name, traveler count, contact details, message, and status.
- Email travelers directly using the Mail icon beside each entry. When you click it, a pop-up opens with the recipient, subject, and content automatically filled based on your global Waitlist Email Template. You can review and edit the content as needed before sending.
Use Cases #
Use Case 1: High-Demand Seasonal Tours #
Situation: You run popular seasonal trips (e.g., Holi Festival Tour or Everest Spring Trek) that sell out quickly each year. Instead of losing potential customers when seats run out, you need to capture this overflow interest for cancellations or future dates.
Implementation:
- Short Notice Message: Enter a message like “Missed a spot? Join the waitlist!” to encourage registration.
- Waitlist Availability Mode: Select When Trip is Fully Booked. The waitlist option will only appear after all seats are sold.
- Waitlist Capacity: Set a limit to control the number of travelers who can join the list.
- Display Booked & Available Seats: Toggle these ON to show real-time interest (e.g., “5 Travelers have joined the waitlist”). This creates social proof and encourages users to sign up quickly.
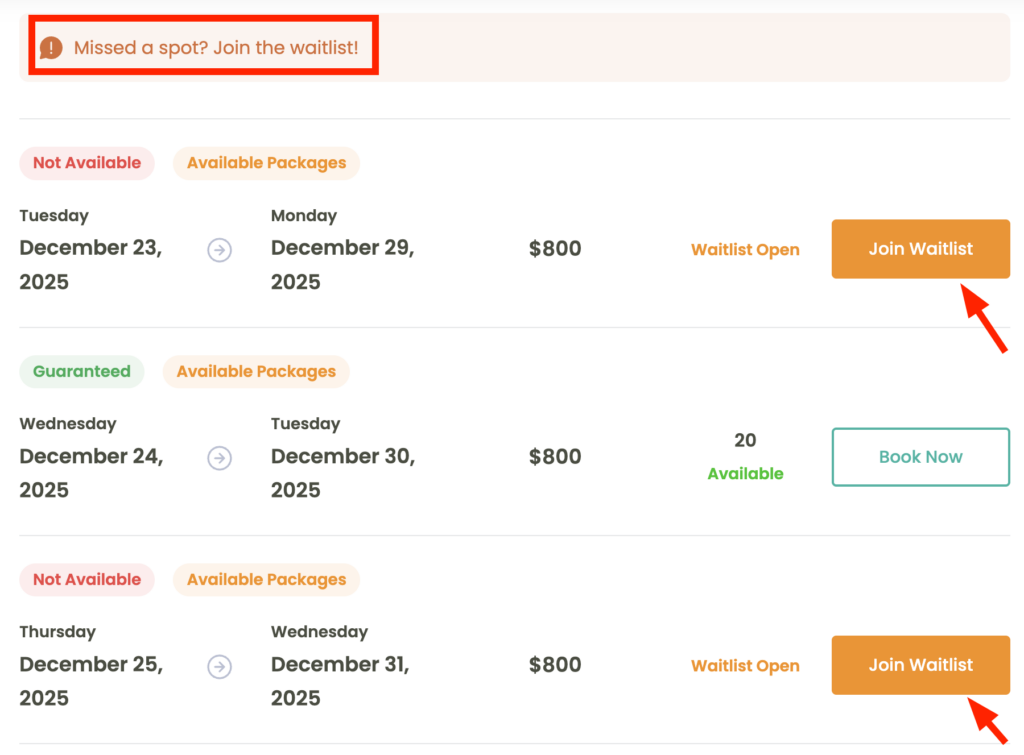
Benefit: You capture booking opportunities even after the trip is filled and can notify interested travelers immediately when seats open due to cancellations or extra departures.
Use Case 2: Collecting Early Demand Before Opening Bookings #
Situation: You want to promote a new trip or next season’s itinerary before opening official bookings. Instead of listing it as “Coming Soon” with no action, you want to collect leads and measure interest to plan your capacity.
Implementation:
- Section Title: Enter a custom title like “Register Your Interest” to match the pre-launch context.
- Short Notice Message: Add a message like “Bookings opening soon! Join the list for updates” to inform travelers.
- Waitlist Availability Mode: Select From the Start. This replaces the booking button with the waitlist form immediately, so travelers can sign up but cannot book yet.
- Button Label: Change the button text to “Register Now” so travelers know they are signing up for future updates.

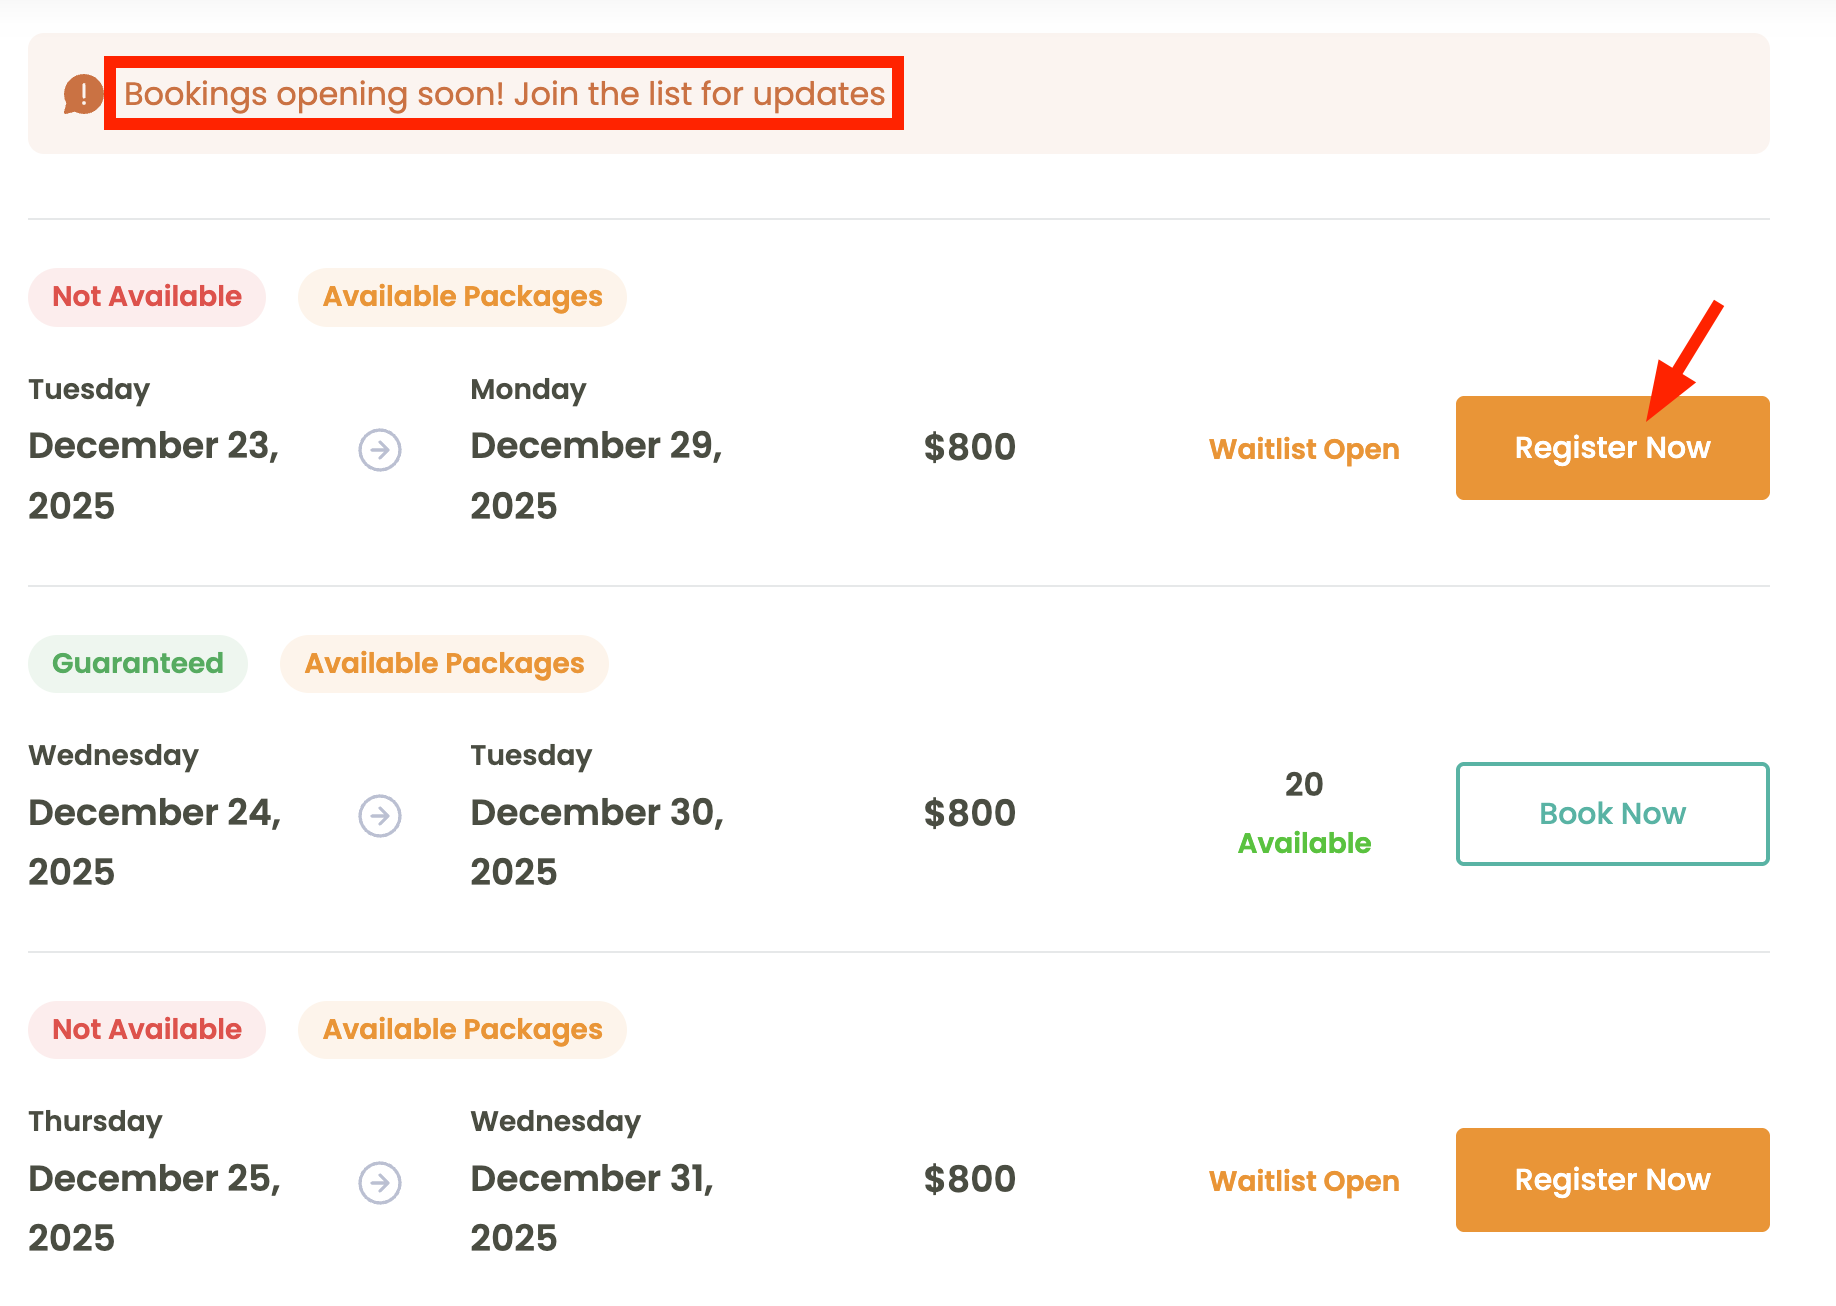
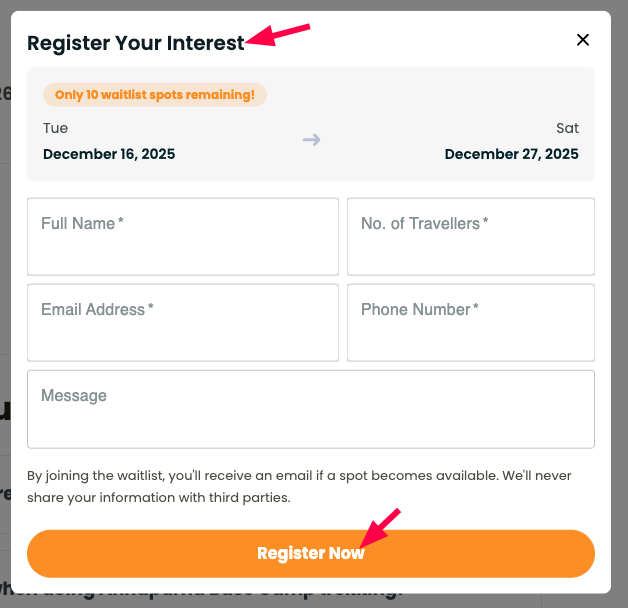
Benefit: You can see how many people are interested before planning dates. When you open bookings, you already have a list of travelers ready to book immediately.
FAQ #
Can travelers book the trip if I enable “From the Start” mode?
No. When “From the Start” is selected, travelers can only join the waitlist. Booking is not available until you switch the Waitlist Availability mode to “When Trip is Fully Booked”.
How do I limit how many travelers can join the waitlist?
You can set a maximum number in the Waitlist Capacity field under the global Waitlist settings.
Where can I view all the waitlist submissions?
Go to WP Travel Engine → Upcoming Trips. You can view, email, and delete waitlist entries from there.
Does the waitlist work for each departure date separately?
Yes. Each date has its own waitlist availability setting, so you can control it per date.