PayPal Express Checkout Payment Gateway allows you to accept trip and tour payments through PayPal Express Checkout.
In this documentation, you will learn step-by-step about add-on installation, setup, and initial configuration options.
Requirement: To use this payment gateway, you need two things:
- WP Travel Engine plugin v-4.0.0 or later: Installed and activated on your website.
- Active PayPal Express merchant account: Includes a PayPal Express Client ID and Secret Key.
Note: WP Travel Engine also offers a default PayPal Standard option. This redirects your customers to PayPal’s website for checkout, then back to your site once complete.
But with PayPal Express Checkout, your customers can complete their entire purchase on your website without being redirected to PayPal.
You can follow the video or the below steps to configure the PayPal Express Checkout Payment add-on.
Download the Plugin File #
After the purchase, you can download the add-on file by visiting the individual add-on pages from here – https://wptravelengine.com/plugins/
Here are the steps you need to follow:
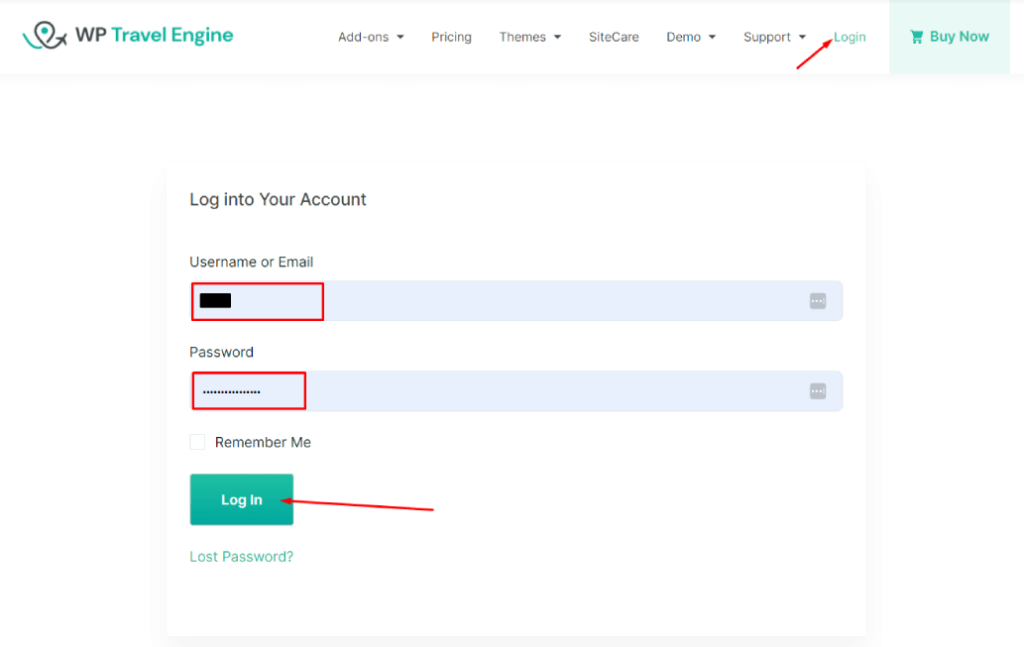
- Visit the WP Travel Engine website and log in to your account through the “My Account” page (https://wptravelengine.com/my-account/).
- Go to the PayPal Express Checkout Payment Gateway add-on page – https://wptravelengine.com/plugins/paypal-express-checkout-payment-gateway/
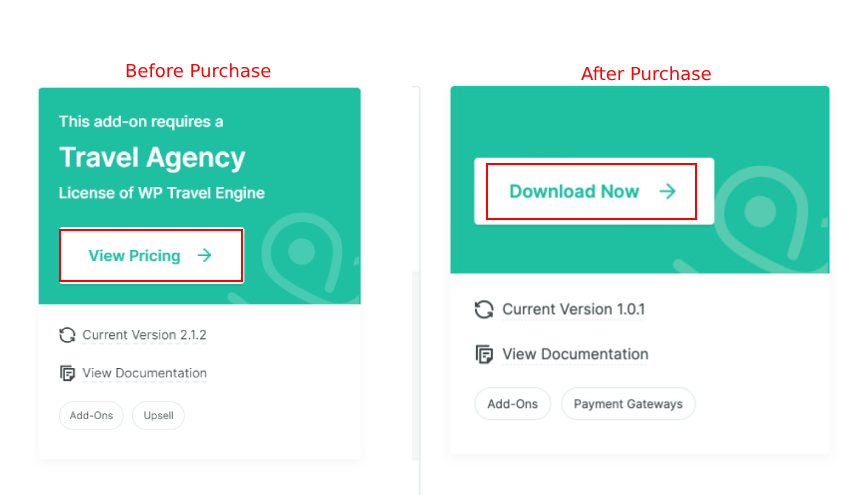
- Now, you will see the Download option on the right side of the page instead of View Pricing. Click on it to download the add-on file.
Installing the Add-on #
To install the add-on, upload the downloaded file to your WordPress dashboard. Follow the steps below:
- Navigate to the Plugin > Add New.
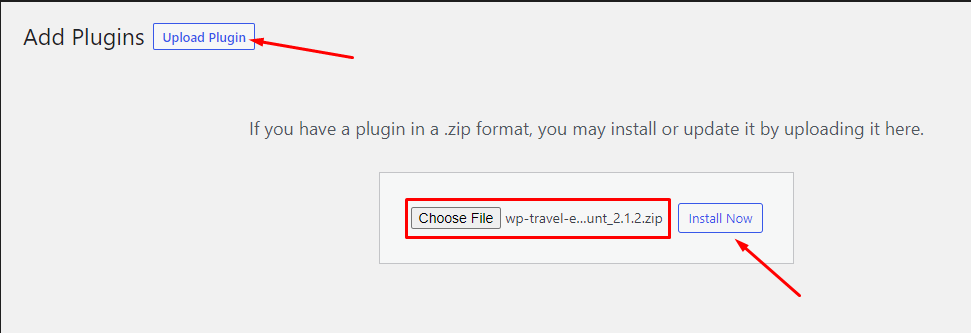
- Click on the Upload Plugin button.
- Select the downloaded file, “wp-travel-engine-paypal-express-checkout.zip,” from your computer.
- Click on Install Now.
- Once the file is installed, click on “Activate” to enable the add-on on your website.
Activating the Plugin License #
To activate the plugin license and receive regular updates, follow these steps:
- Go to your Admin Dashboard and navigate to WP Travel Engine > Plugin License.
- Enter the license key in the PayPal Express Gateway field.
- Click Save Changes.

- Refresh the page to see the Activate License button, then click on it.
After successful activation, you can update the PayPal Express add-on from the plugins page normally whenever a new update is released.
Configuring the PayPal Express Checkout Gateway #
To configure the main settings for th PayPal Express Checkout Payment Gateway, navigate to WP Travel Engine > Settings > Payments> PayPal Express Checkout.
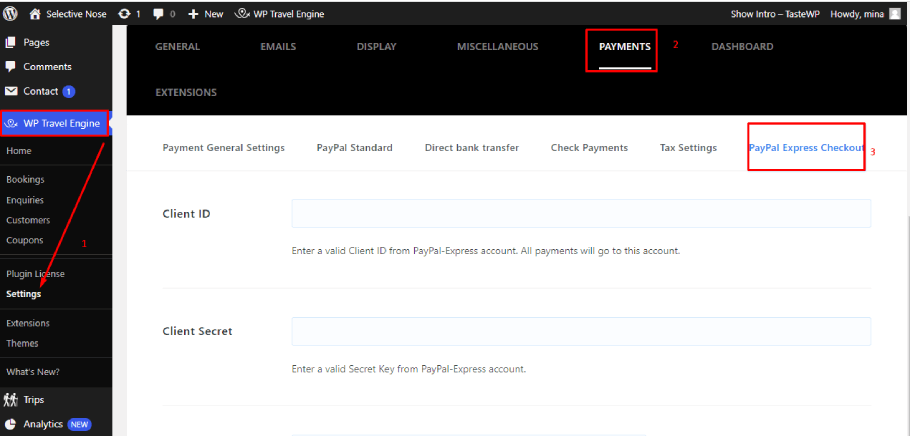
- Client ID (required) – Enter your PayPal Express Client ID.
- PayPal Secret (required) – Enter your PayPal Express Secret Key.
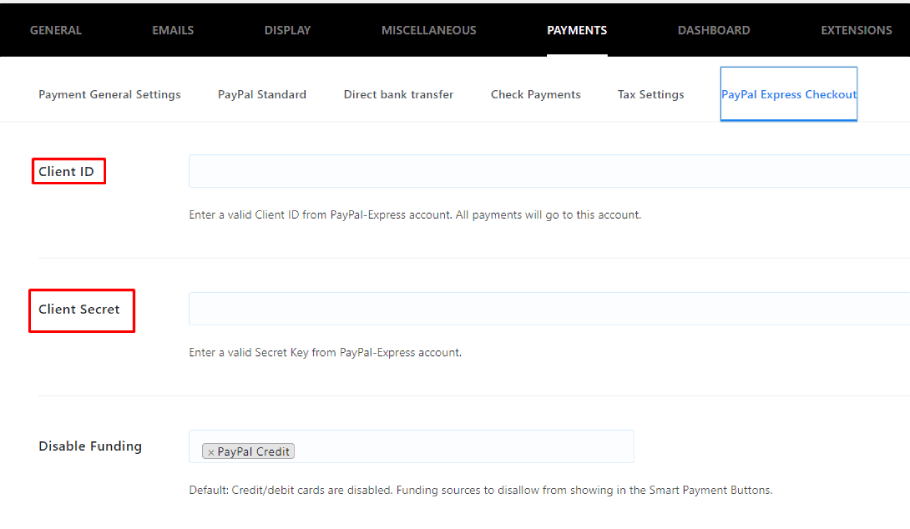
- Disable Funding (optional)- Choose which funding sources to hide from the smart payment button by selecting them from the available options. By default, PayPal credit cards and debit cards are disabled.
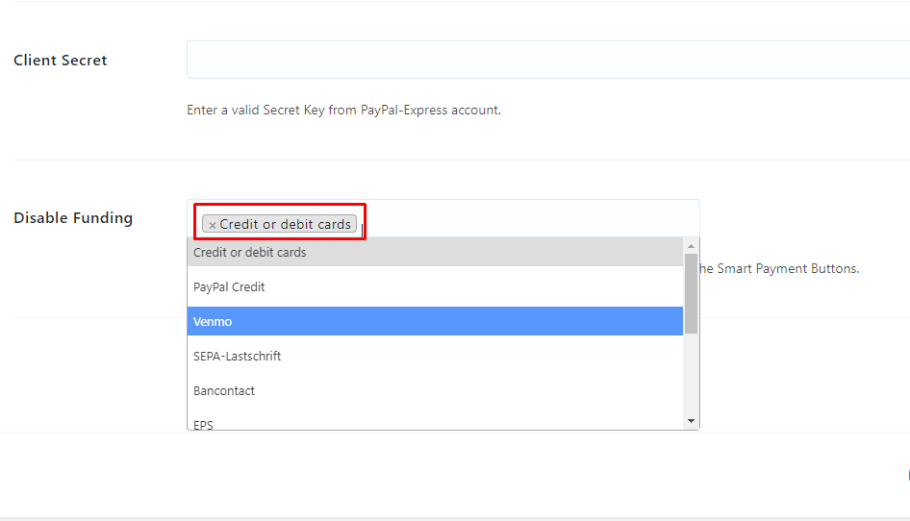
- Click Save and Continue.
Enable PayPal Express Checkout for Each Trip #
Now, to enable this payment option in your every trip pages, navigate to WP Travel Engine > Settings > Payments > Payment General Settings.
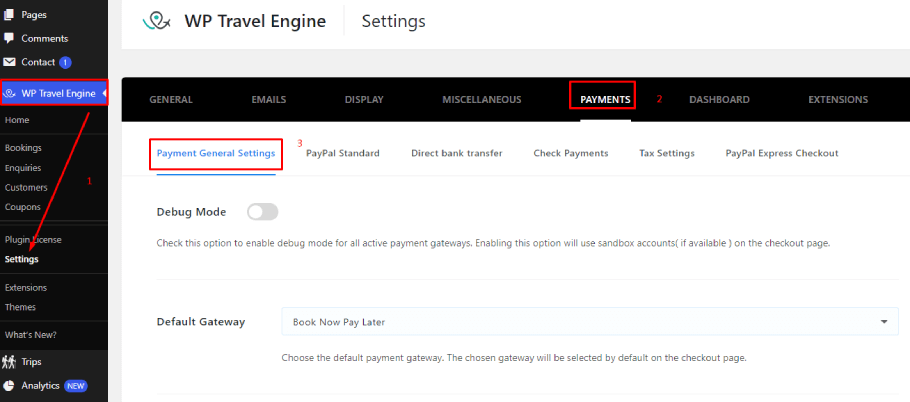
Then simply check the box for PayPal Express Checkout.
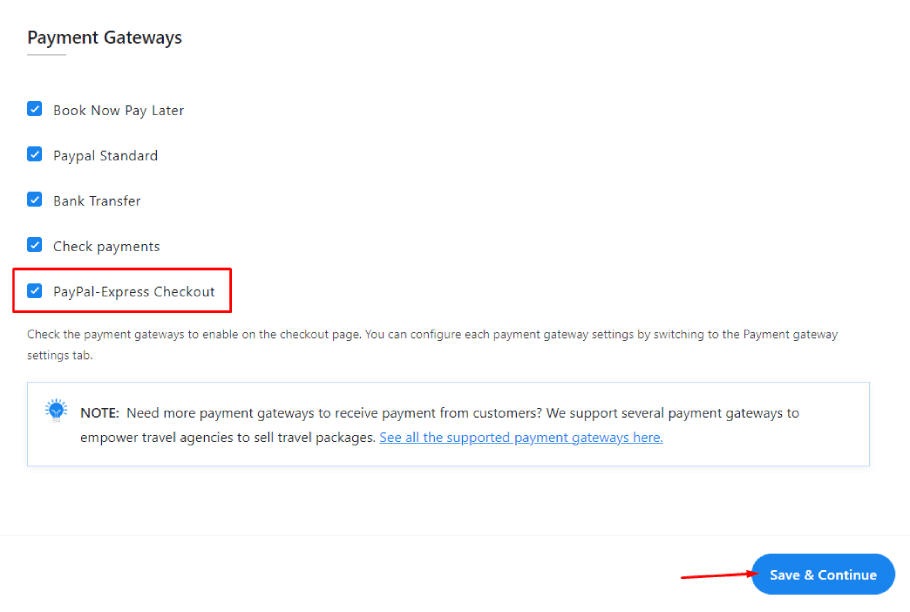
Click Save & Continue.
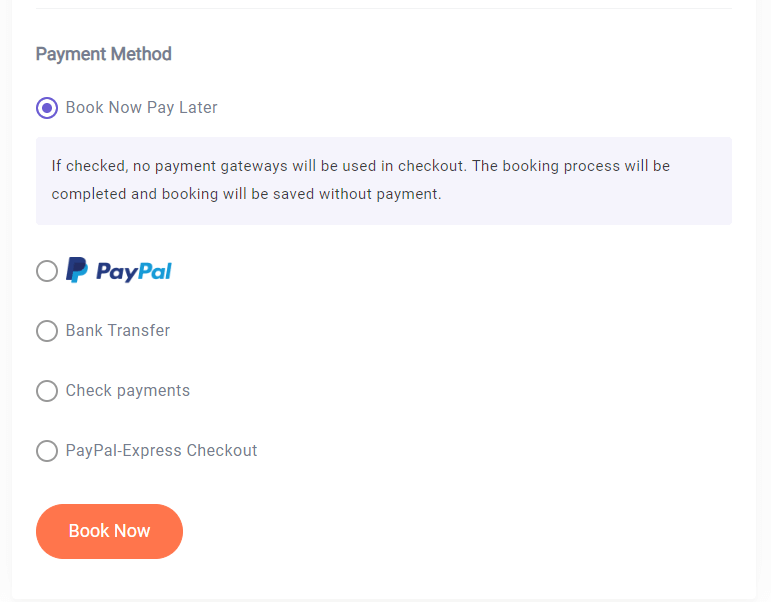
Front Preview #
Manual Payment Capture (If Automatic Capture Fails) #
In some rare cases, a payment made through PayPal Express Checkout may not be automatically captured by your website even though the traveler has completed the payment from their side.
When this happens, WP Travel Engine provides a Capture Manually option inside the booking dashboard so the admin can capture the payment manually.
When Does the “Capture Manually” Button Appear? #
The Capture Manually button appears when:
- A traveler successfully completes payment through PayPal Express Checkout, but
- The automatic payment capture does not complete successfully, and
- The payment status remains Pending in the booking.
This situation can sometimes occur due to temporary communication issues between your website and PayPal.
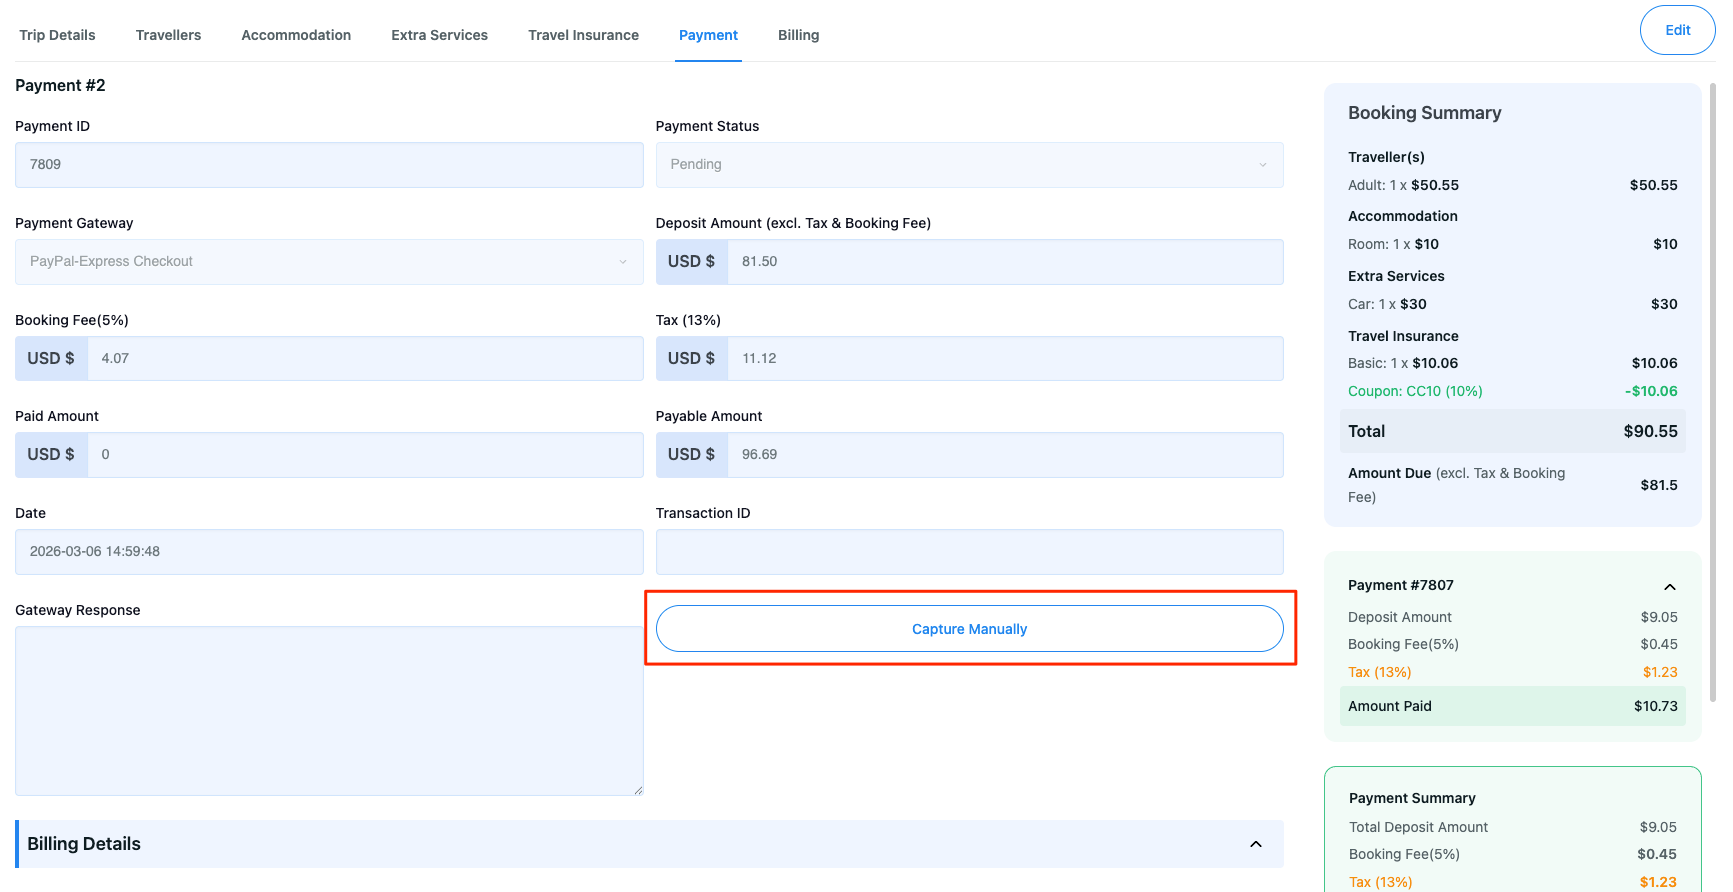
How to Use It #
- Navigate to WP Travel Engine → Bookings.
- Open the booking where the payment status is Pending.
- Go to the Payment tab.
- Click the Capture Manually button.
- The system will attempt to capture the payment from PayPal and update the booking payment status accordingly.
When Should You Use It? #
Use the Capture Manually option when:
- The traveler confirms that the payment was completed.
- PayPal shows that the payment has been sent or authorized.
- The booking in WP Travel Engine still shows the payment as Pending.
After the capture is successful, the payment will be recorded in the booking and reflected in the Payment Summary.