The Elementor Widgets plugin helps you create single trip pages using a visual editor.
In this documentation, you will learn about plugin installation, setup, and initial configuration options step-by-step.
Requirement: Elementor Widgets Plugin requires WP Travel Engine plugin v-5.0.0 or later installed and activated on your website.
You can either follow the video or the below steps to configure Elementor Widgets Plugin.
Installing the Plugin #
- Download the plugin from wordpress.org
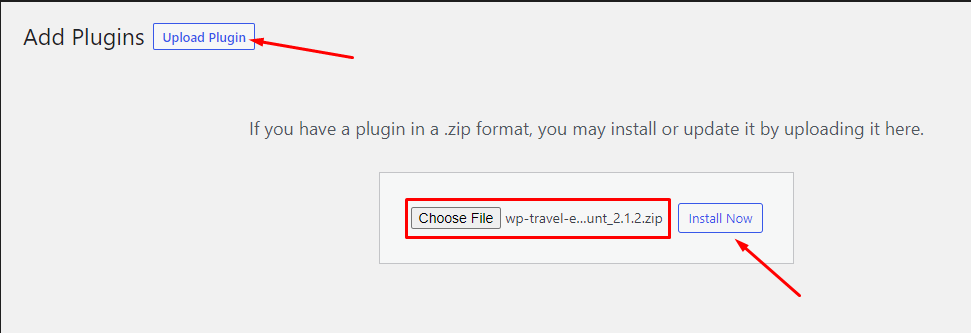
- From your dashboard, navigate to the Plugin > Add New
- Click on the Upload Plugin button.
- Select the downloaded file, “wp-travel-engine-elementor-widgets.zip,” from your computer.
- Click on Install Now.
- Once the file is installed, click on Activate.
Enabling Elementor for Trip Pages #
Before you start customizing your trip templates with Elementor widgets, you need to enable Elementor for your trip pages.
Here’s how you can do it:
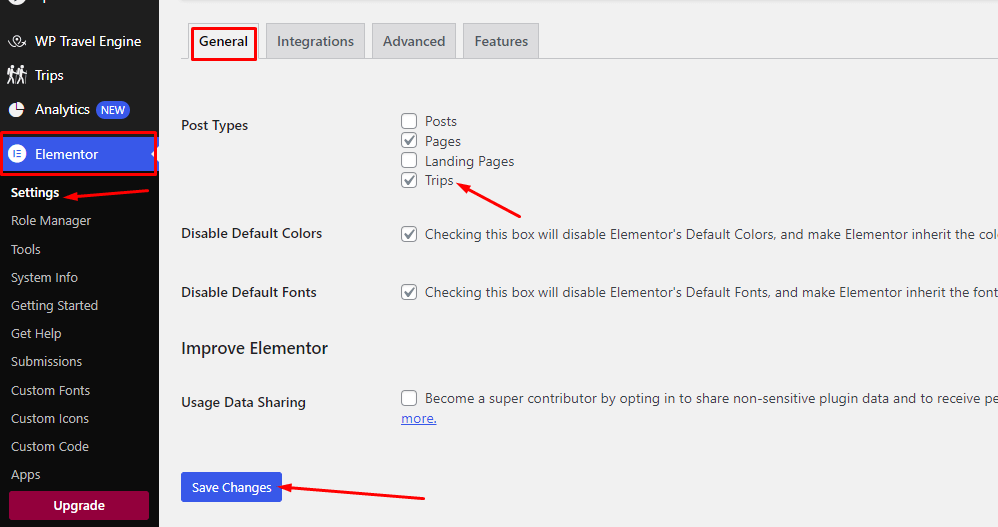
- Go to Elementor > Settings > General.
- Under General, check Trips on Post Types.
- Click Save Changes.
- Next, navigate to the Features tab within Elementor settings.
- Choose the Active option on Flexbox Container.
- Click Save Changes.
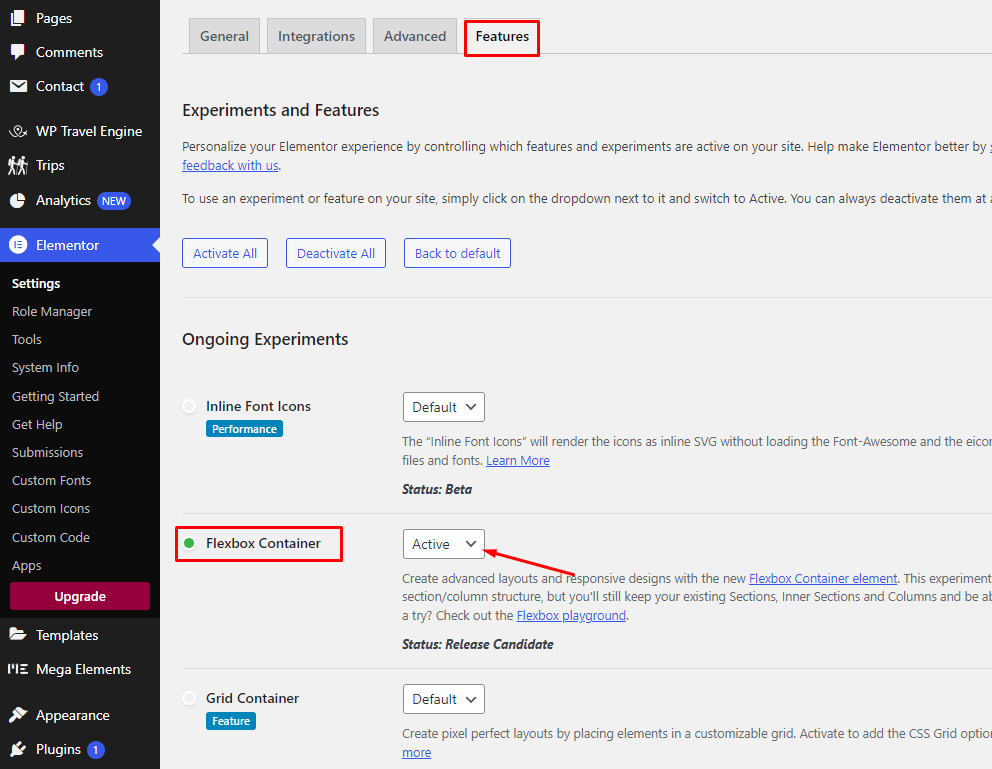
Note: Enabling the Flexbox Container feature is essential to import our default template. However, you can still use widgets without enabling this option.
Designing Trip Pages with Elementor Widgets #
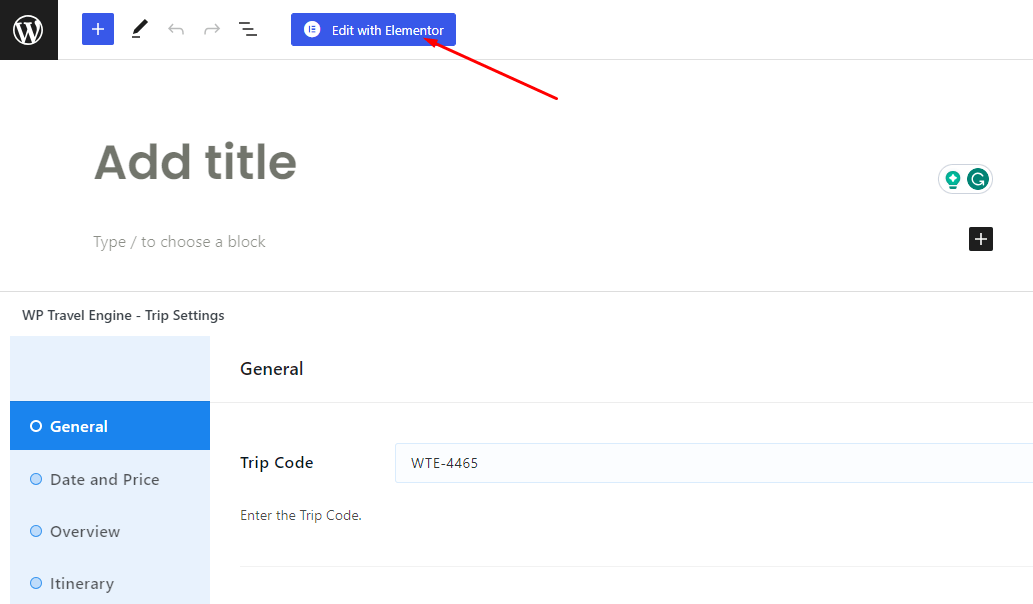
To design a new trip page in the Elementor page builder, navigate to Trips> Add New. Then you can launch the Elementor editor by clicking on Edit with Elementor.
If you want to give a fresh look to your existing trip page,follow these steps:
- Go to the Trips section of your WordPress dashboard.
- Select the specific trip you wish to edit.
- Launch the Elementor editor by clicking on the Edit with Elementor button.
- Click on the Settings icon at the bottom of the panel.
- Then, find the Page Layout option and choose Elementor Full Width.
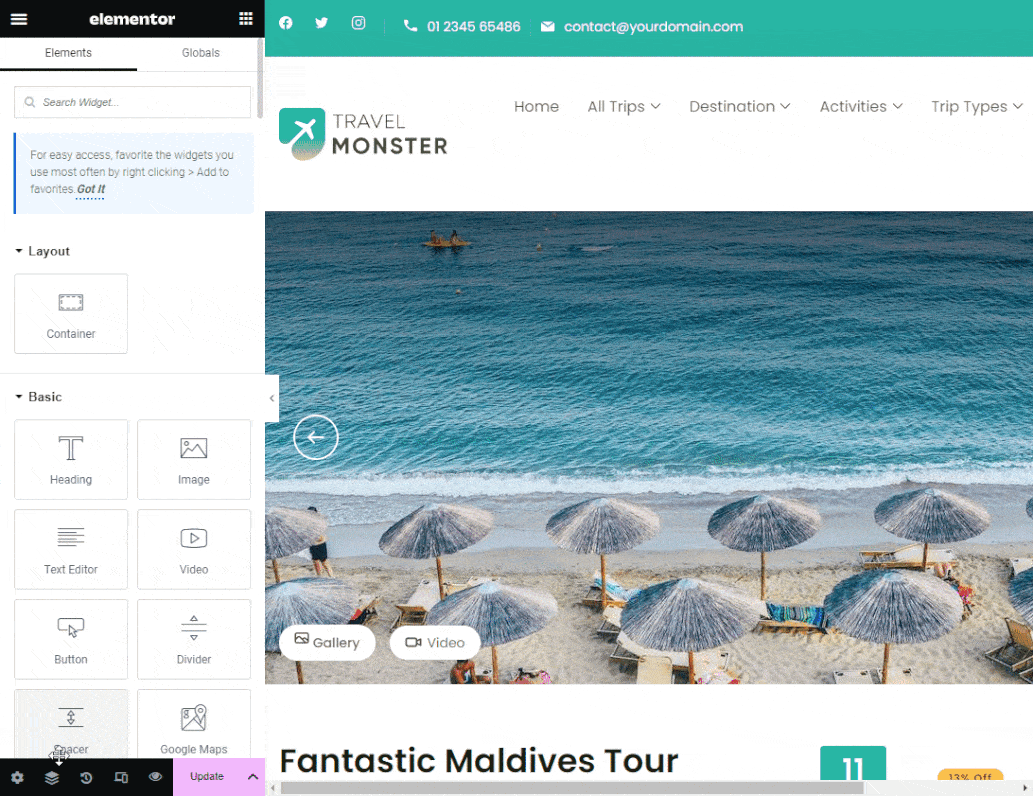
- On the left side of the screen, you’ll see the Elementor sidebar. Scroll down and find widgets provided by WP Travel Engine.
There are several widgets under the WP Travel Engine section like Trip booking, Trip – Faqs, Trip -Overview, etc. You can customize your trip page by selecting the widgets as per your preferences.
Note: The previous set of five widgets, such as Trips, Destinations, Activities, Trip Types, and Trip Search are also applicable for customizing single trip pages.
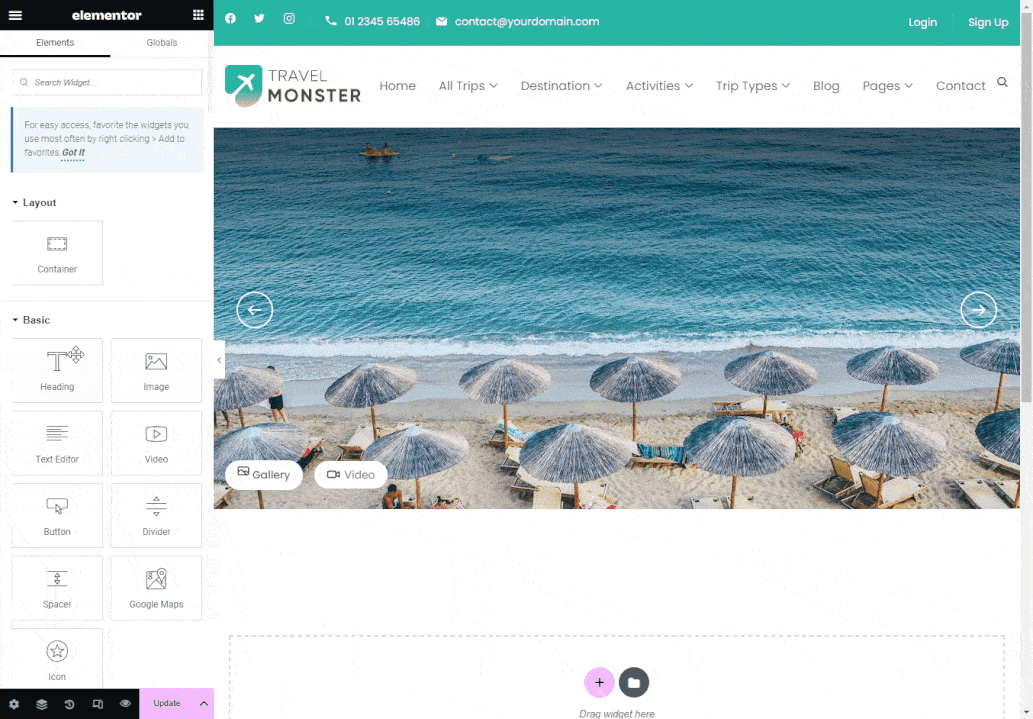
Use Pre-Made Elementor Templates #
Elementor Widgets offers a ready-made template for you. Instead of spending time dragging widgets individually, use our premade template for easier customization.
To use and edit our premade template, follow these steps:
- Navigate to the desired trip page.
- Click on Edit with Elementor to launch the editor.
- Click on the Add Template icon to explore and apply available templates to your design.
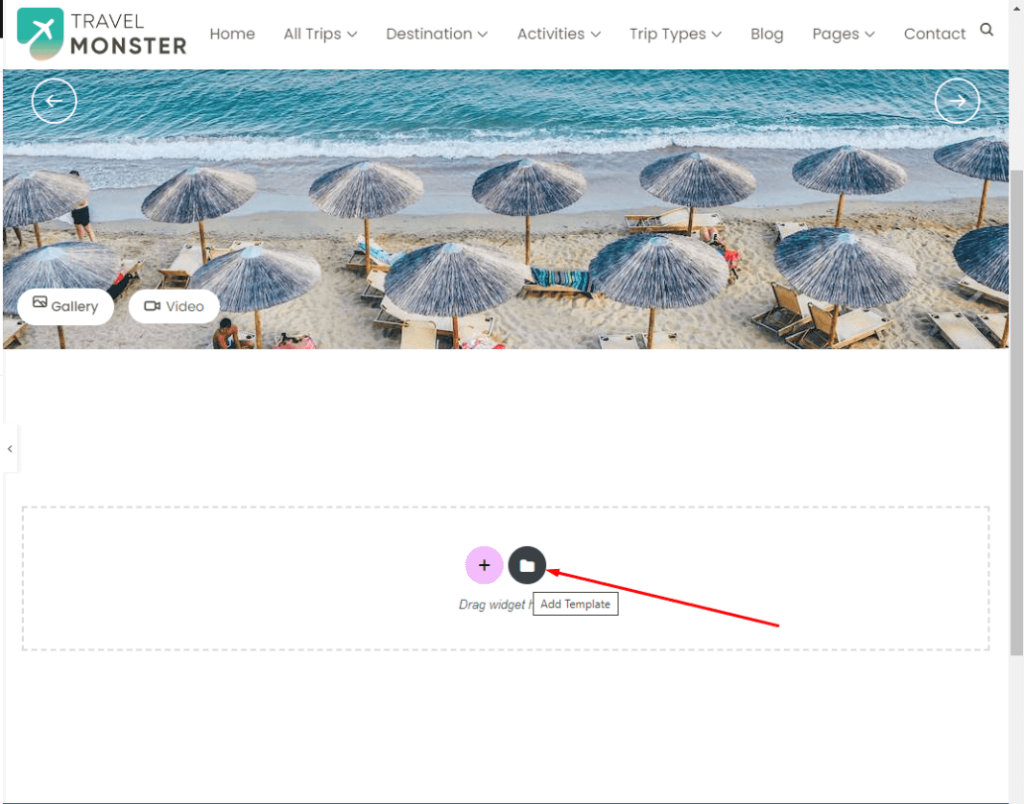
In the template library, you’ll find all the Block and Page templates that you can use in your trip page. Hover over a template to preview it before applying.
For using the template provided by Elementor Widgets, follow these steps:
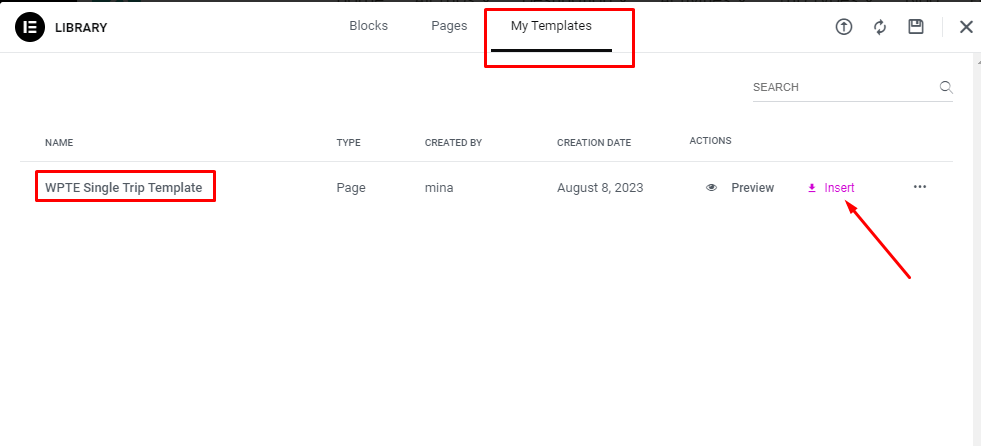
- Go to the My Templates tab.
- Find WPTE Single Trip template, then click on Insert.
After choosing your preferred template, Elementor will integrate it into your design. You can now customize it by adding widgets or removing any placeholder items.