

How to Add a Feature Image on a Trip
Choose the photo that shows up on your trip listings, trip cards, and search results so travelers see your best shot before they click in.
What a featured image does
A featured image is the photo that represents a trip on your trip archive page, trip cards, and search results. It gives travelers something to look at before they open the full itinerary.
For example, you might use a mountain view for a trekking trip or a group photo for a multi-day package. The right photo helps travelers recognize the trip at a glance.
Add a featured image
What you'll need before you start: A landscape photo saved on your computer, or a photo already in your WordPress Media Library.
Open the trip you want to update
Start here so you can change the photo for the correct trip.
On the left sidebar of your WordPress dashboard, click Trips. Find the trip you want to update. Click Edit under the trip title.
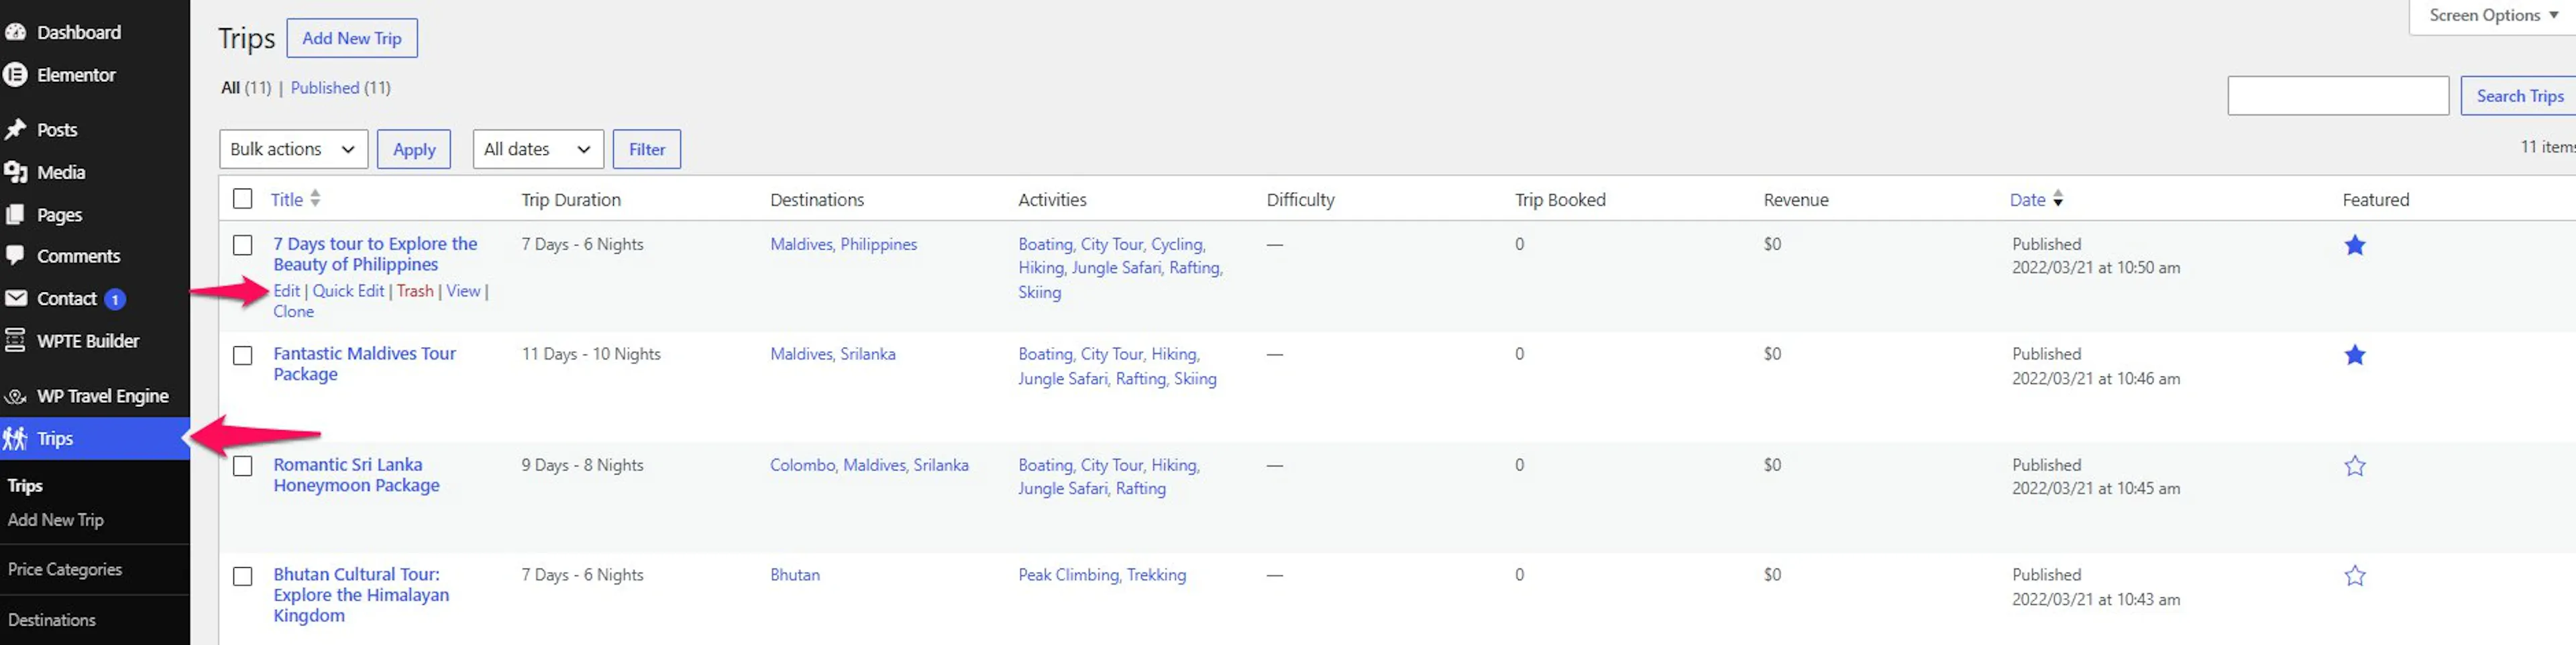
The trip edit screen opens. You are ready to choose its featured image.
Open the Featured Image panel
The Featured Image panel controls the photo that appears in trip listings.
Look in the right-hand sidebar for the Set Featured Image panel.
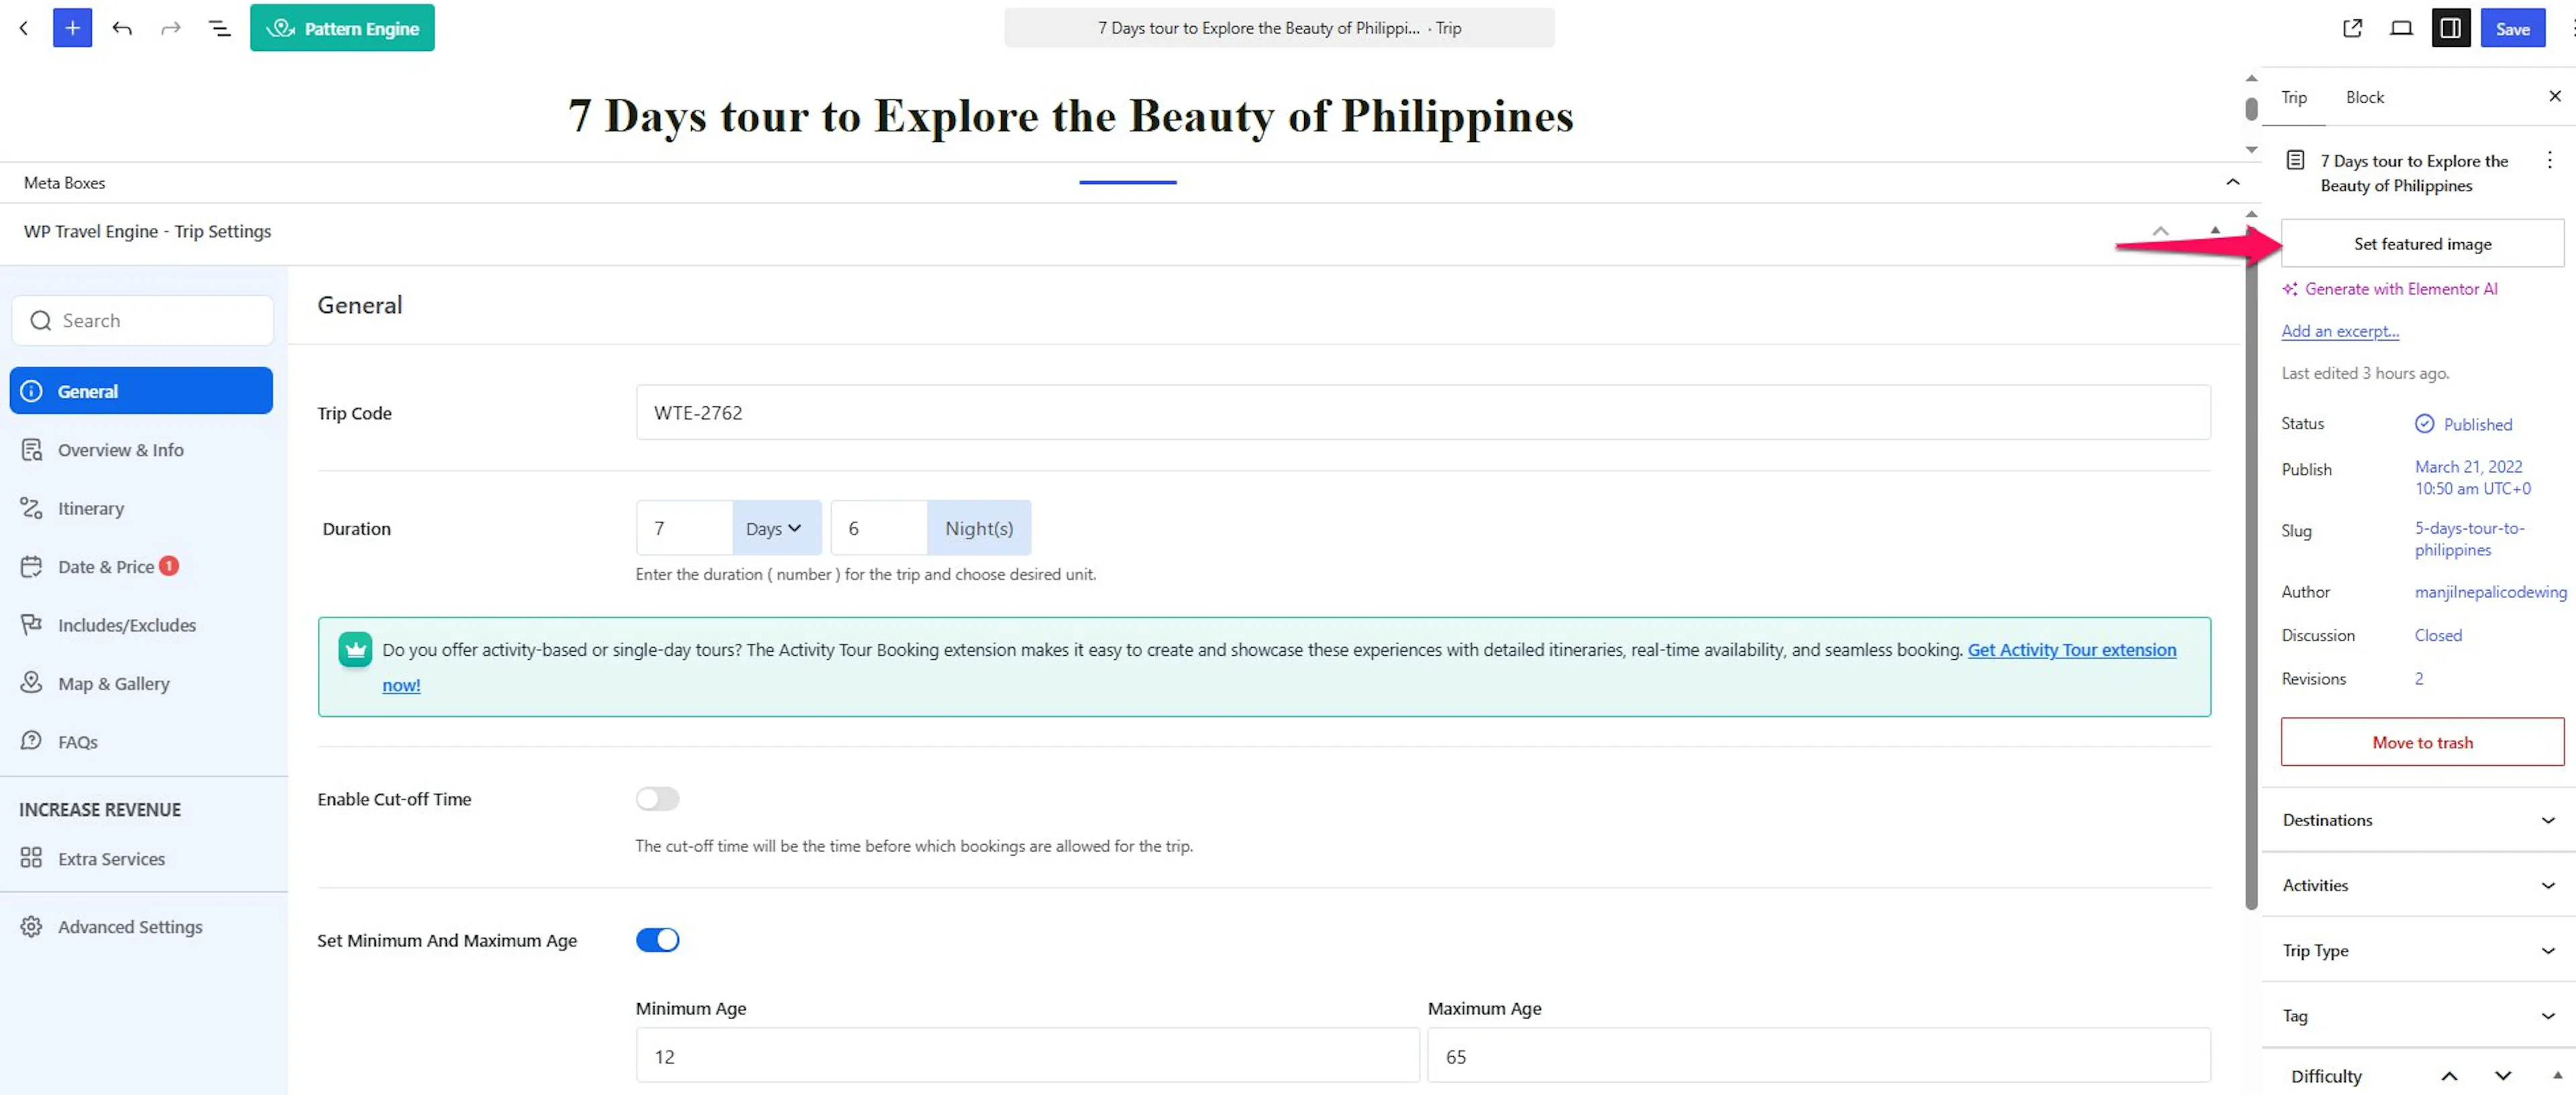
You should see the option to add a photo. The next step opens your media choices.
Choose and set the photo
Choosing a clear photo helps travelers understand what the trip offers before they open it.
Click Set featured image. A media popup opens. Select a photo from Media Library. To add a photo from your computer, click Upload files and choose the file. Select the image. Then click Set featured image in the bottom right corner of the popup.
Use a landscape photo. Trip cards and archive listings crop images to that shape. Portrait photos can lose the main subject at the edges.
The selected photo now appears in the Featured Image panel. You are ready to save the trip.
Save the trip
Saving applies the new photo to your trip.
At the top of the trip edit screen, click Save.
Your featured image is now saved. Next, check the live trip archive to make sure it appears correctly.
Check the image on your site
What you'll need before you start: The live website address for your trip archive page.
Open your trip archive page
Checking the live page confirms that visitors can see the new photo.
Open your trip archive page on the live site. This is the page that lists all your trips.
The archive page should load with your trip listings. Find the trip you updated.
Confirm the thumbnail
The thumbnail shows you which photo travelers will see before they open the trip.
Check that the new photo appears as the trip thumbnail.
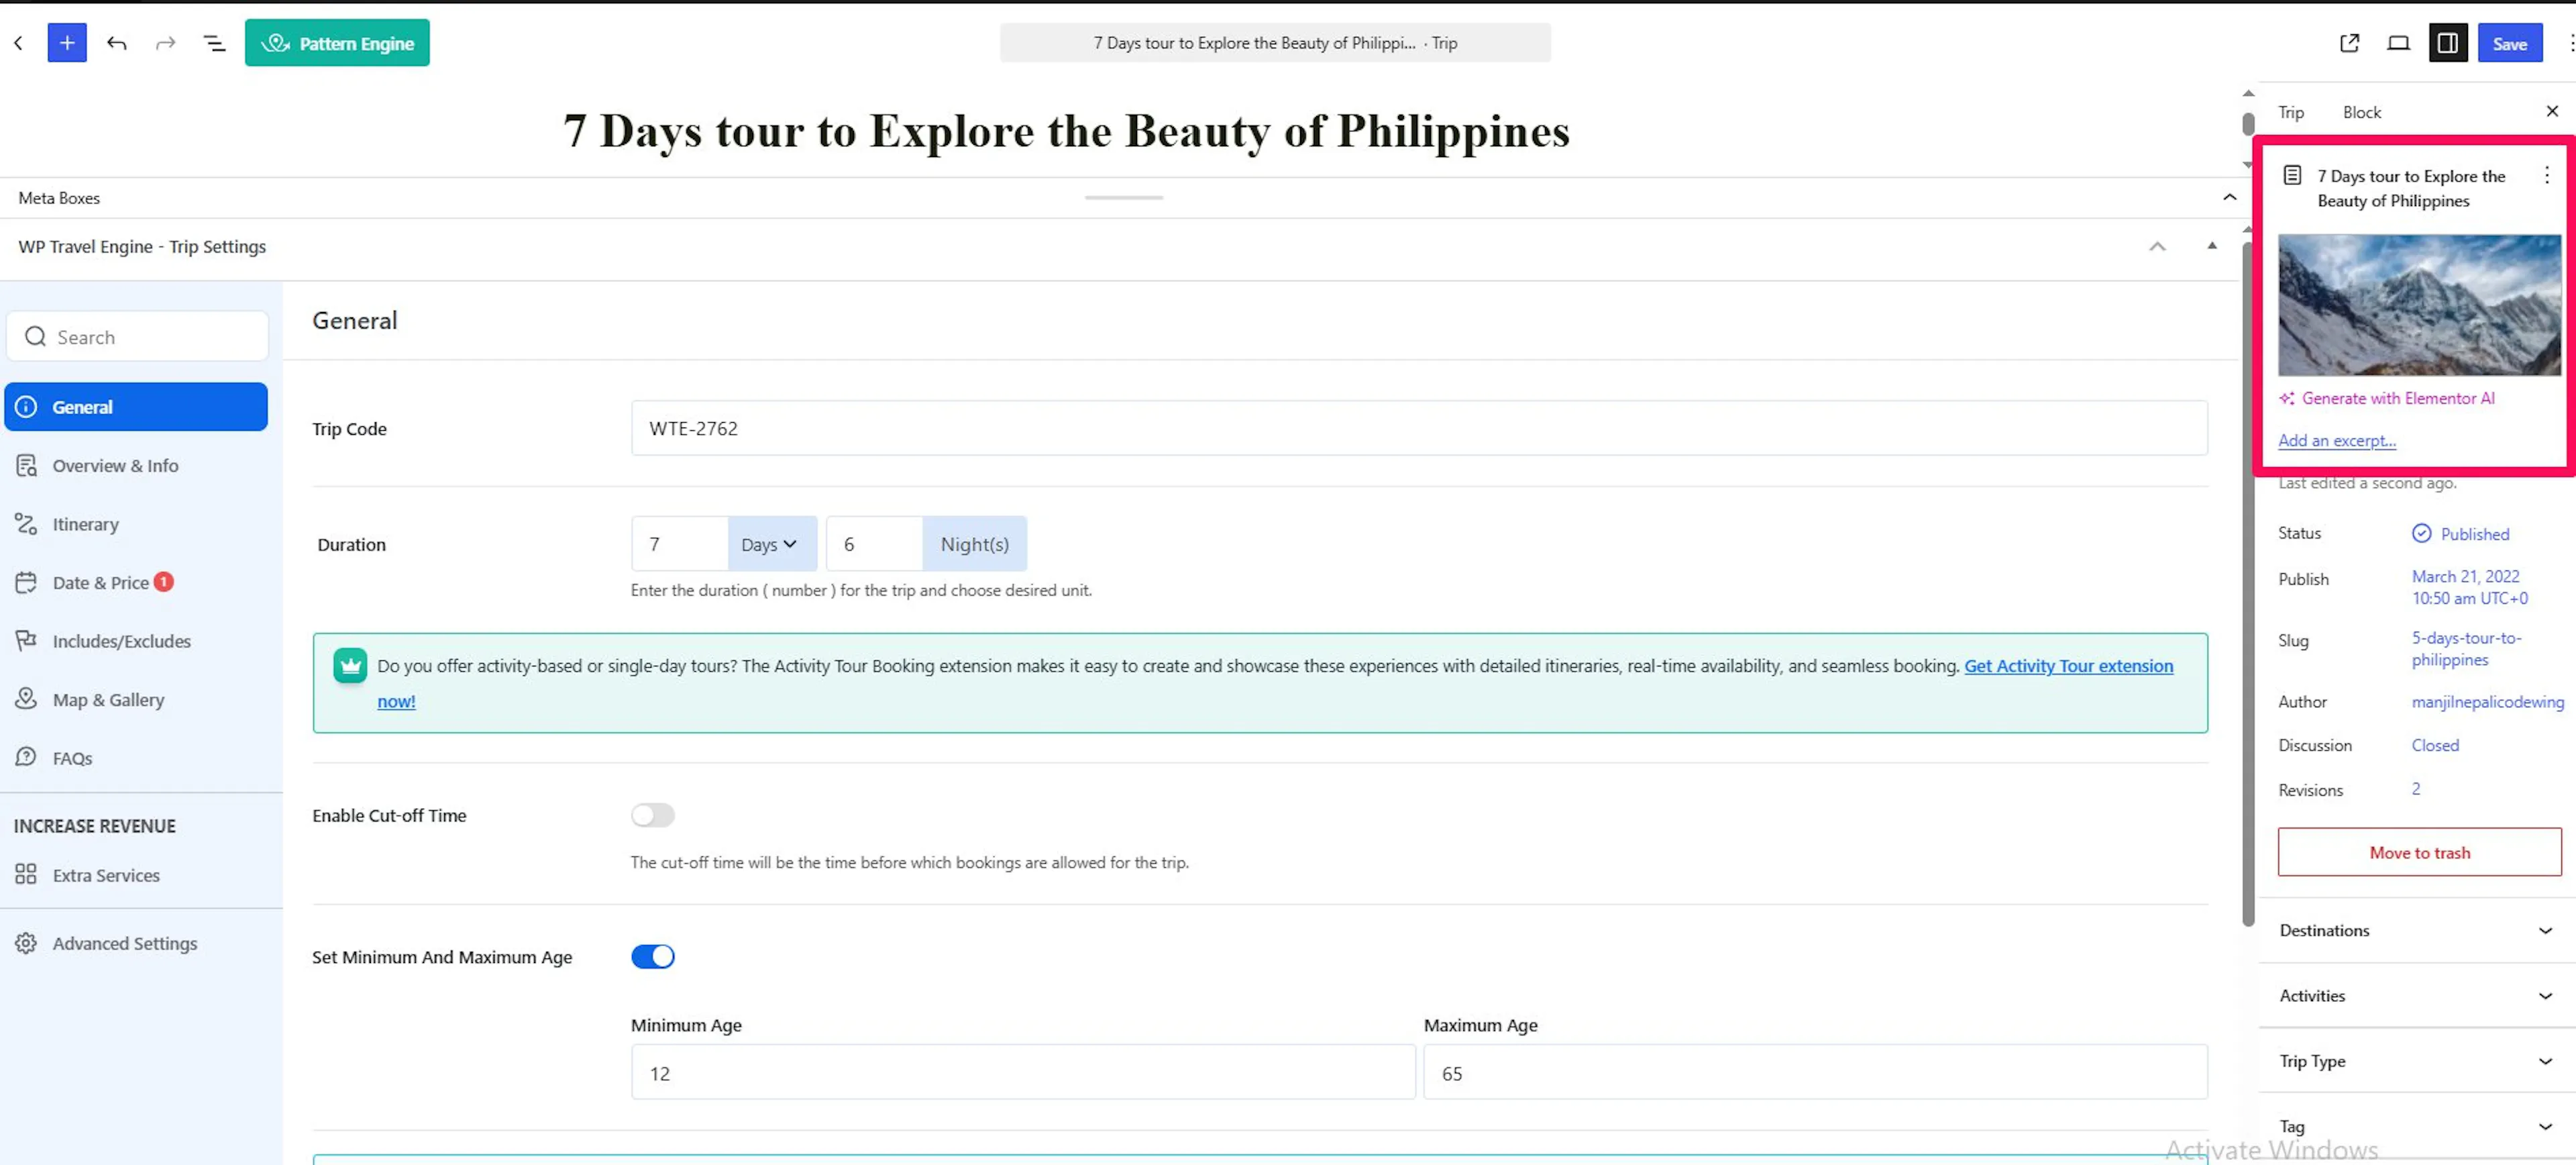
The featured image can also appear on the trip page and in other trip listings.
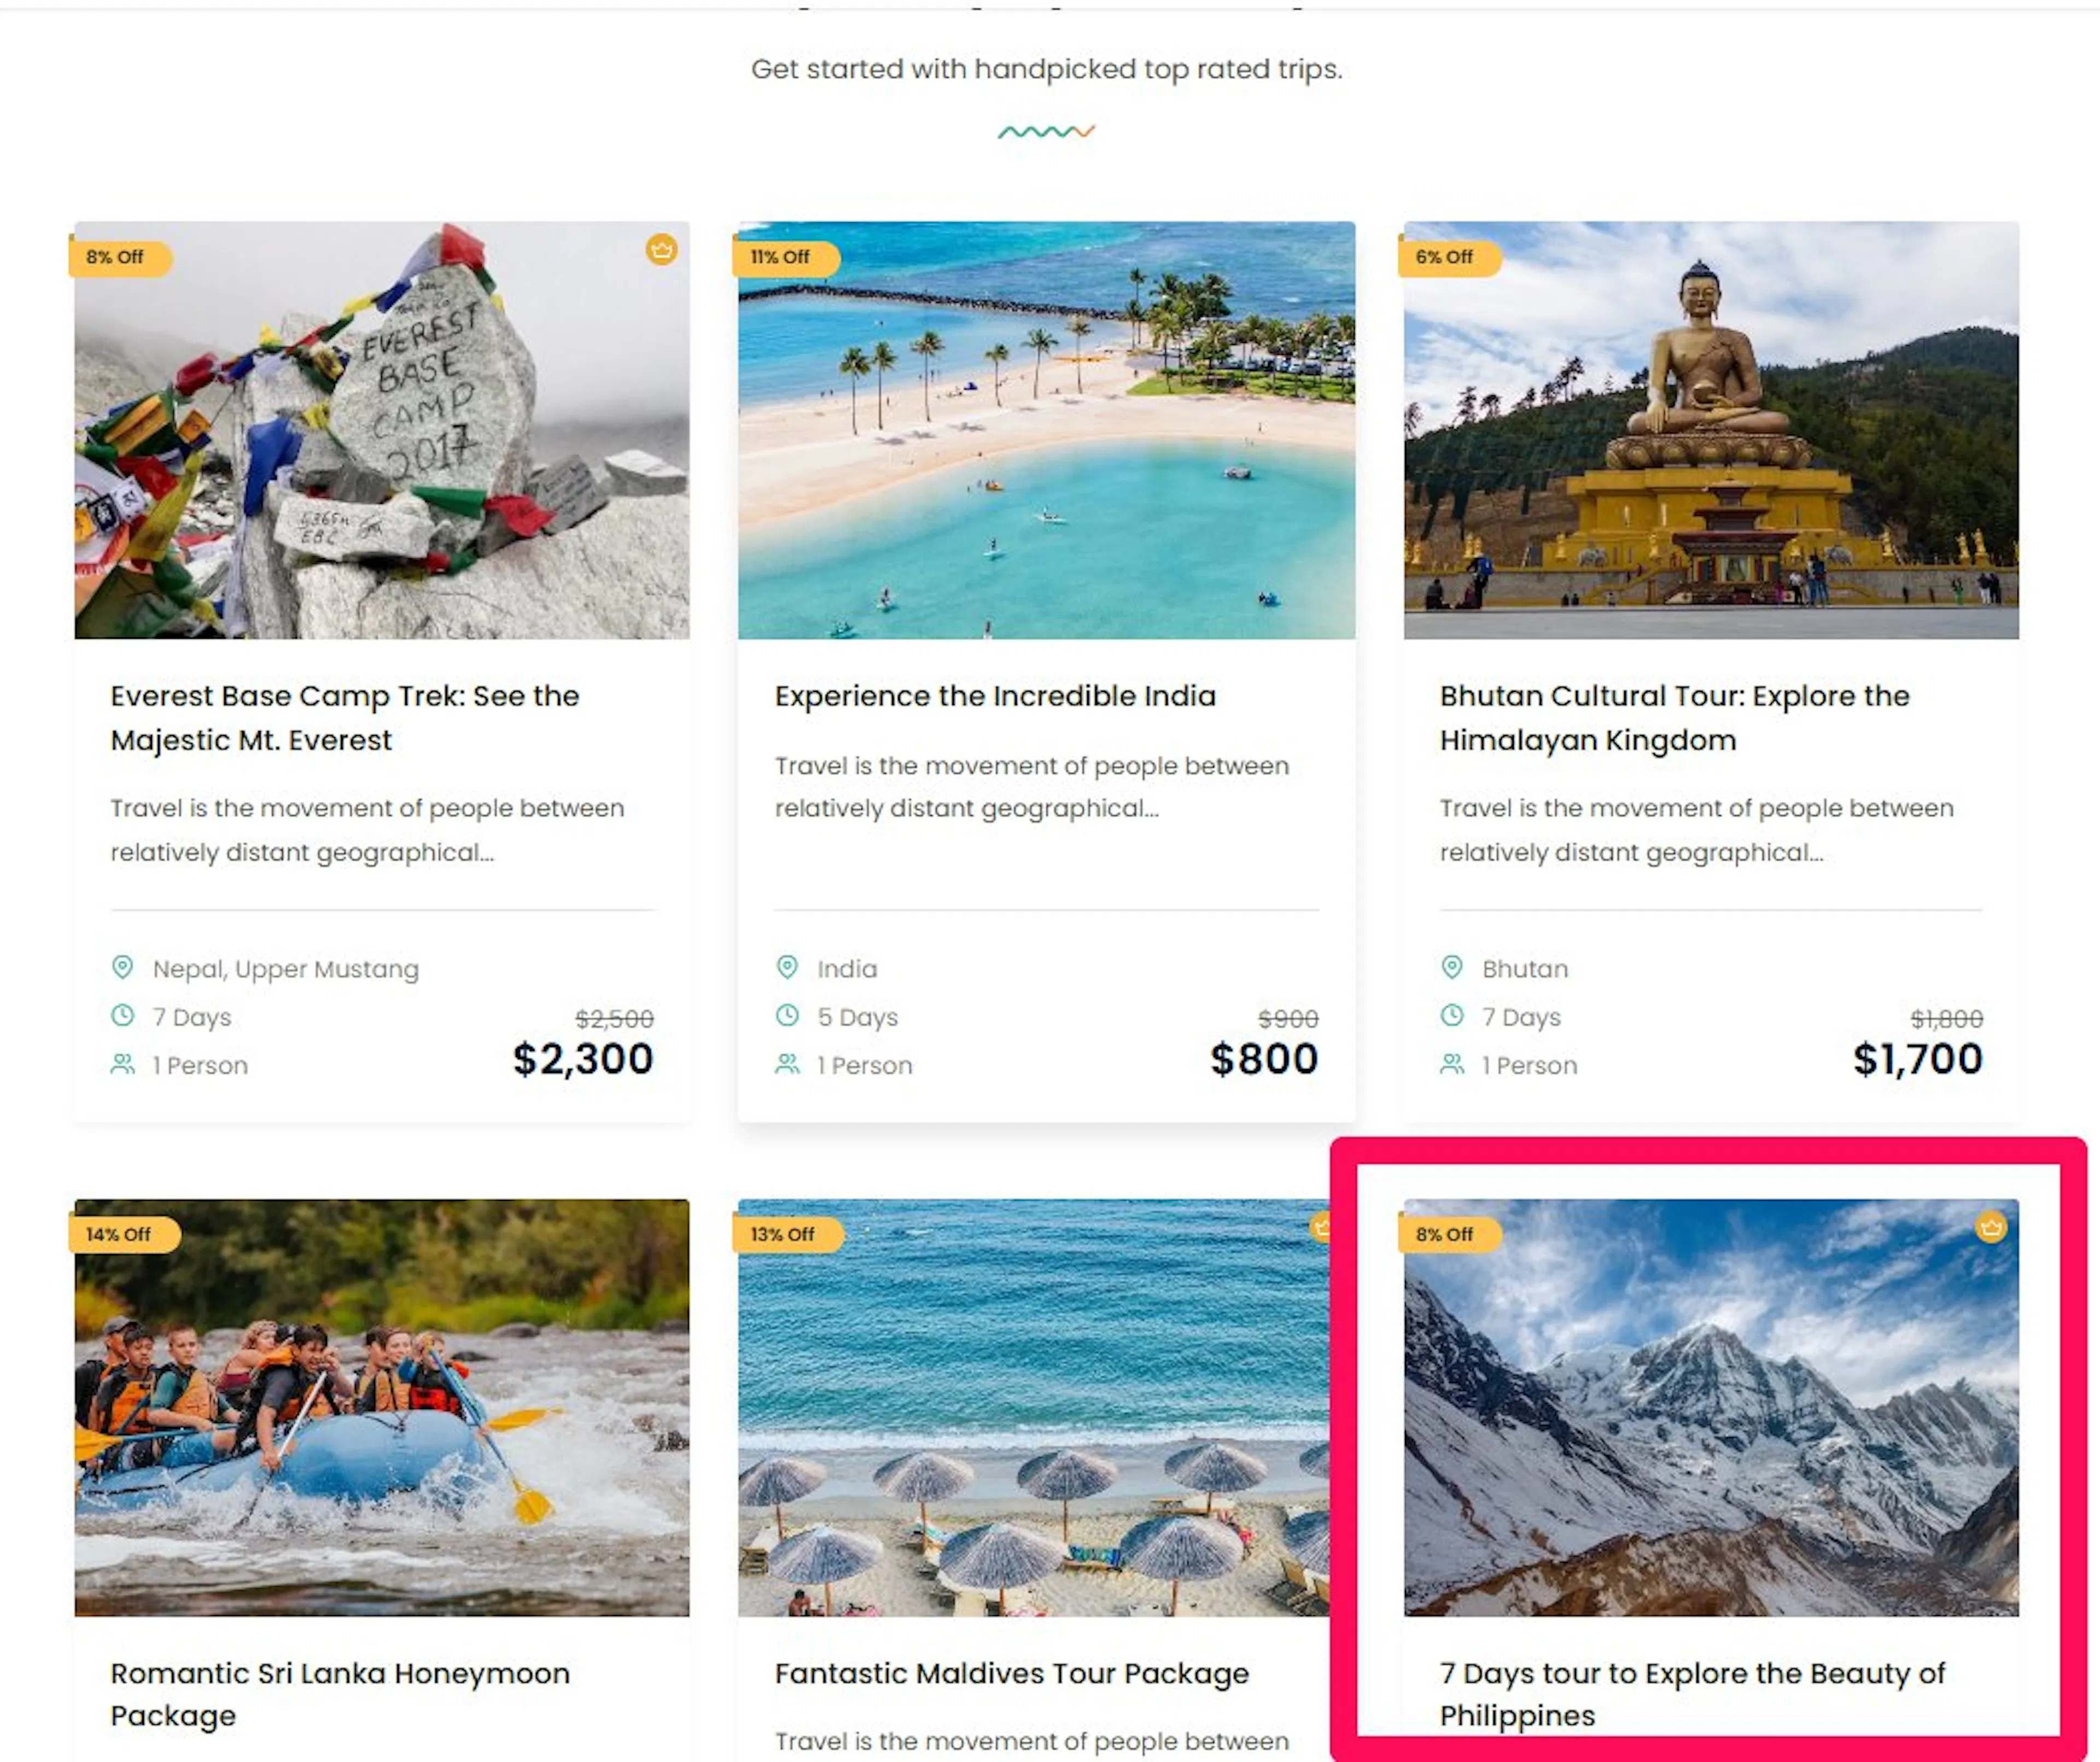
If you see the new photo, your featured image is set correctly.
If the photo does not show up, open WP Travel Engine Dashboard > Settings > Display > Single Trip. Confirm that Show Trip Featured Image is turned on. Save the setting if you changed it, then check your trip archive again.
If you are still stuck or something does not look right, our support team is happy to help. Reach out at our support page and we will get you sorted.